Teacher Guide
For individual teachers and tutors: invite your own students, organise classes, create AI assignments, grade handwritten work and track every student's progress.
Section 1
Sign in & the teacher home
A personal teacher account is self-service — no school required. Sign up at app.thinka.ai with the Teacher role, and everything in this guide works out of the box. (If your school runs thinka, see the School guides instead — the teaching tools are the same.)
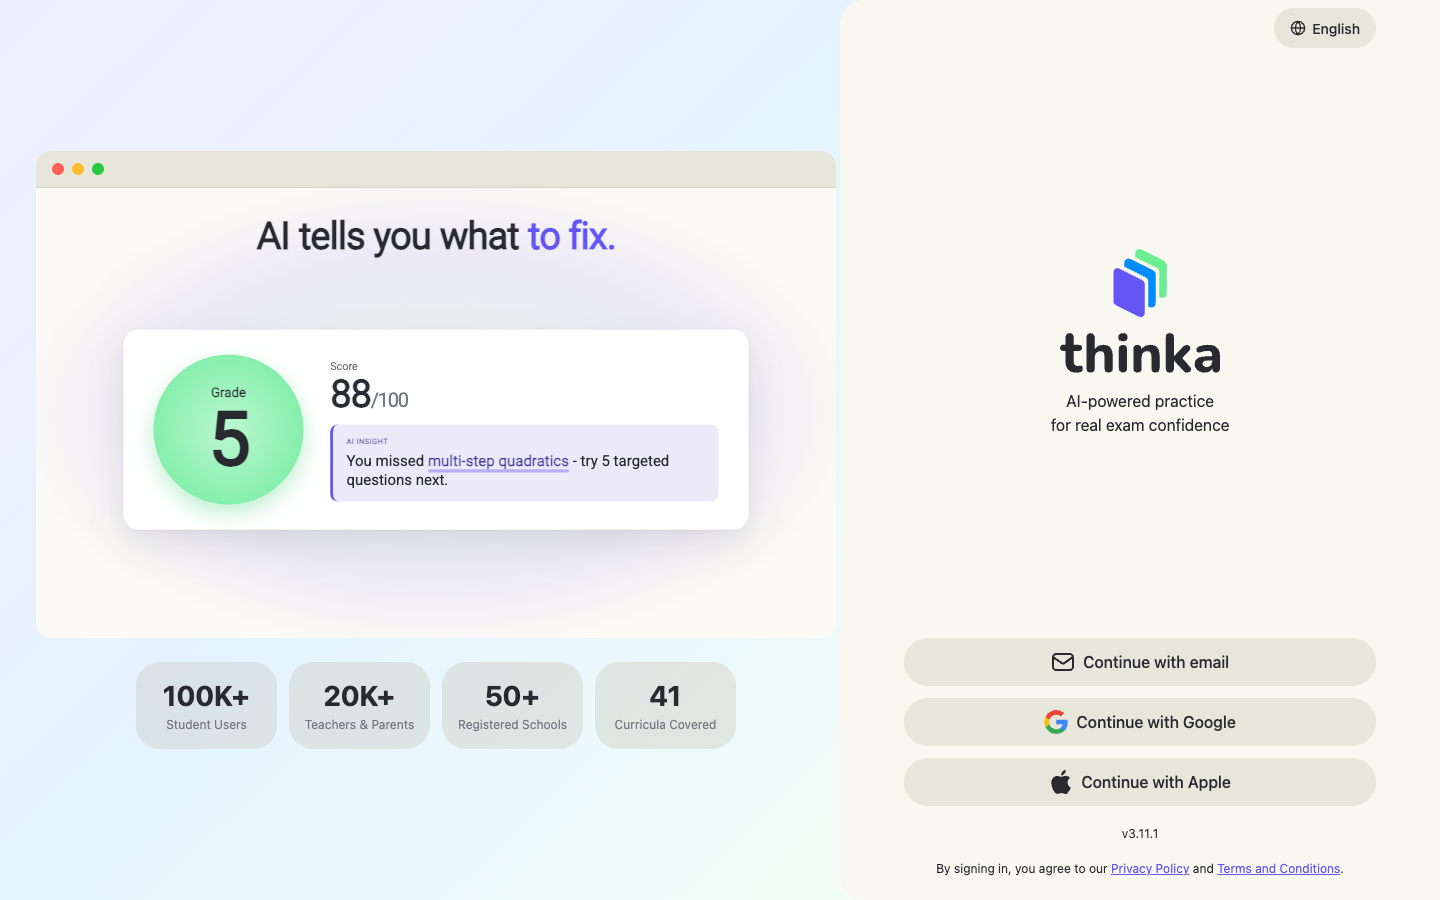
Sign in at app.thinka.ai
Open https://app.thinka.ai, choose Continue with email (or Google / Apple) and sign in. New here? The same screen lets you create an account and pick the Teacher role.
The teacher home
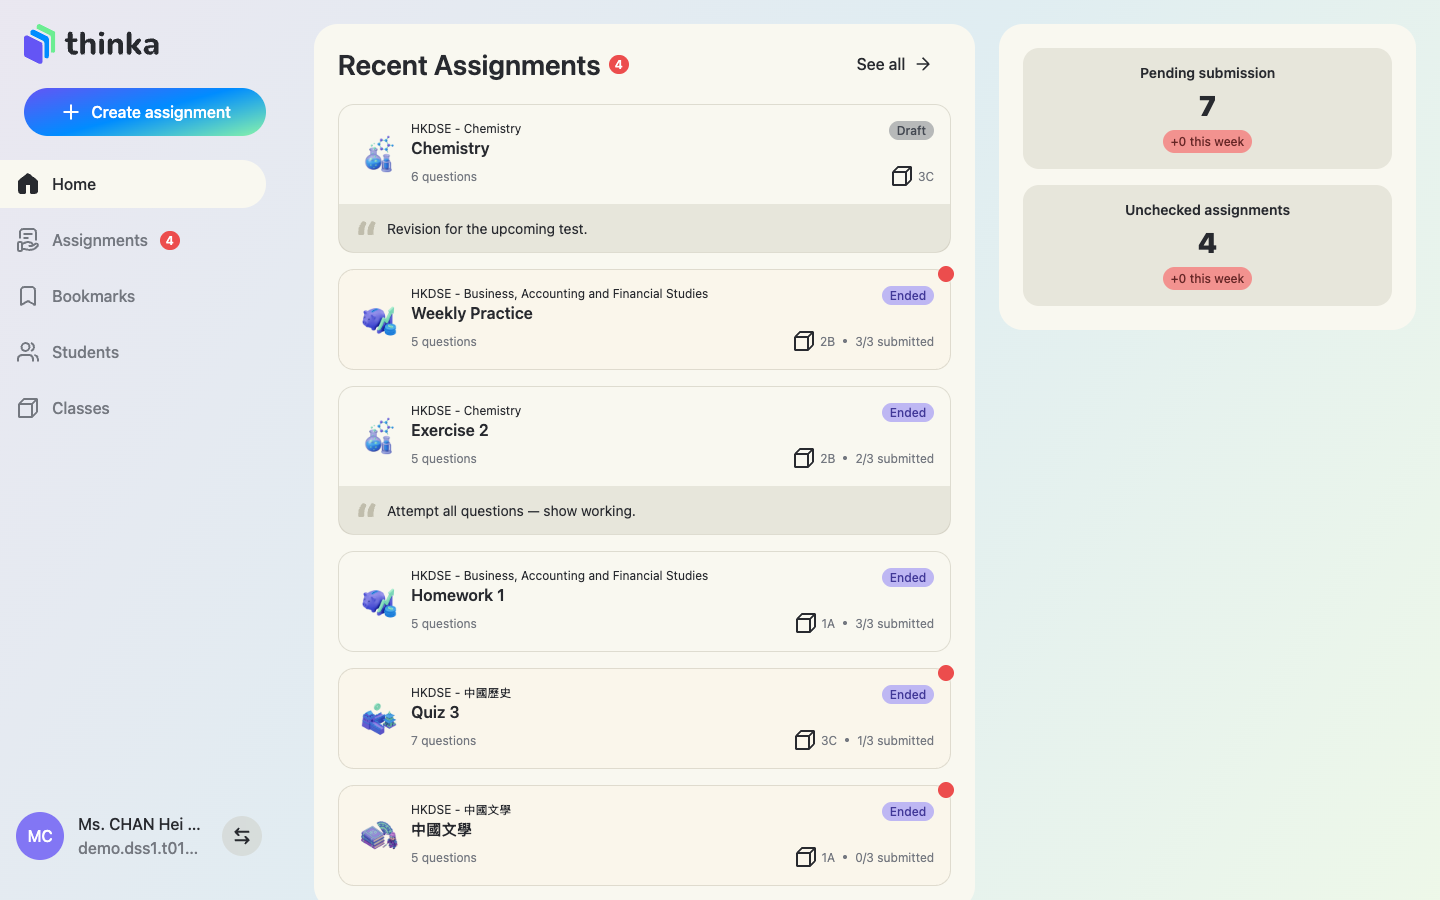
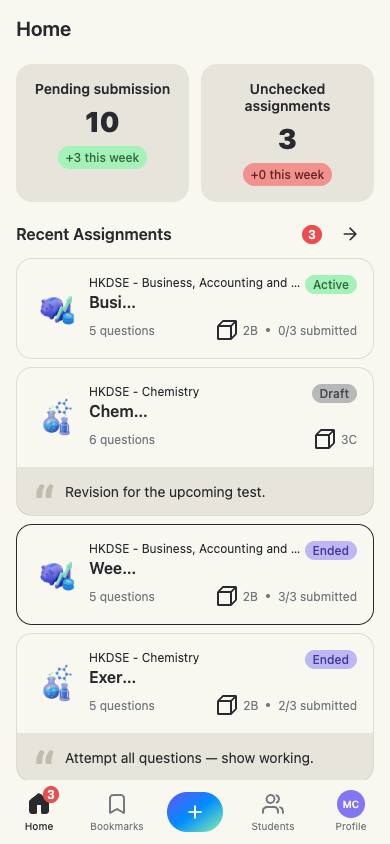
The home page is your daily overview:
- Recent Assignments — drafts and published assignments, each showing how many students have submitted.
- Pending submission — how many student submissions you are still waiting for.
- Unchecked assignments — submissions with answers that still need your review.
The sidebar holds the five main areas: Home, Assignments, Bookmarks, Students and Classes.
All assignments in one list
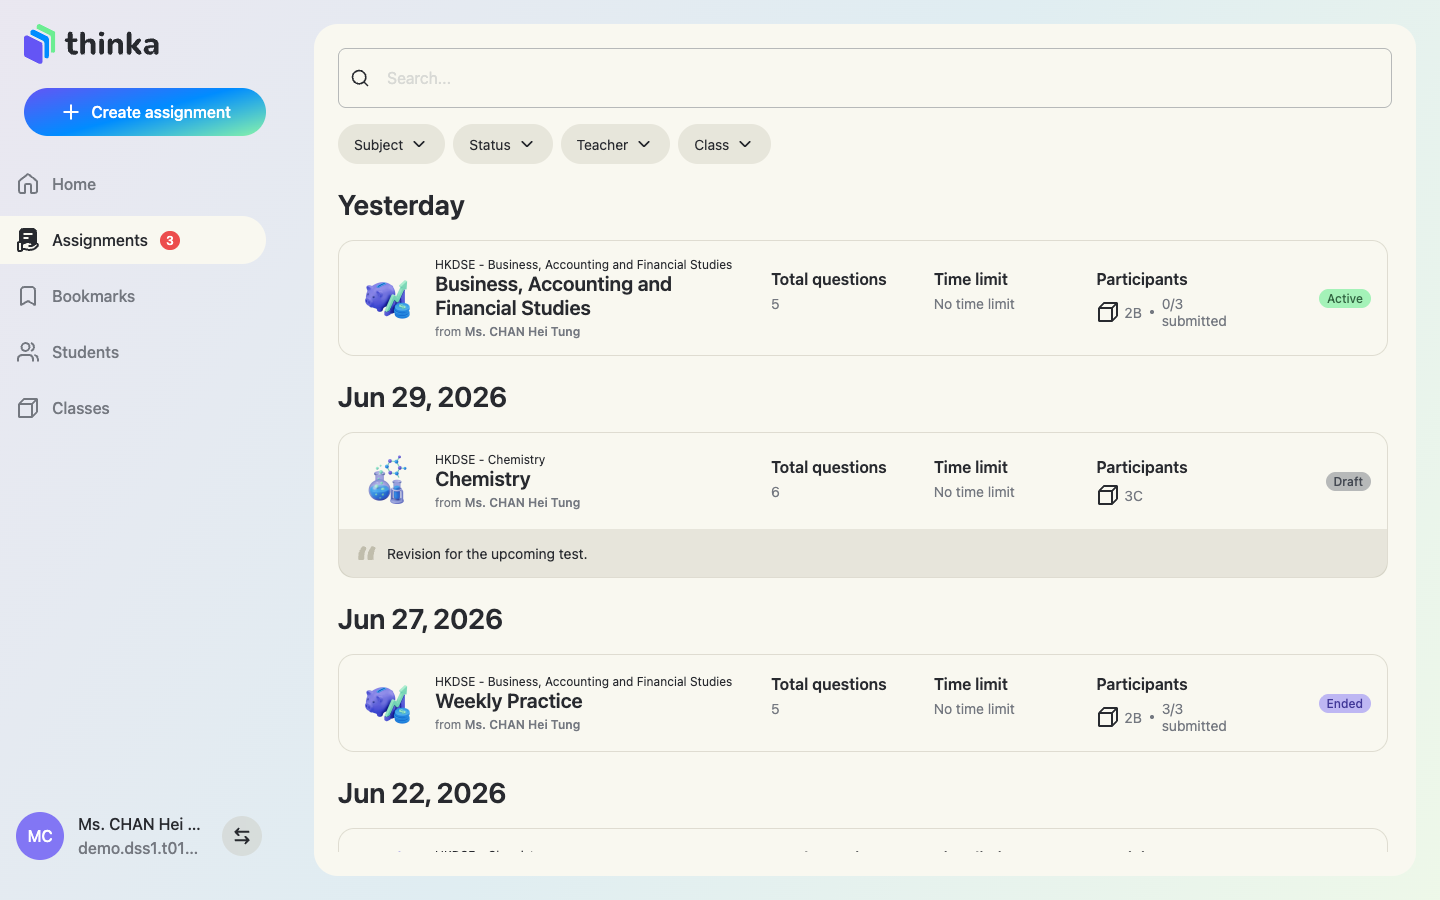
Assignments lists everything you've created, grouped by date, with question counts, time limits and participant numbers. Use the filter chips to narrow by subject. Click any assignment to open its detailed report.
Section 2
Your students
Before assigning work, connect with your students. Each student needs a (free) thinka student account; you link them to you by invitation — one by one, or imported in bulk from any file.
Invite students by email
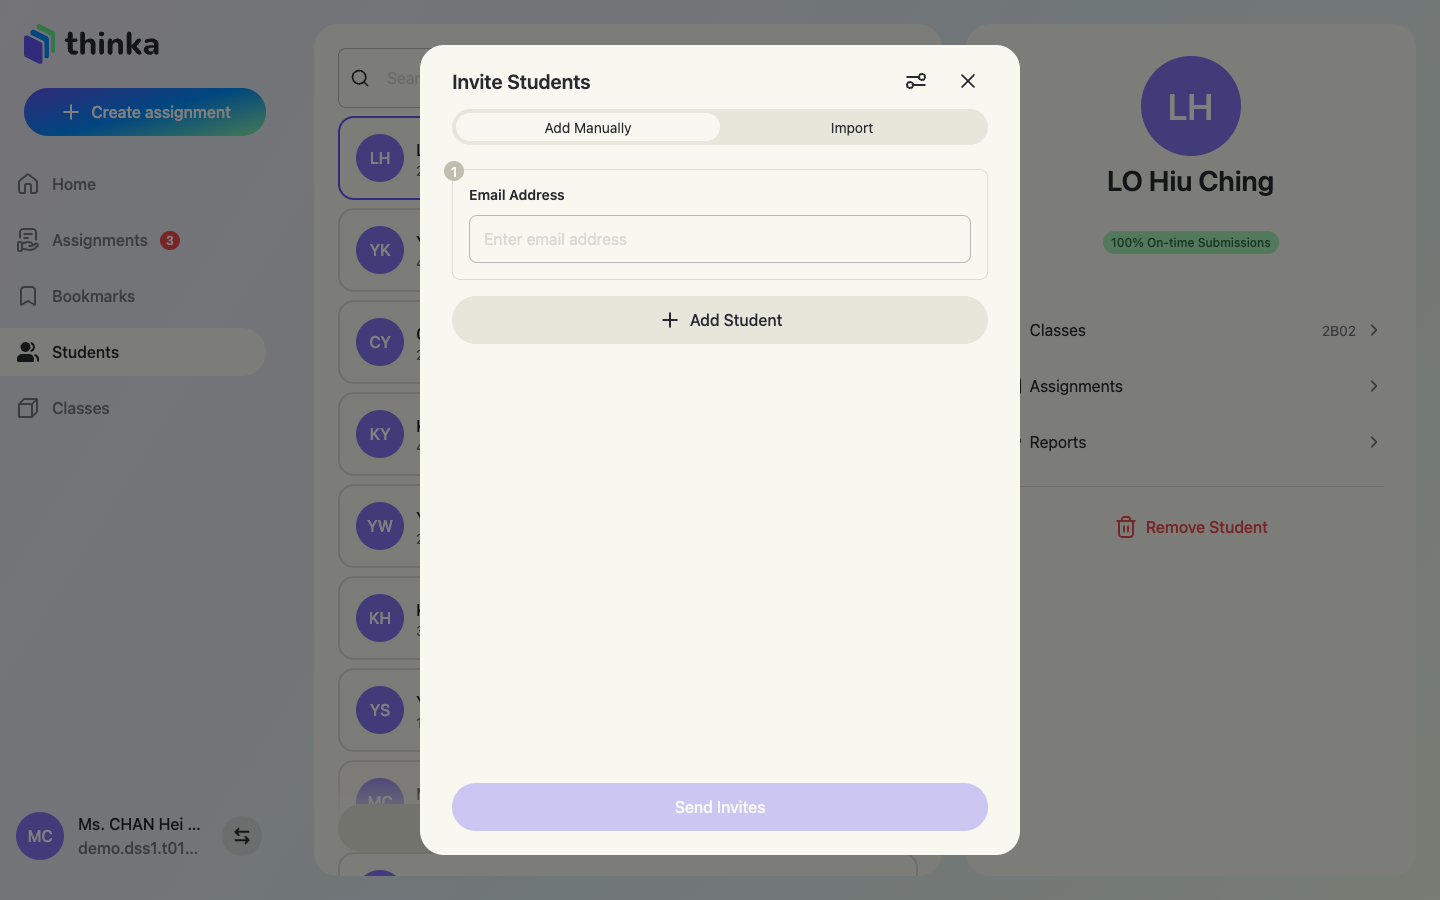
Go to Students → Invite Students. On the Add Manually tab, enter each student's email address and press Send Invites. Students see the invitation on their thinka home page and can accept with one tap.
Create accounts for them (optional)
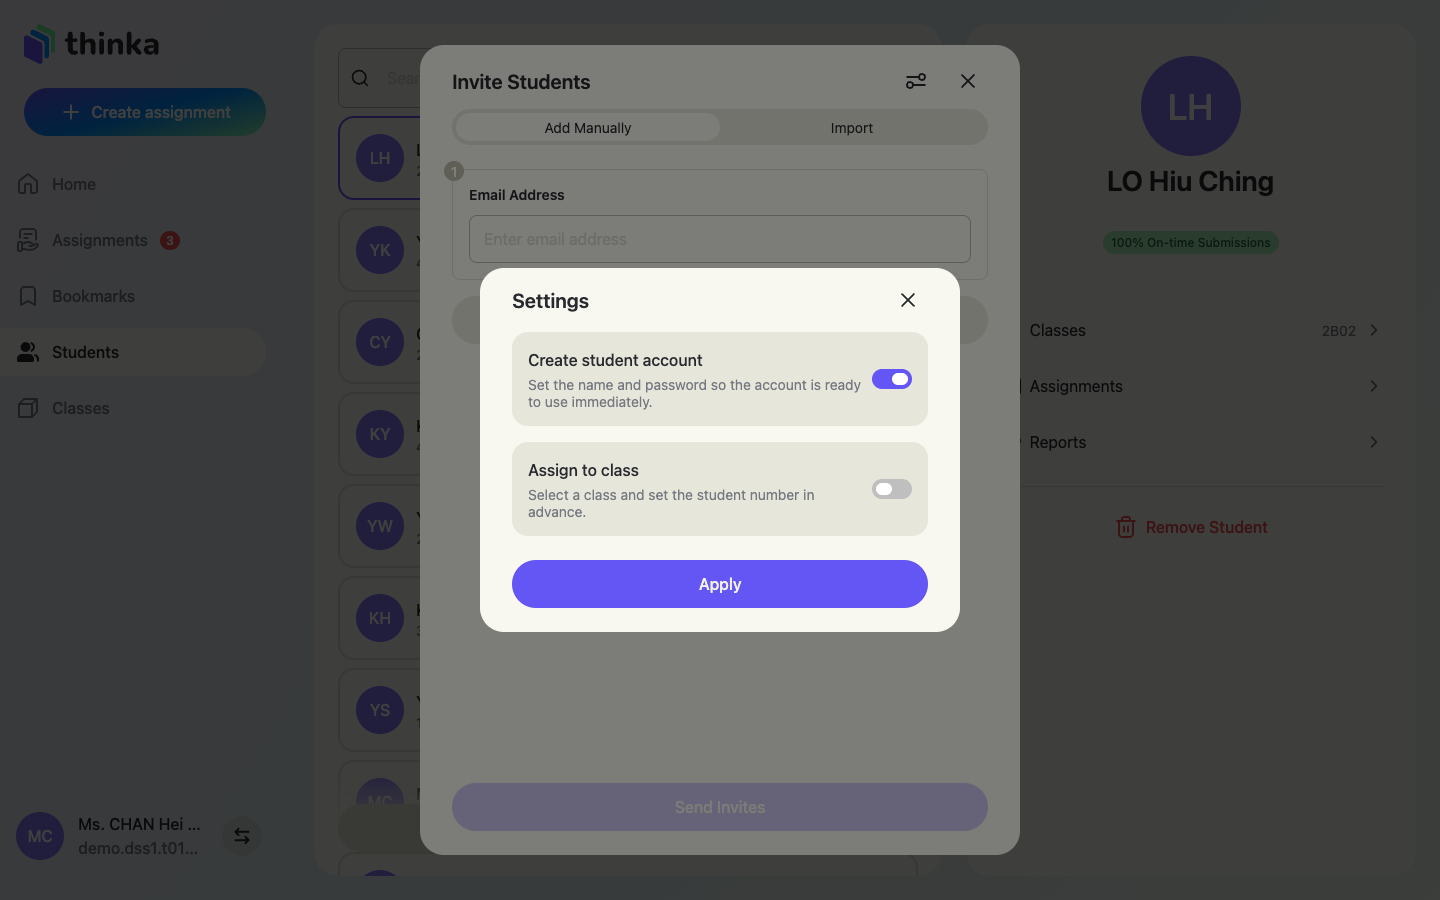
Open the ⚙︎ settings icon at the top of the invite sheet to reveal two switches:
- Create student account — set the student's name and password yourself, so the account is ready to use immediately (great for younger students who don't manage email).
- Assign to class — put the student straight into one of your classes with a student number.
Bulk import from any file
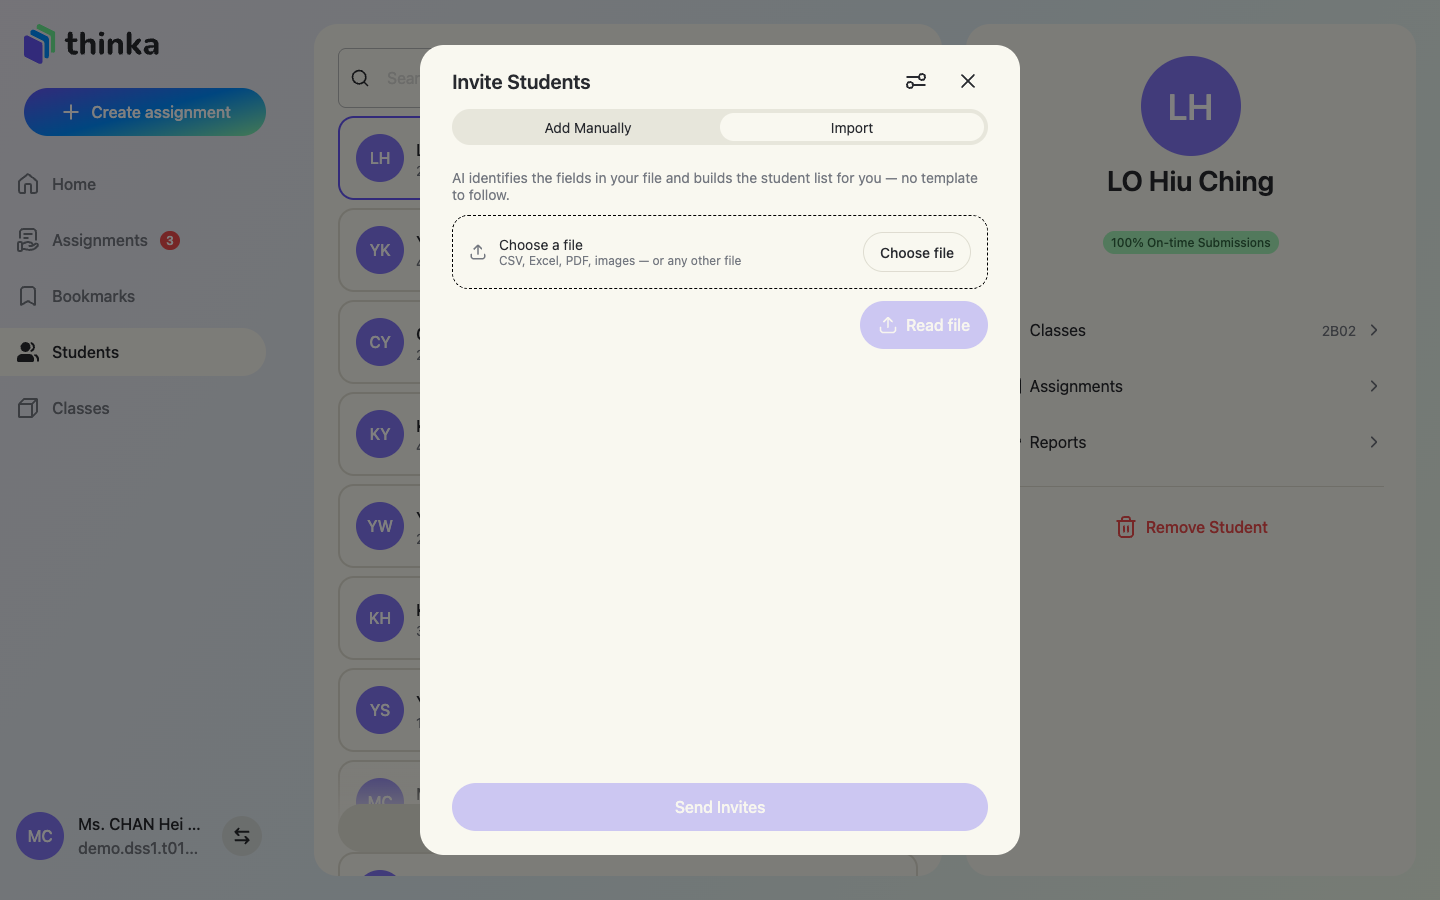
Switching to the Import tab lets you upload a student list as CSV, Excel, PDF — even a photo. AI identifies the fields in your file (name, class, email, …) and builds the student list for you, so there is no template to follow.
Students who already have a thinka account simply get an invitation; brand-new emails get an account created for them.
The student profile
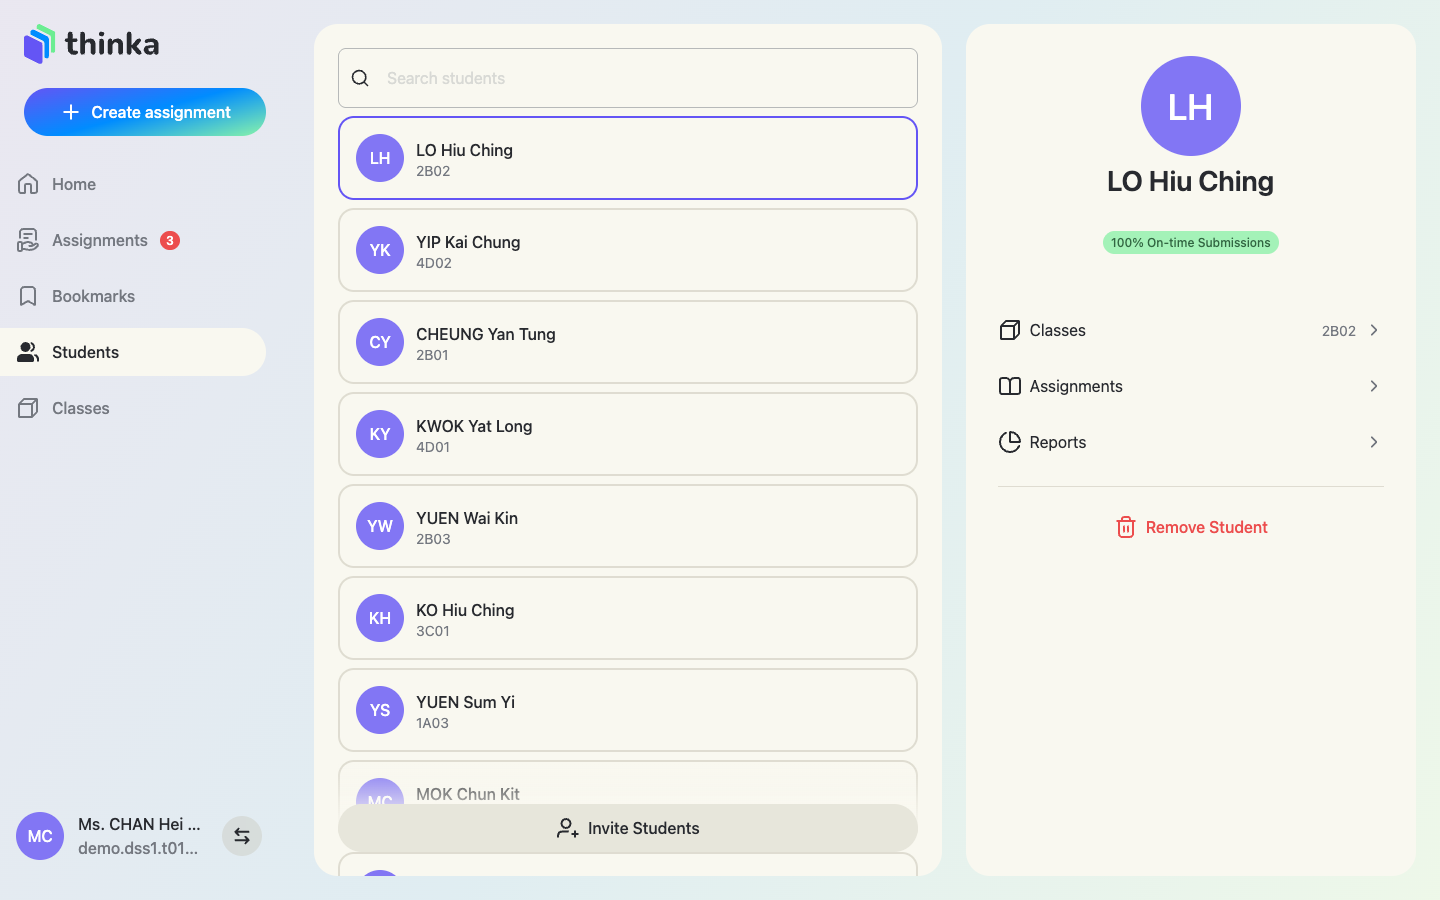
Click any student to see their profile: their classes, every assignment you've given them, and their Reports (performance analytics). Remove Student unlinks them from you — their own account and history stay intact.
Section 3
Classes
Group students into classes
Classes keeps larger groups manageable. Create class to add one (e.g. 1A, 2B), then Add Student to Class to build the roster — each member gets a student number like 1A01. When you later assign work, you can pick a whole class in one tap.
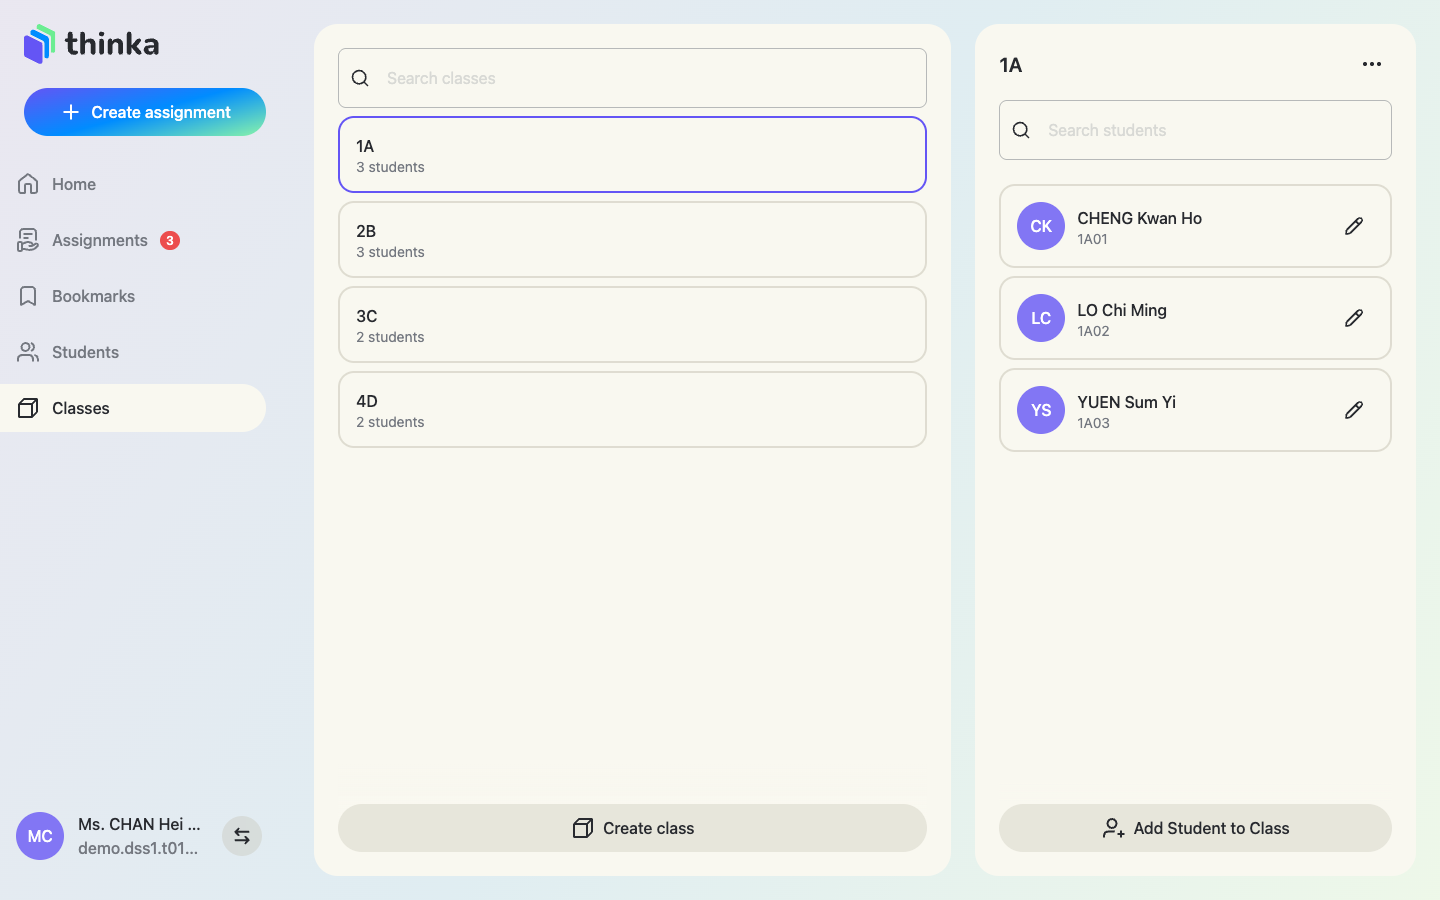
The ✏️ icon next to a student edits their class and student number.
Section 4
Create an assignment
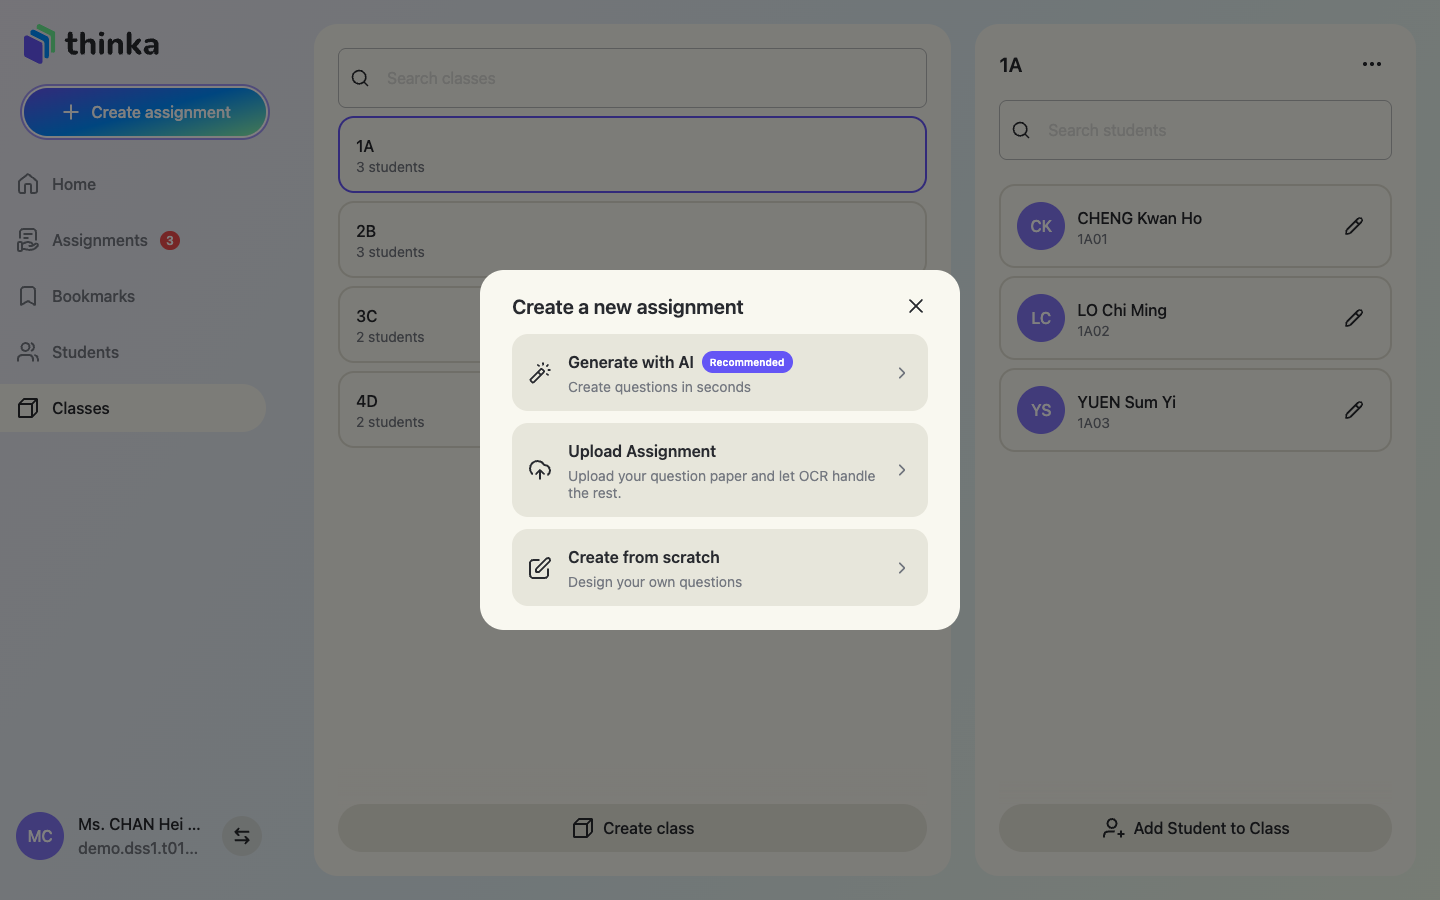
Press + Create assignment (top of the sidebar) to open the assignment builder. There are three ways to get questions: let AI generate them, upload your own paper, or write them from scratch.
Choose how to create
- Generate with AI — pick a curriculum, chapters and difficulty; AI writes the questions in seconds. *(This guide follows this path below.)*
- Upload Assignment — upload your own question paper (PDF / photo / document) and OCR turns it into interactive questions, complete with AI solutions.
- Create from scratch — write every question yourself in the editor.
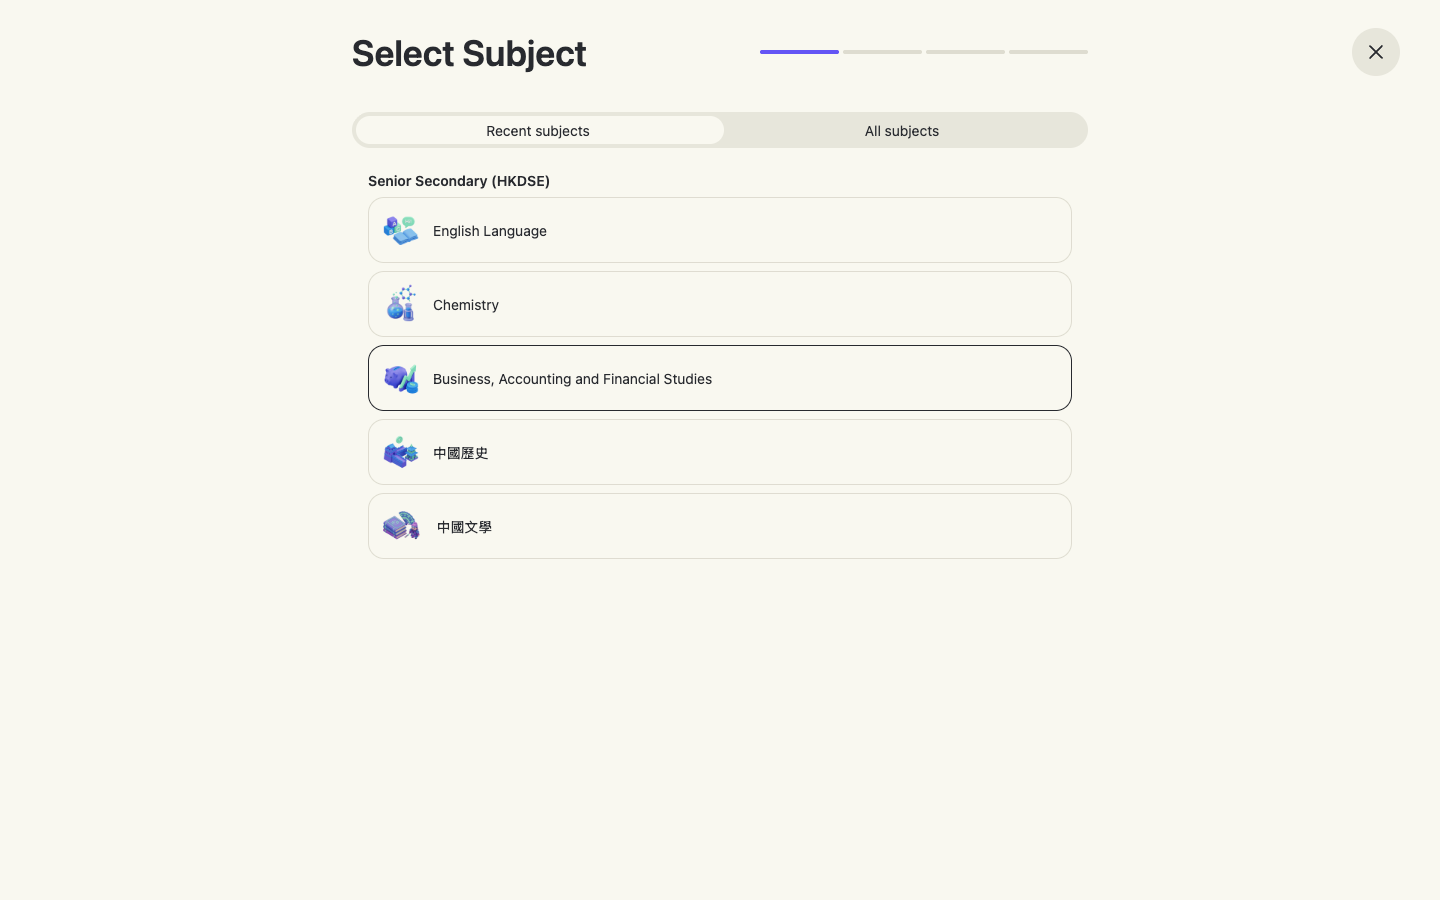
1 · Select the subject
Pick the curriculum (e.g. Senior Secondary HKDSE, IGCSE, IB…) and subject. All subjects shows the full catalogue across every curriculum thinka covers.
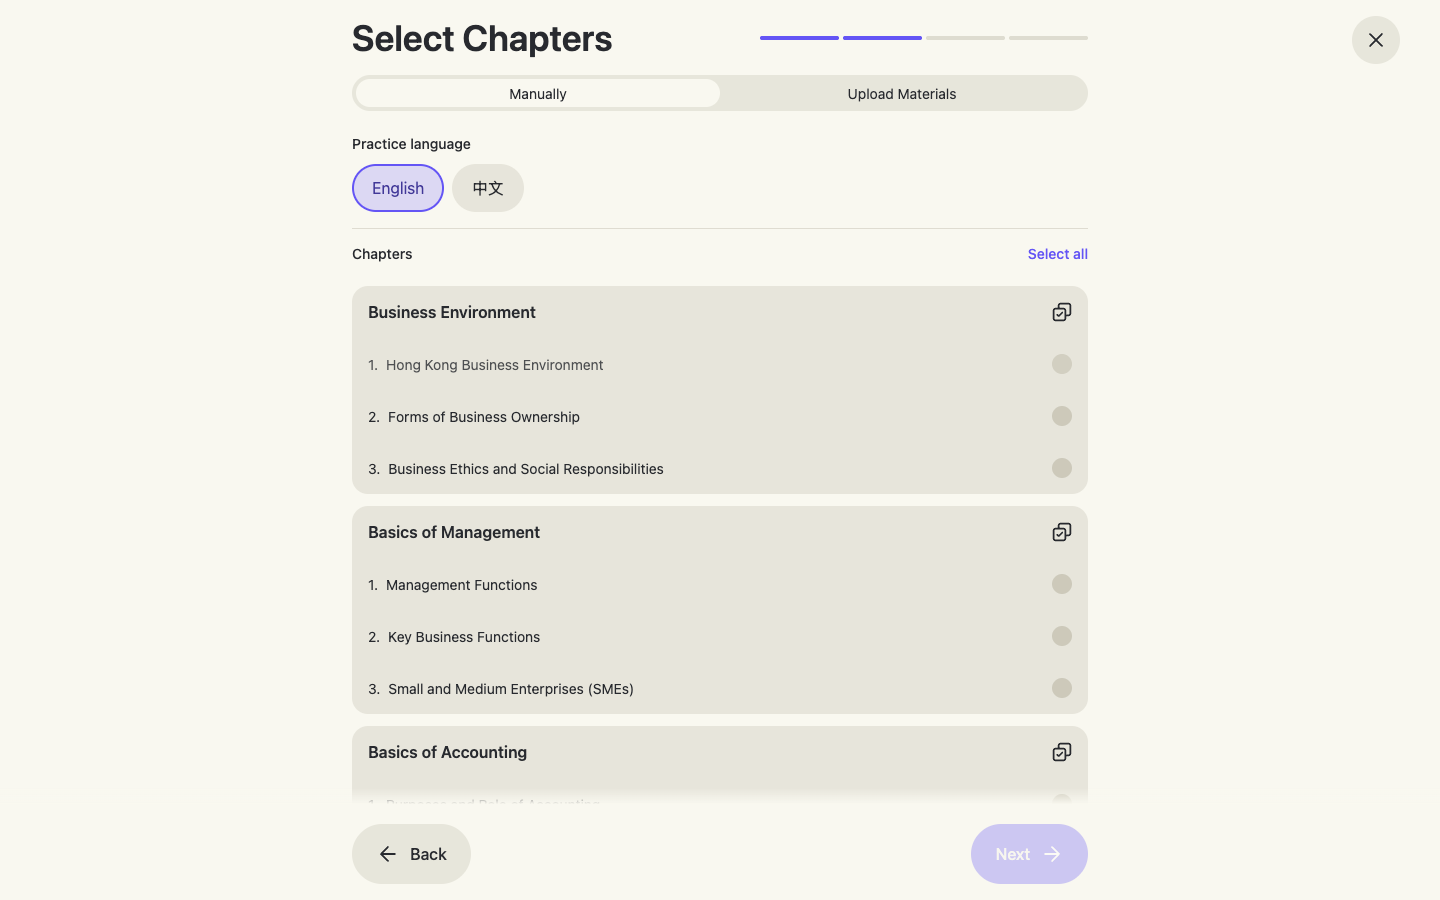
2 · Select chapters — or upload materials
Choose the practice language (English / 中文), then tick the chapters and topics to test. Chapter groups can be selected in one tap.
…or let AI match your own teaching materials
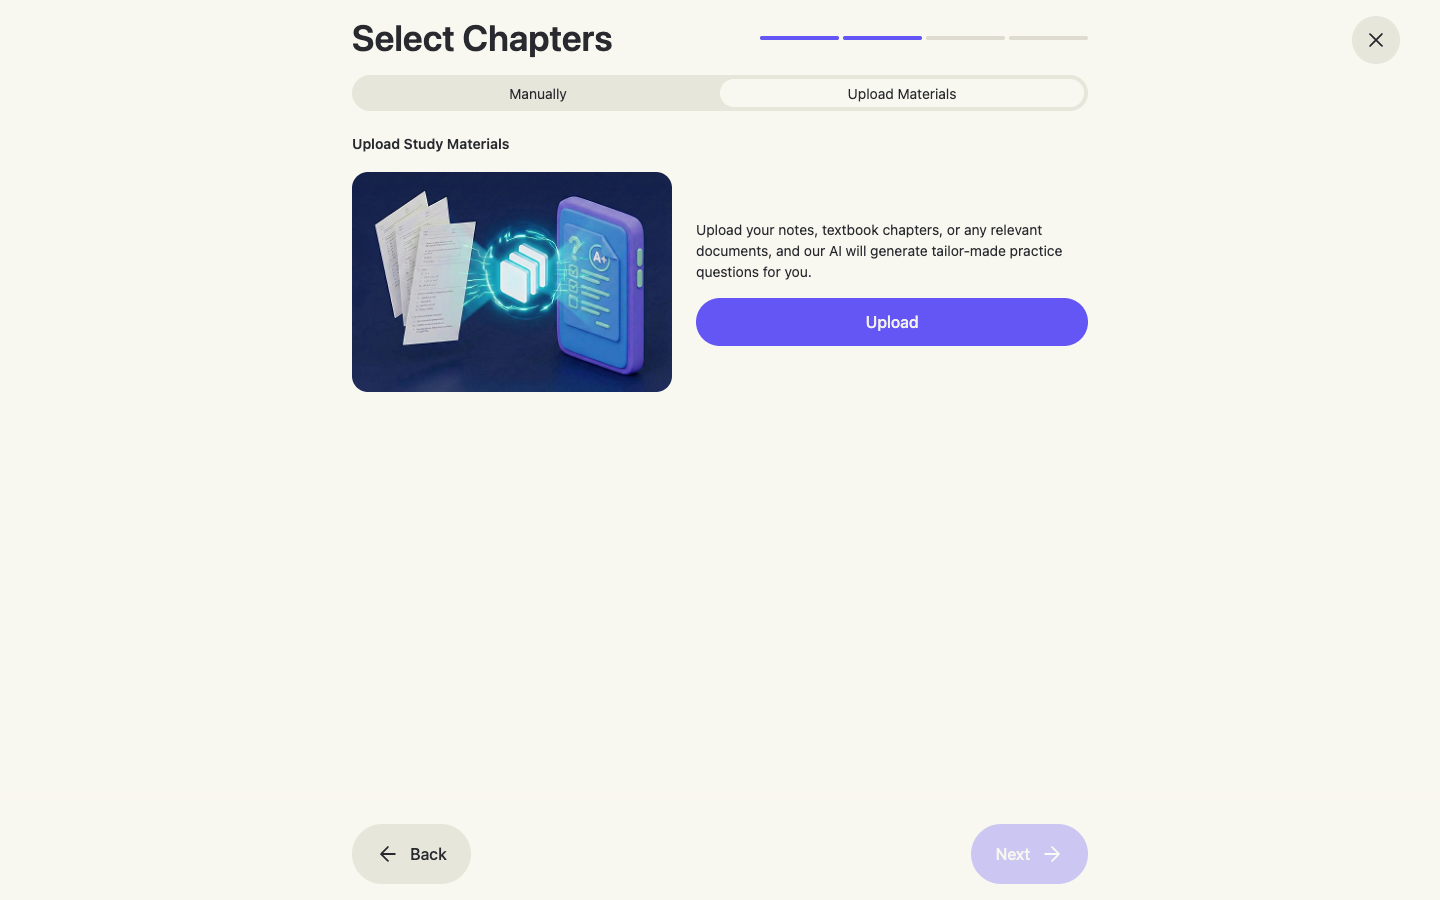
Switch to the Upload Materials tab to upload your own notes, textbook chapters, e-books or past papers instead of picking chapters. AI generates questions matching the scope, style and difficulty of the uploaded materials — ideal when your teaching order differs from the standard syllabus.
3 · Choose the difficulty
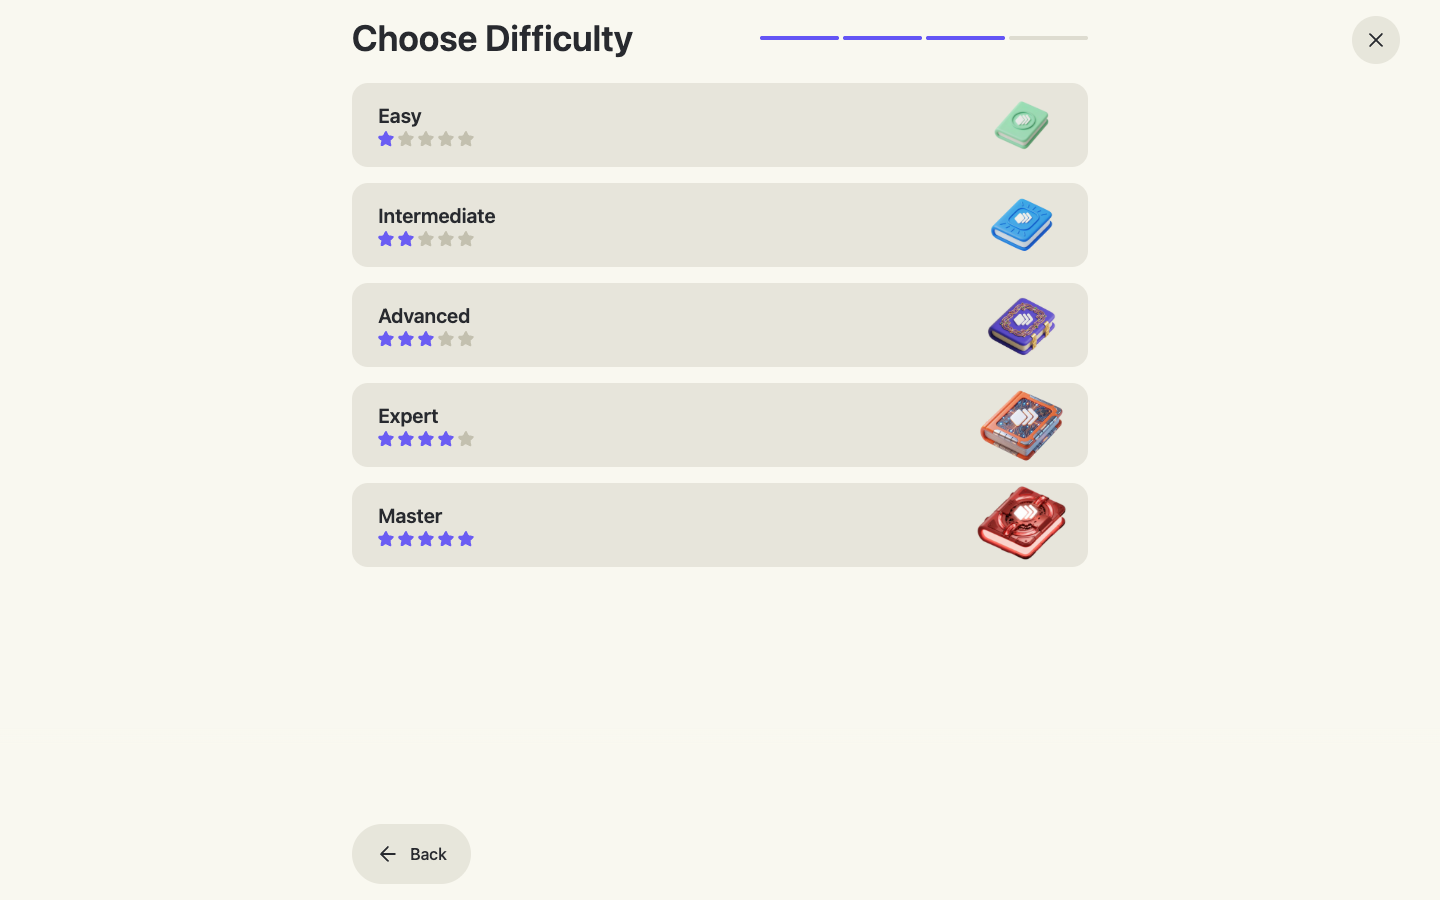
Five levels from Easy to Master set the average difficulty of the generated questions.
4 · Title, question mix & generate
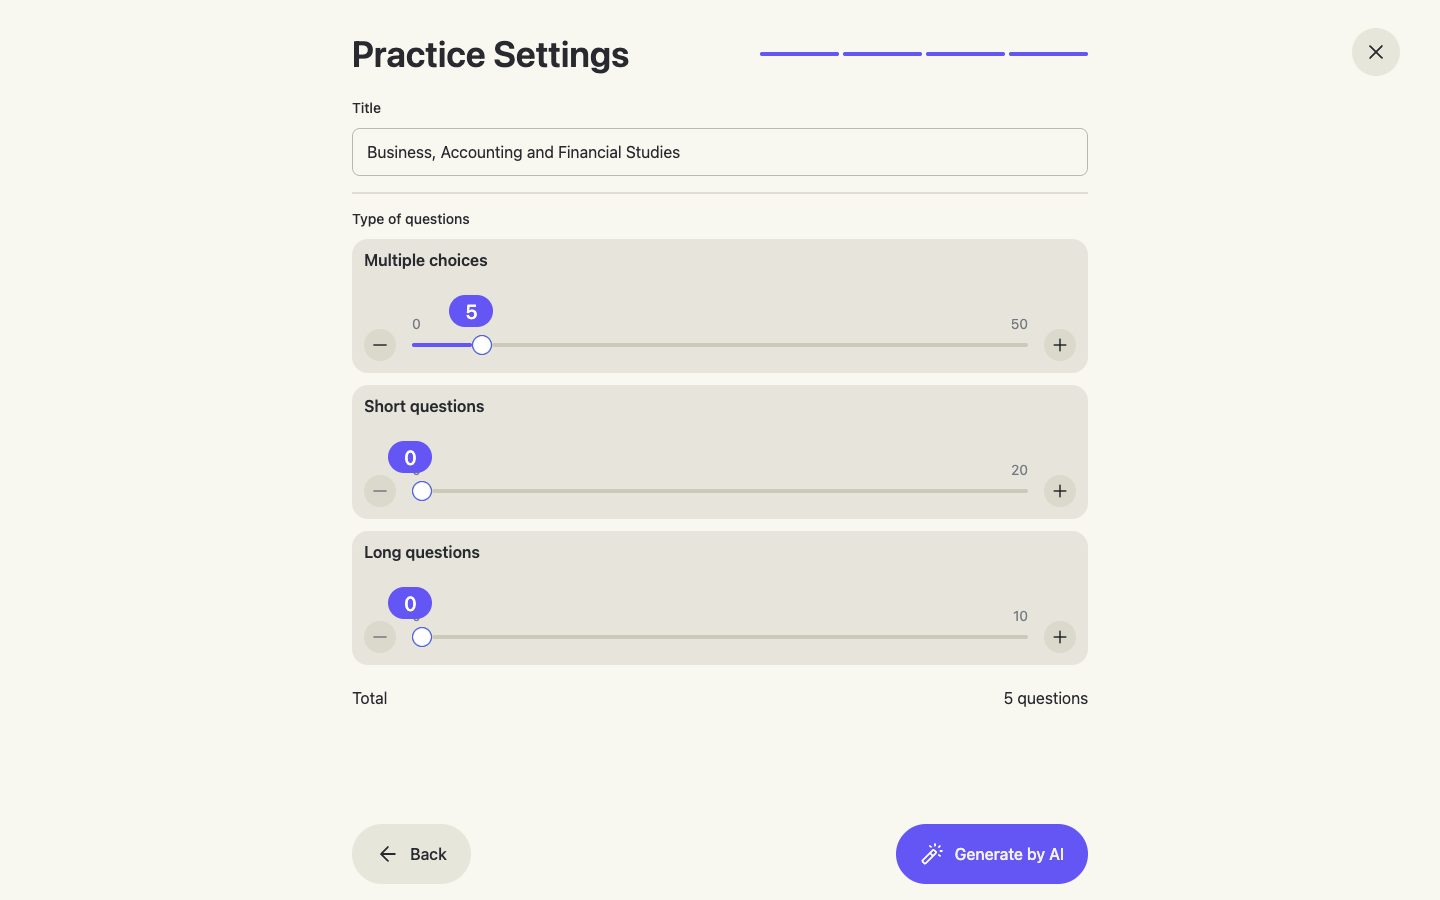
Name the assignment, then use the sliders to set how many multiple-choice, short and long questions you want. Press Generate by AI — the full set is ready in a moment.
5 · Preview and fine-tune every question
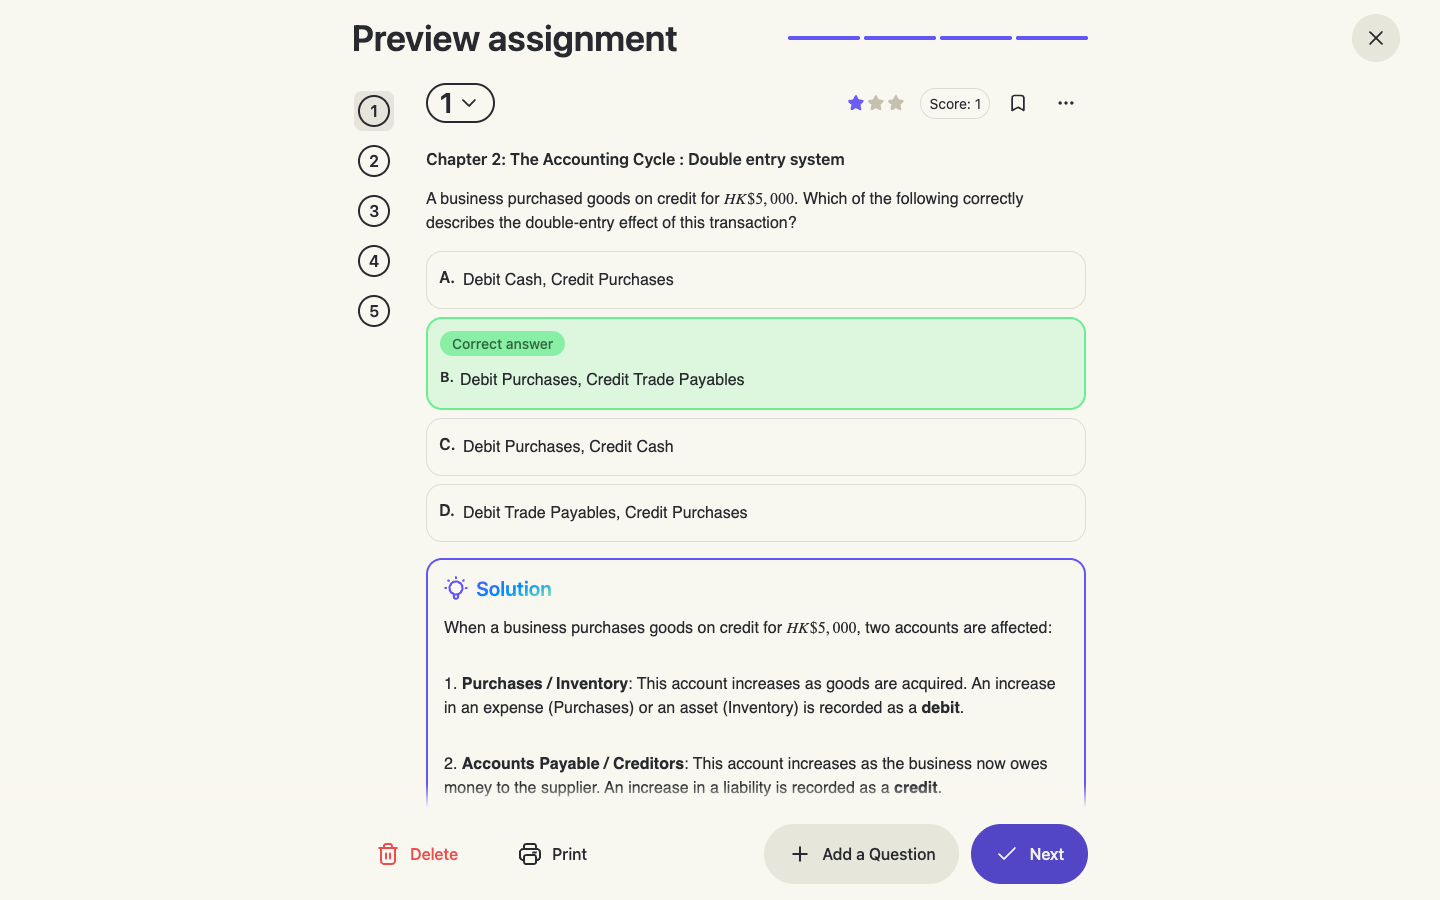
The preview shows each question with its correct answer and full solution. Use the ⋯ menu on a question to change, edit, report or delete it, and + Add a Question to append more (AI-generated, hand-written or uploaded).
Print it (optional)
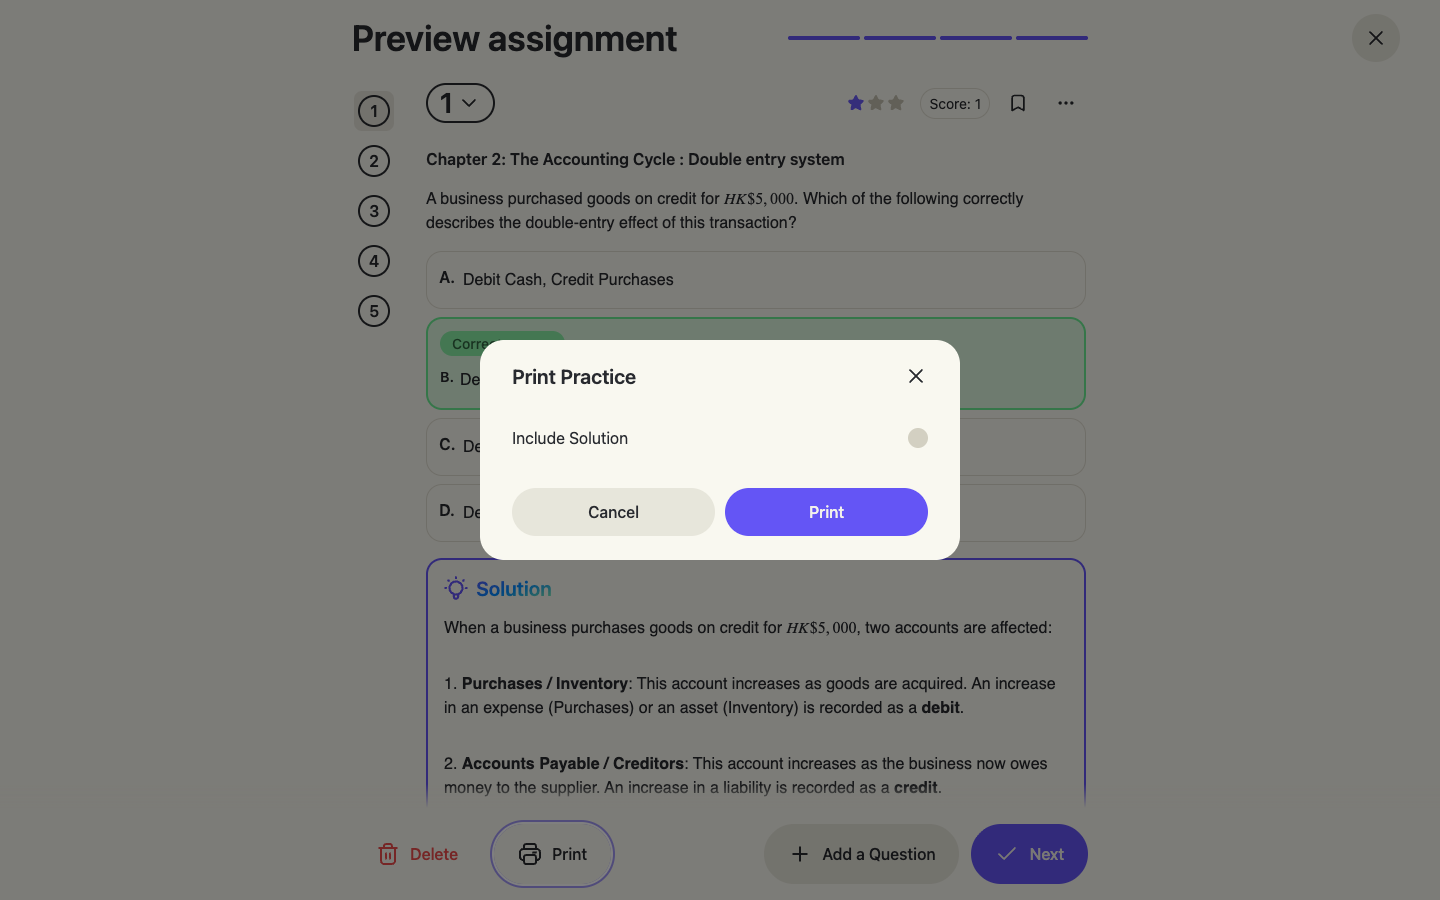
Print produces a clean paper version — toggle Include Solution for a teacher copy. You can also save it as PDF from the print dialog.
6 · Assign to students
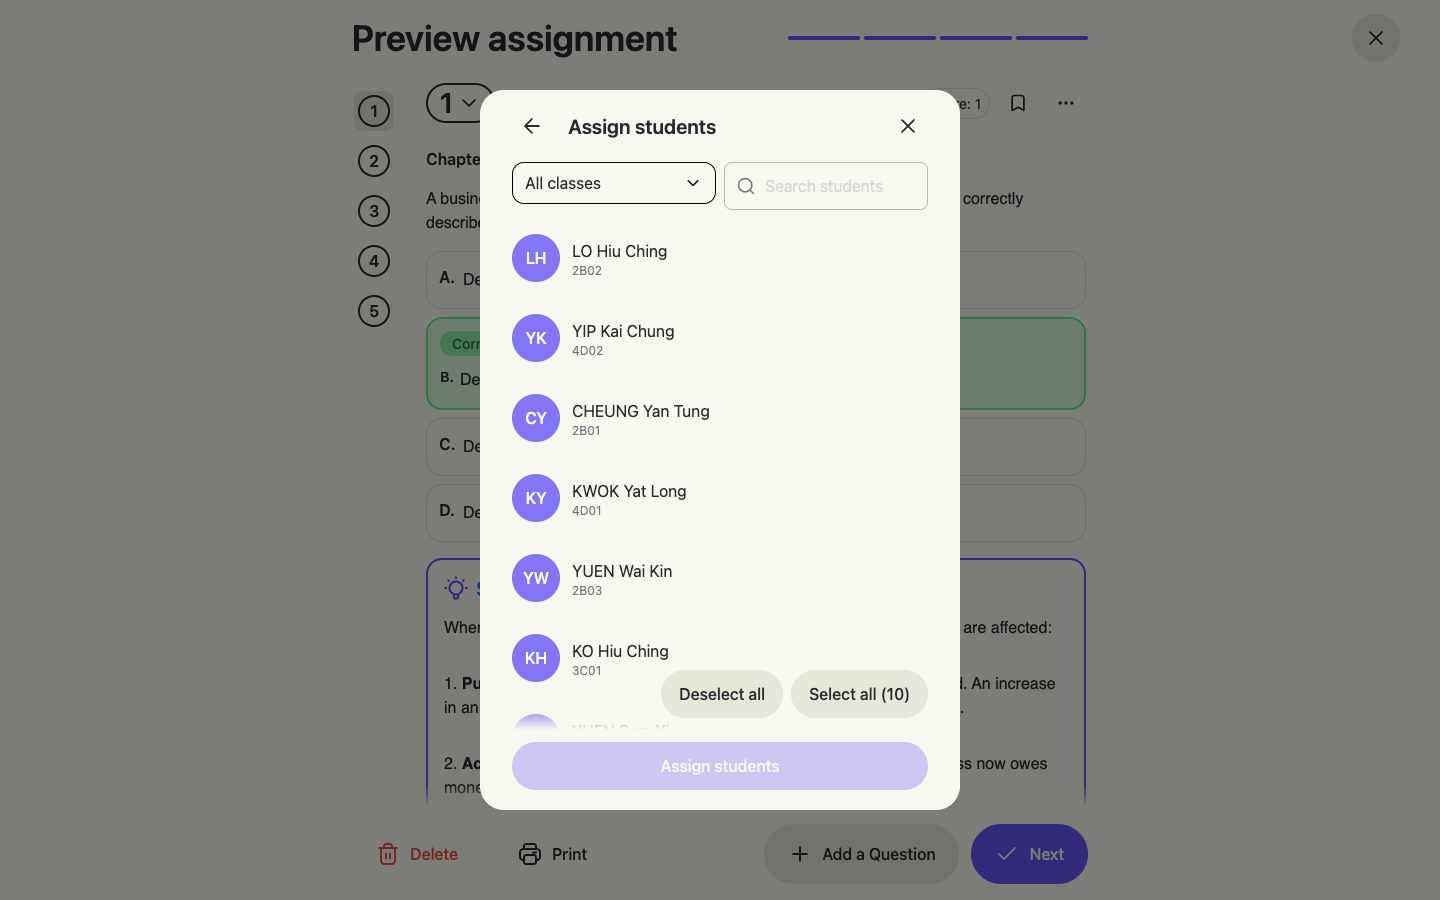
Press Next — the assignment saves automatically and asks whether to Assign now. Pick students individually or filter by class to select a whole group at once.
7 · Time limit, due date — publish
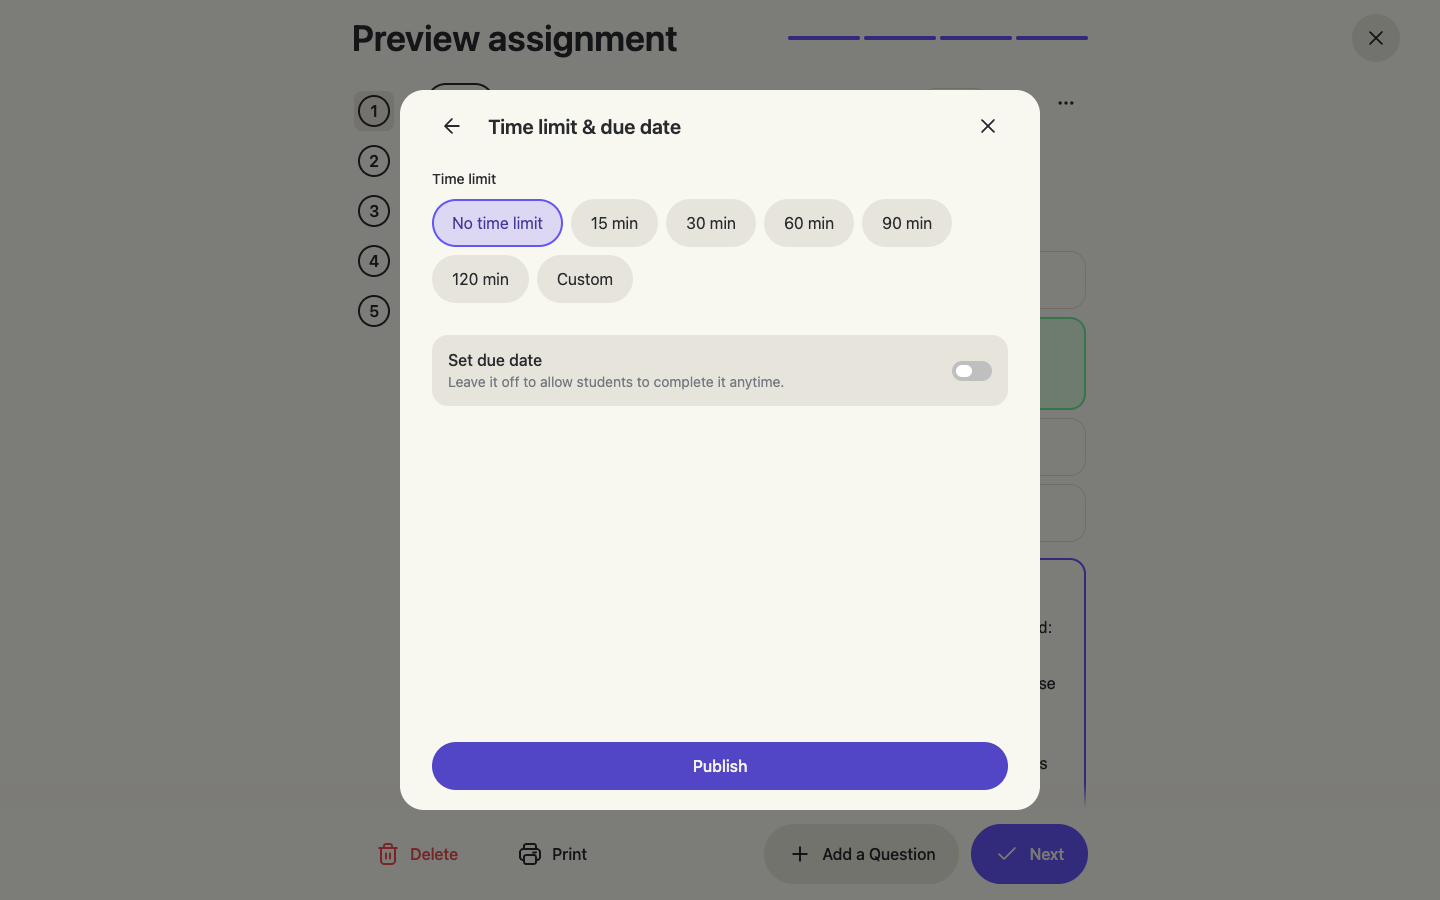
Optionally set a time limit (15–120 min or custom) and a due date, then press Publish.
Done — students are notified
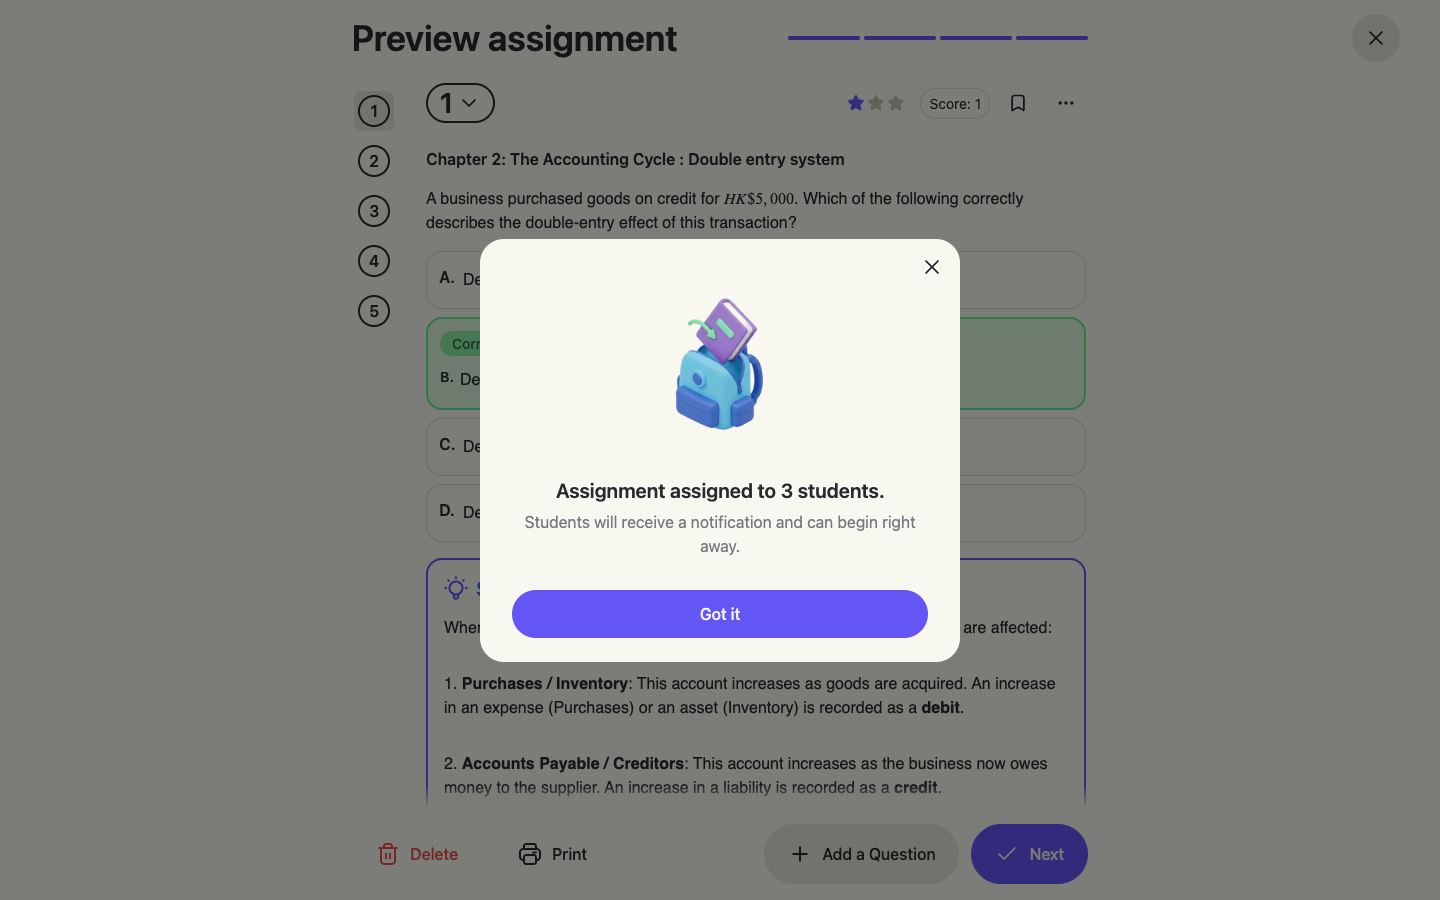
Students receive the assignment instantly and can begin right away. Submissions flow back into the assignment report as they finish.
Section 5
Review results & grade
Everything is marked by AI the moment a student submits — multiple-choice and written answers alike. Your job is just to review, adjust where needed, and read the analytics.
The assignment report
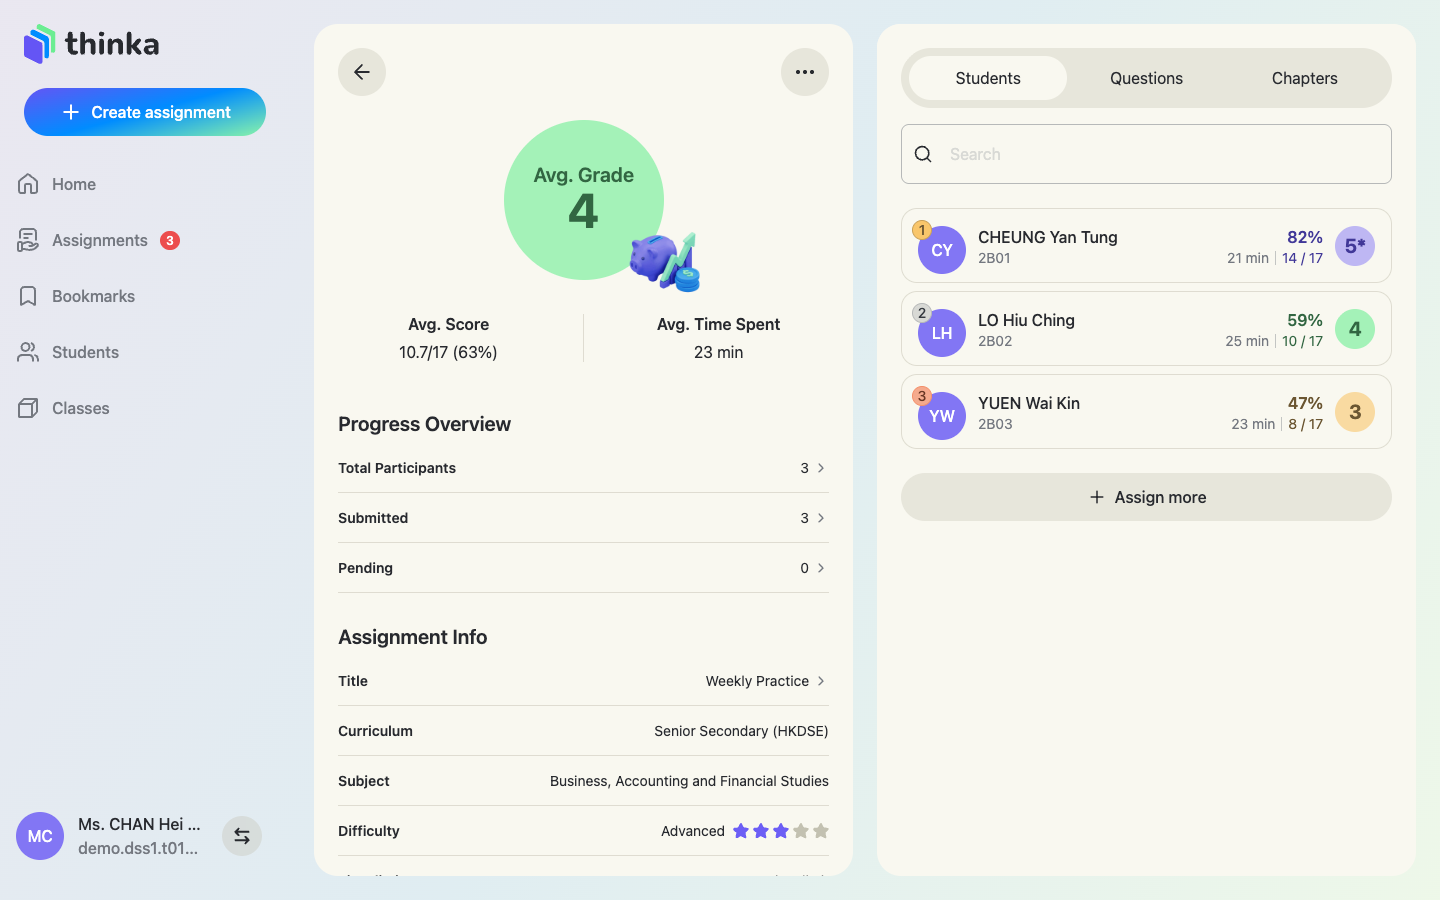
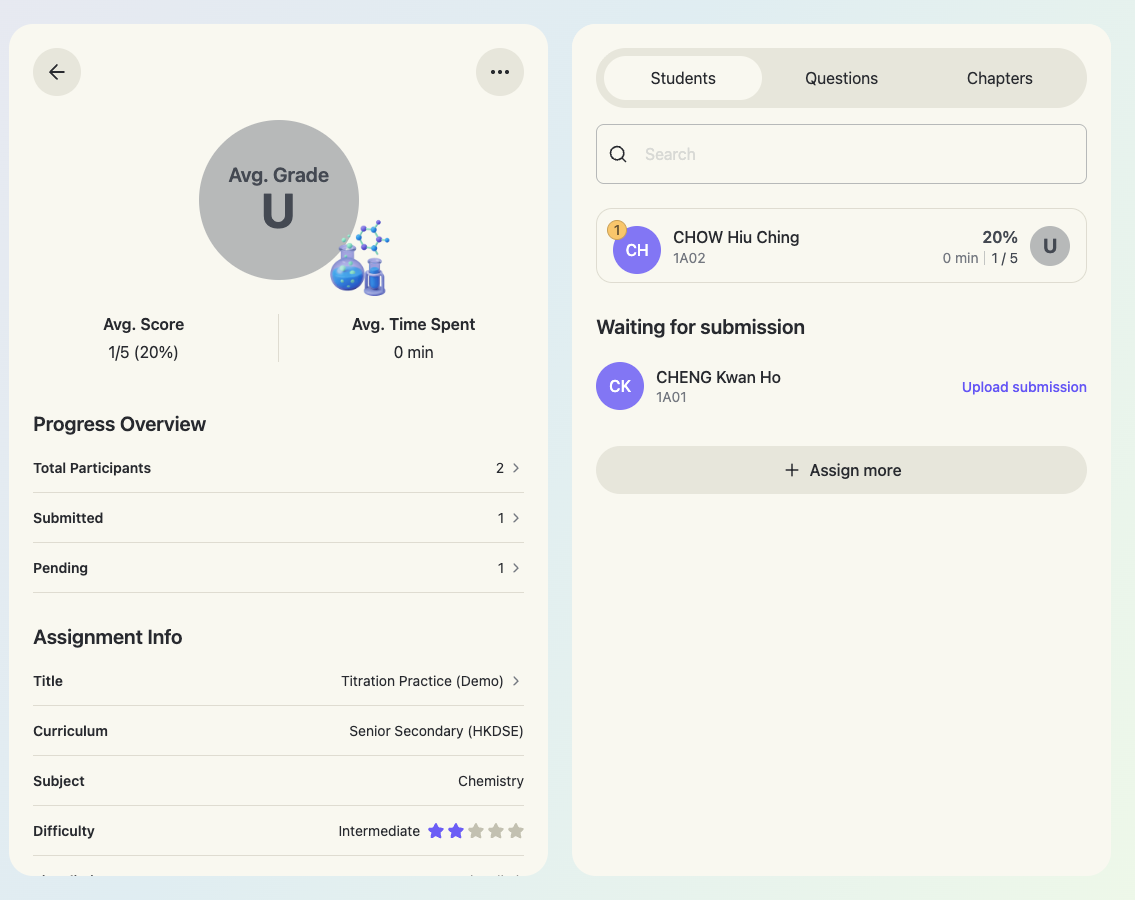
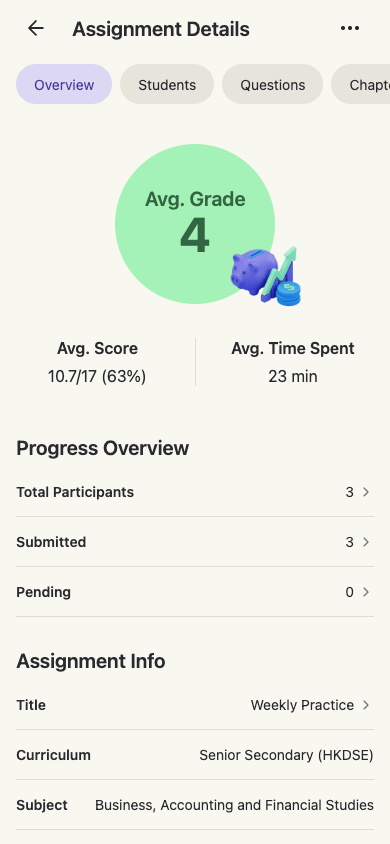
Open an assignment to see the class-level picture: average grade, score and time spent, plus who has submitted and who is still pending. Three tabs break it down by Students, Questions and Chapters.
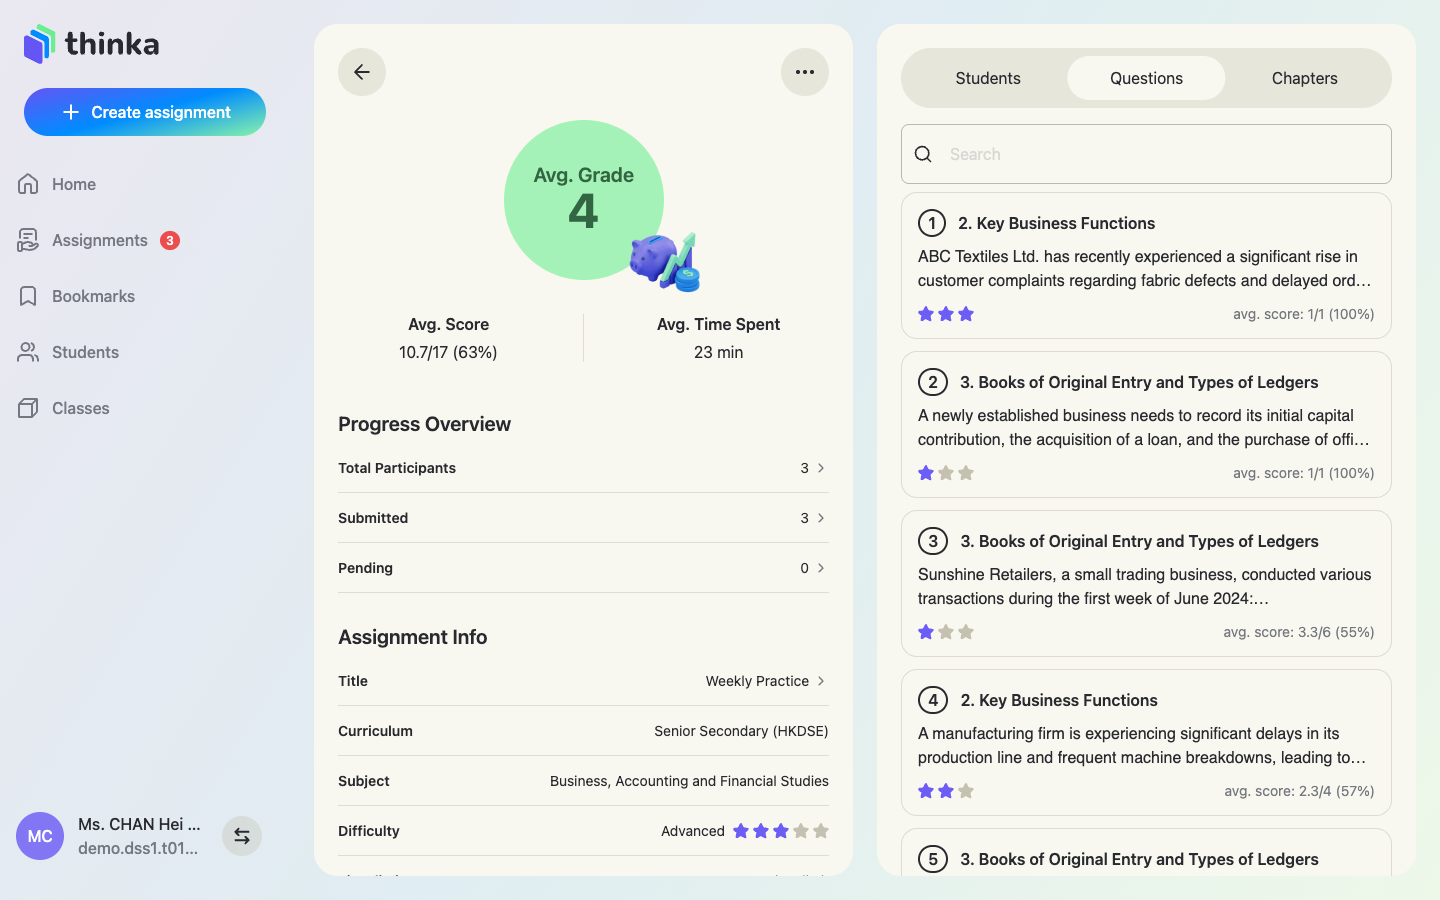
Per-question & per-chapter averages
The Questions tab shows the class average on every question — spot exactly where the class struggled. The Chapters tab rolls the same data up by topic, so you know which chapter to reteach.
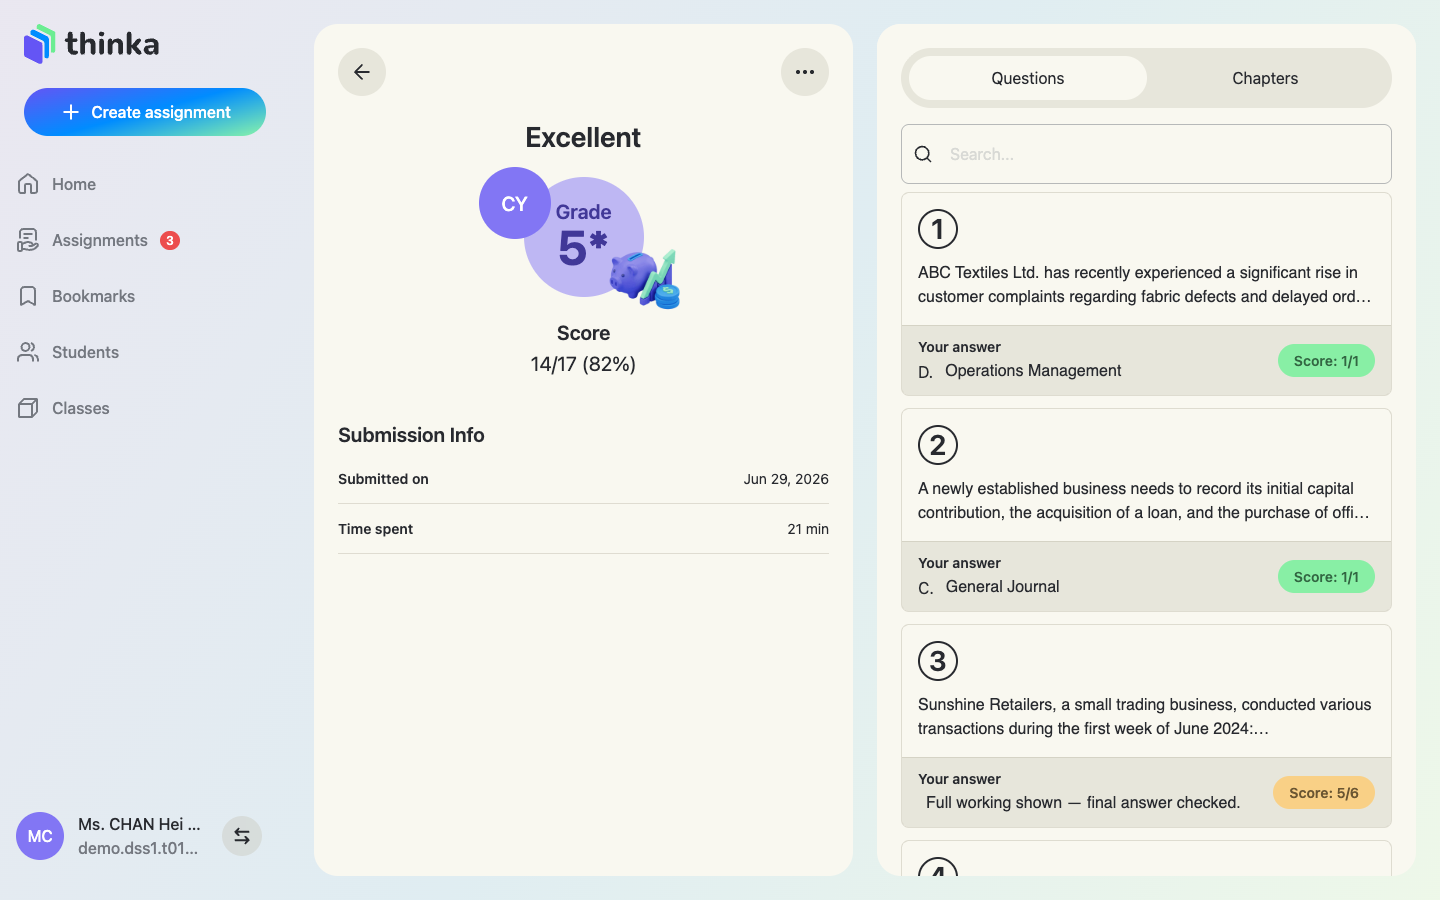
A student's paper
Click a student to open their graded paper: grade, score, time, and every answer with the AI's marking.
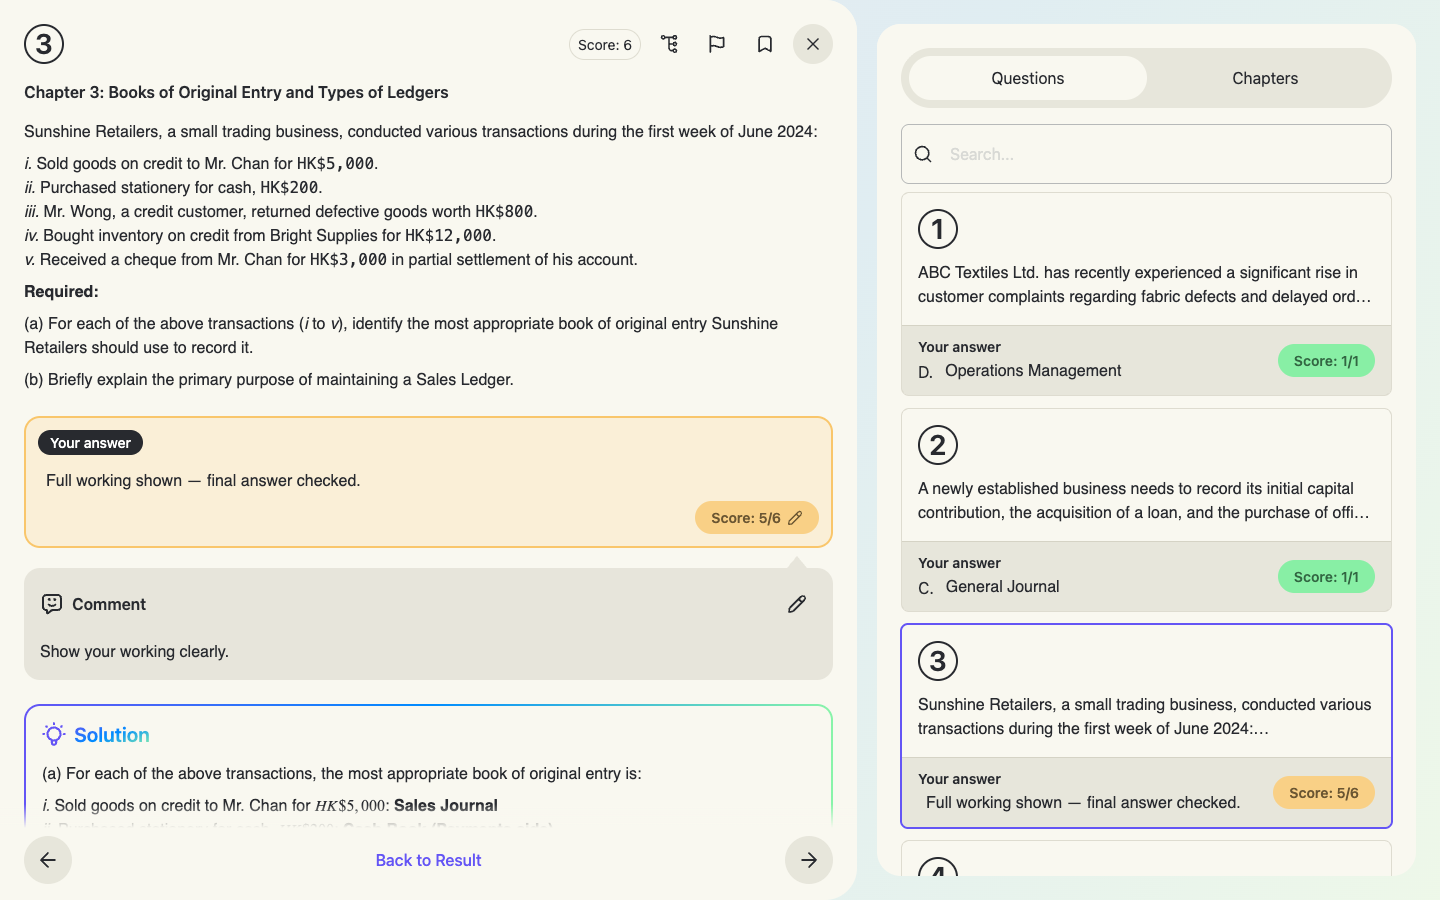
Adjust scores & comments
Open any question to see the student's answer beside the model solution. You can edit the score and edit the AI-written comment — your adjustments override the AI.
Generate follow-up practice
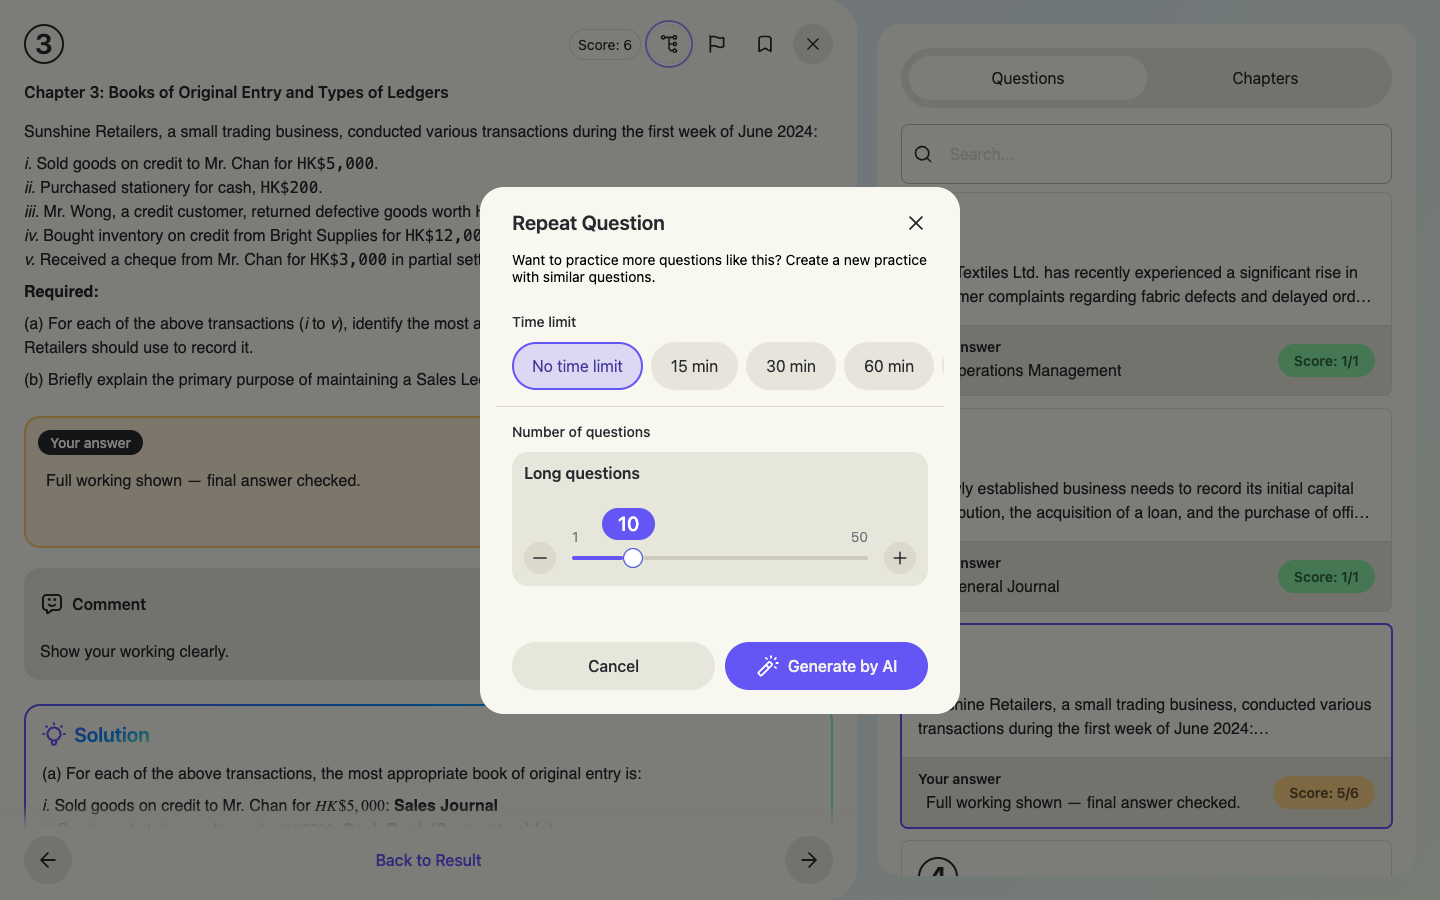
The Repeat Question button instantly creates a new practice of similar questions — perfect as targeted follow-up for a weak topic.
Report a faulty question
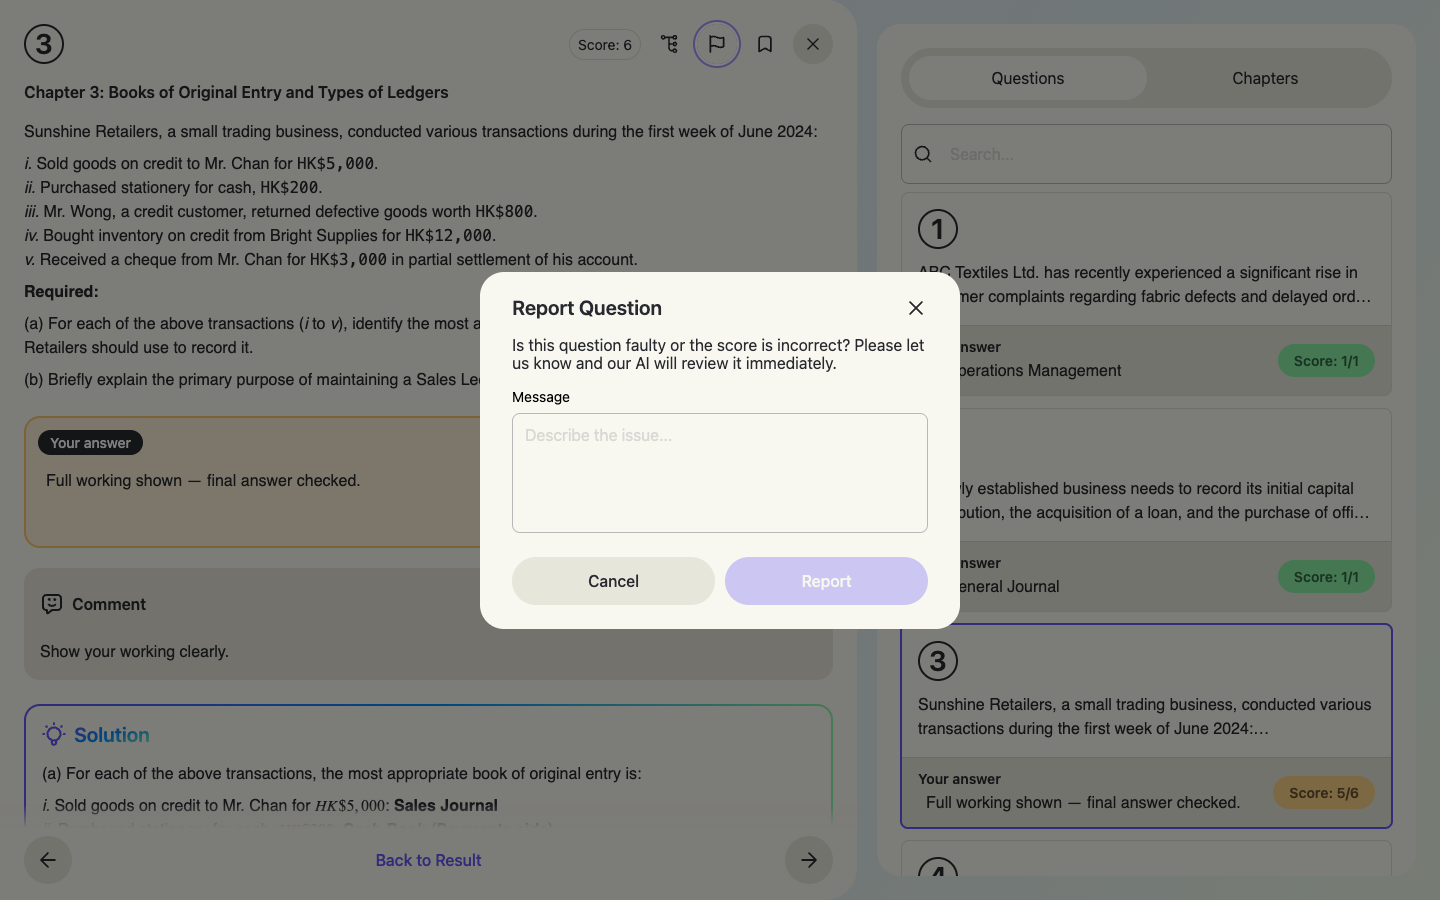
If a question or its marking looks wrong, press the 🚩 Report Question button, describe the issue, and AI reviews and fixes it immediately — wrong answers, wrong marking, or suggestions like shortening the solution steps.
Upload handwritten answers (OCR grading)
For students who worked on paper, open their pending submission and use Upload submission to photograph their handwritten answers. OCR reads the writing, matches it to the questions and the AI grades it — the student's result appears as if they had submitted digitally.
Section 6
Teaching from your phone
Get the thinka app on your phone: search thinka on the App Store or Google Play, or simply open https://thinka.ai/download. The same account works everywhere, with a bottom-tab layout made for phones.
Home, assignments & students on mobile
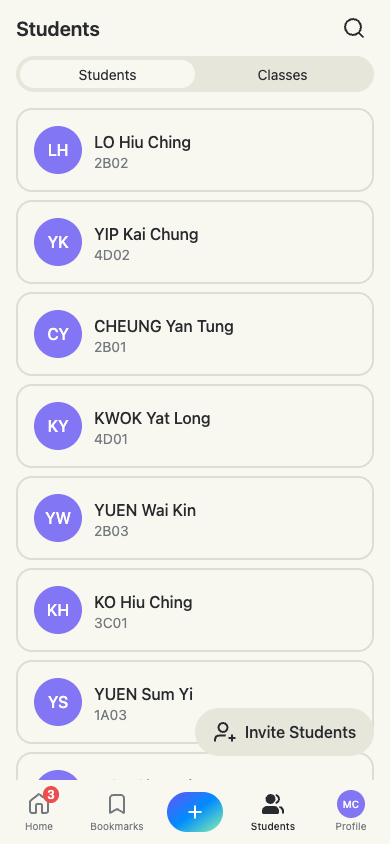
The phone layout keeps everything: pending/unchecked counters, recent assignments, the full student roster and the + button to create assignments on the go.
Assignment reports on mobile
Assignment analytics — averages, progress, per-student and per-question breakdowns — read just as well on a phone.
Your students, anywhere
The student roster and class lists travel with you — invite a new student from your phone in seconds.