Admin / Owner Guide
Set up your school: people, classes, subjects, branding and the school-wide dashboard.
Section 1
Signing in as school owner / admin
The school owner is the account that owns the school workspace. Admins are teachers who have been granted Admin access. Both sign in the same way as any other user.
Two places to sign in: the school domain or the general domain
Your school has its own address, https://<school>.app.thinka.ai. Opening it shows a sign-in page with your school logo and name. Only school members can sign in here, and it always opens straight into the school workspace.
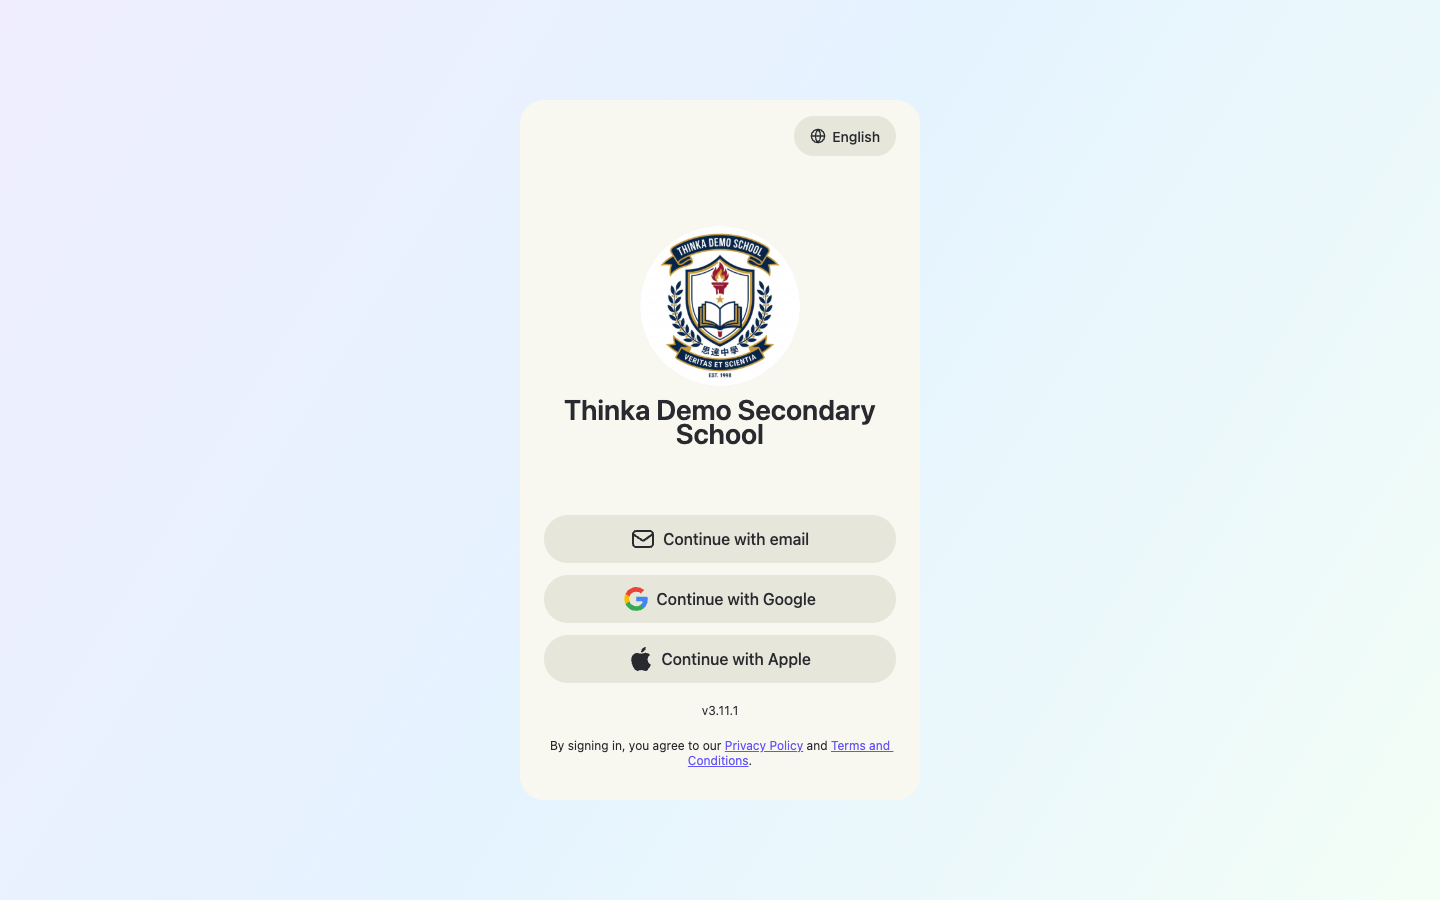
School-branded sign-in page on the school's own domain.
The general domain, for comparison
The general https://app.thinka.ai shows the standard thinka sign-in page instead. Any thinka account can sign in there — including personal (non-school) accounts — and users who belong to a school can switch between their personal and school workspaces afterwards.
Everything after this page is identical on both domains, so the rest of this manual simply shows the school domain. In short: use the school domain for day-to-day school work; use the general domain when you also need your personal workspace.
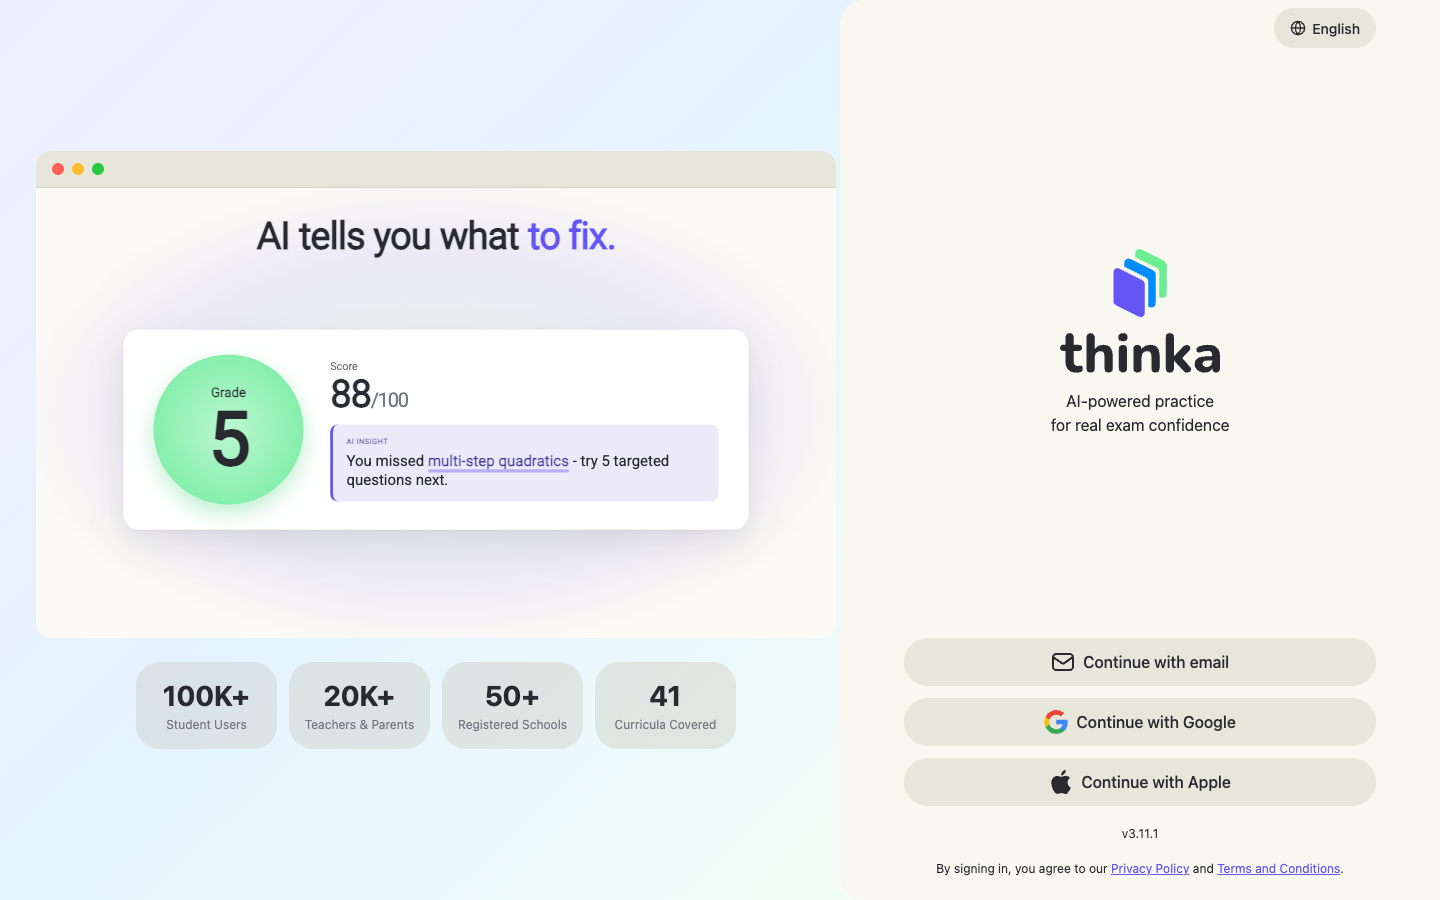
The standard thinka sign-in page on app.thinka.ai.
Continue with email
Click Continue with email, enter your school email address and click Continue.
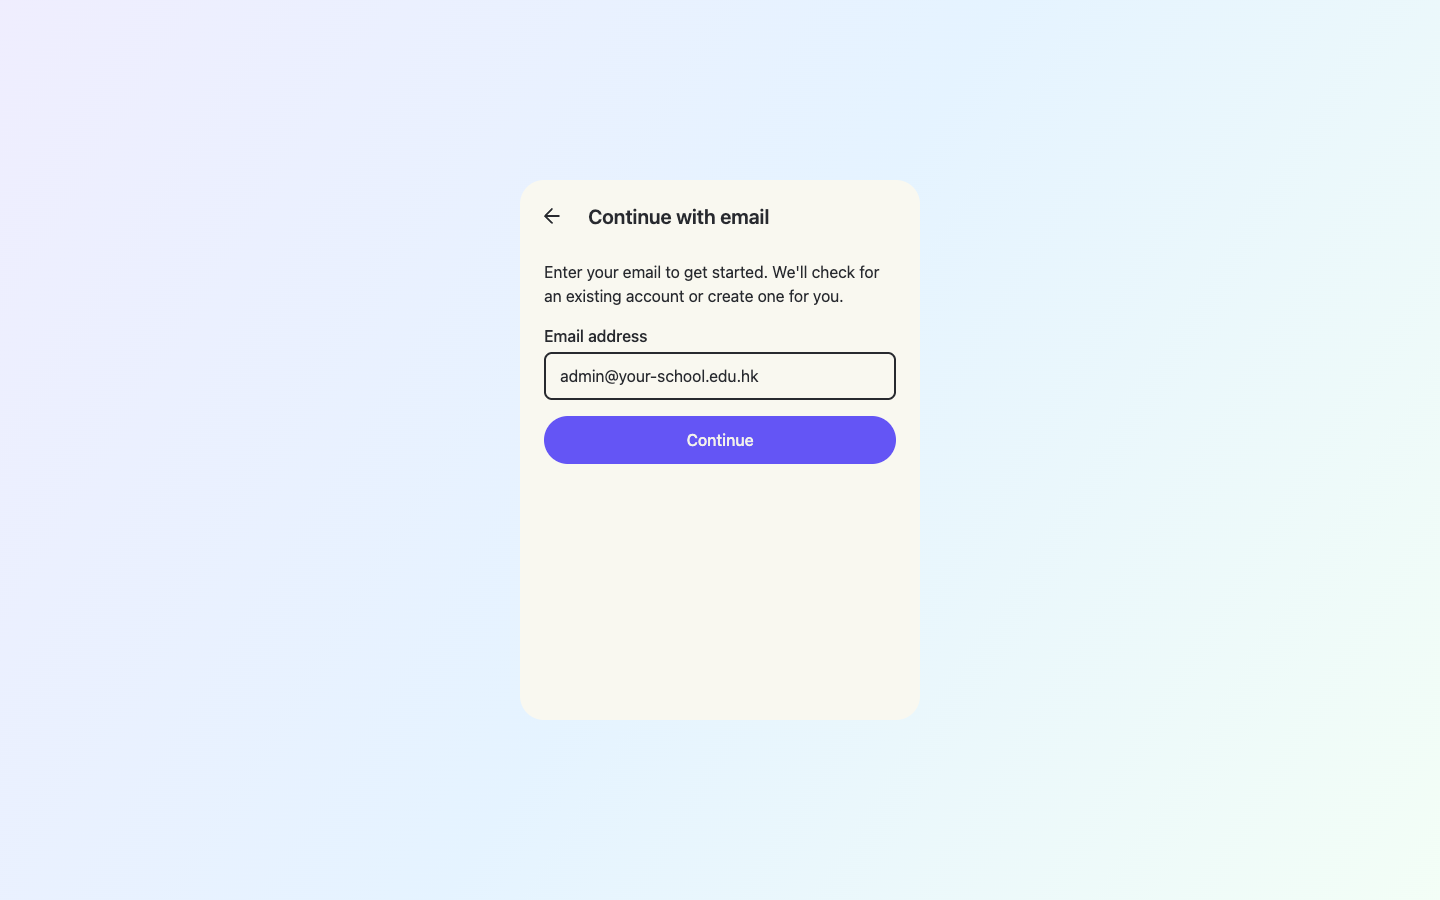
On a school domain, only emails that belong to the school (owner, admins, teachers, students) can proceed. Other emails see “Incorrect email.”
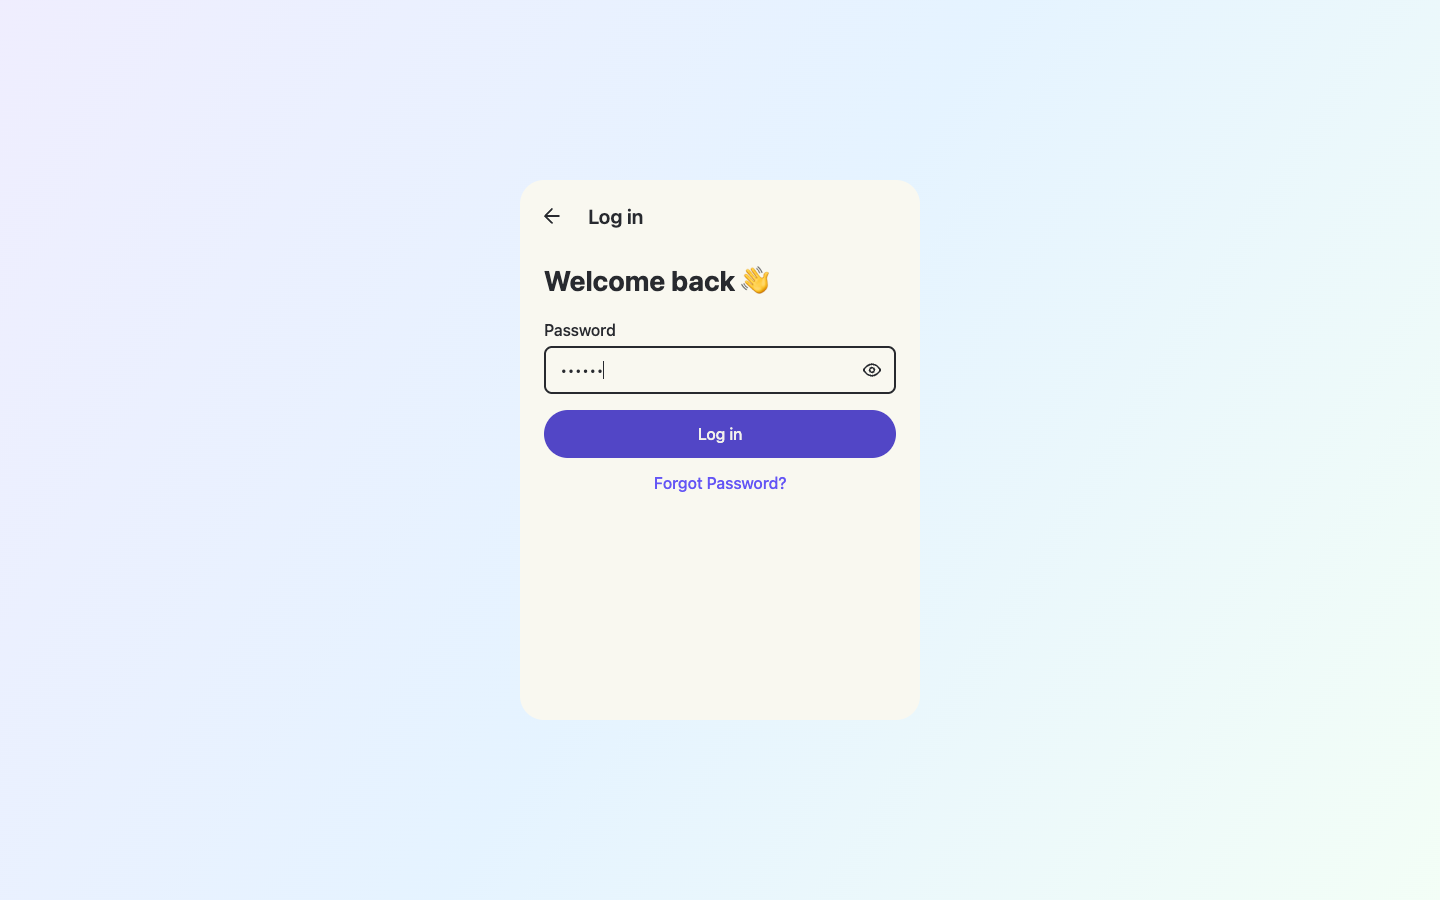
Enter your password and log in
Enter the password for your account and click Log in.
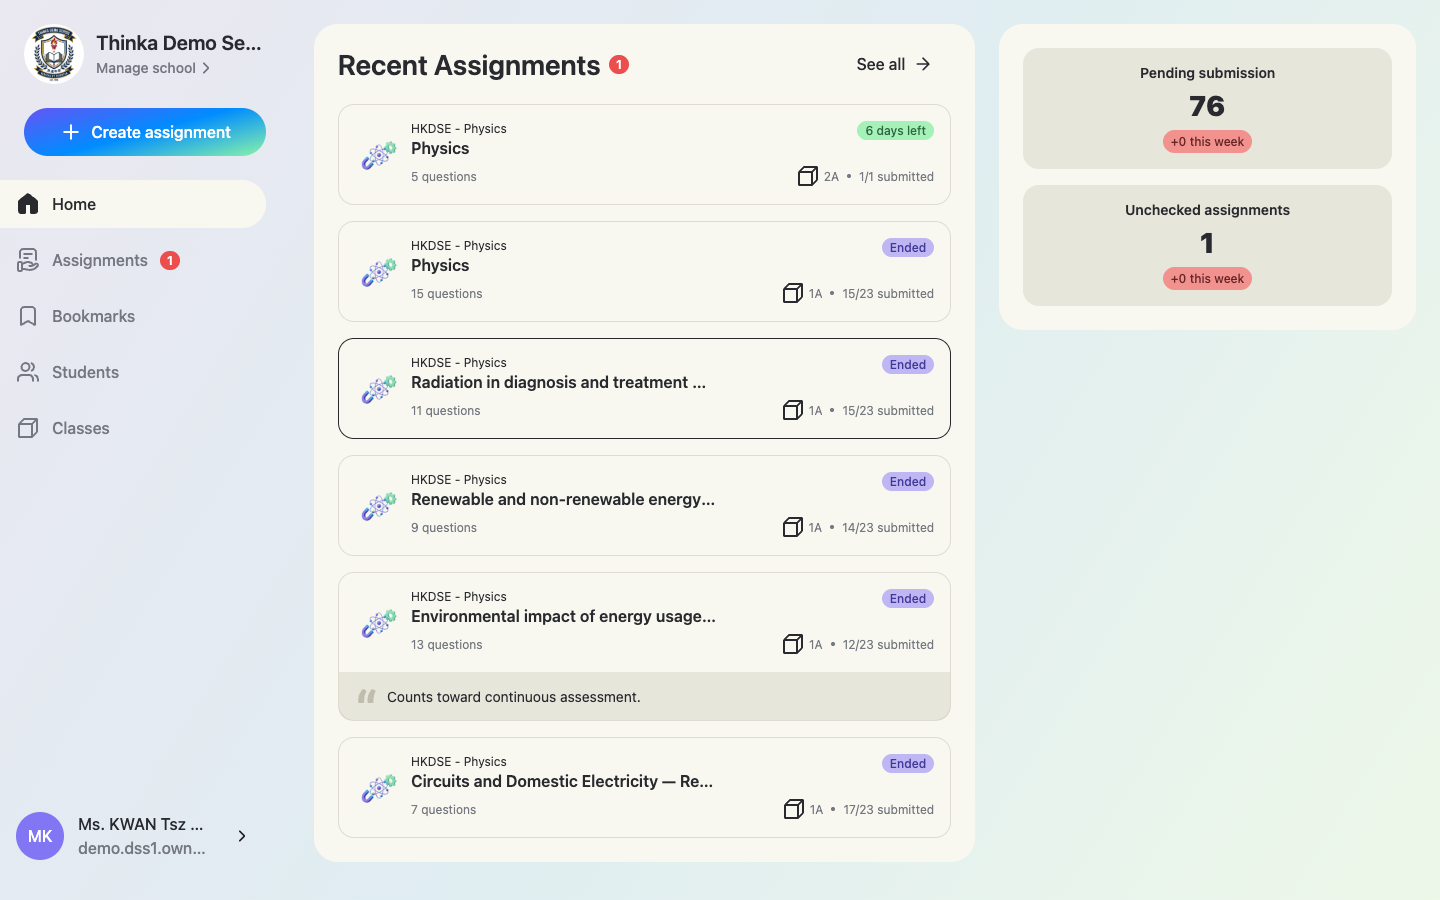
You land in the teaching workspace
Owners and admins are teachers too, so after signing in you land on the teaching home. School management lives in a separate console (next section).
Section 2
Opening the school console
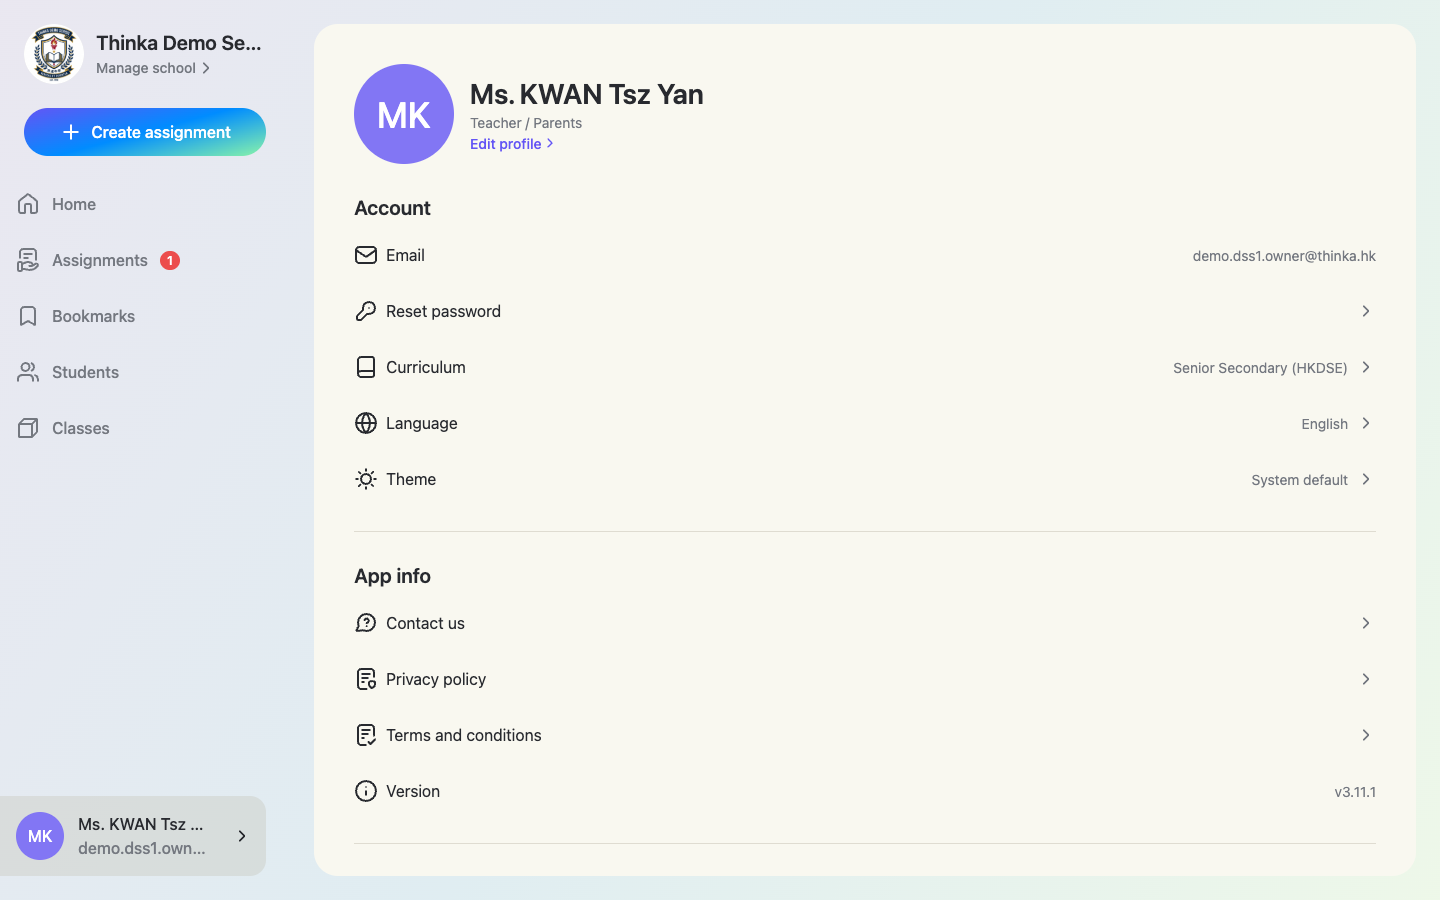
Open your profile and click “Manage school”
Click your name at the bottom of the sidebar to open your profile. Owners and admins see a Manage school entry at the top of the sidebar.
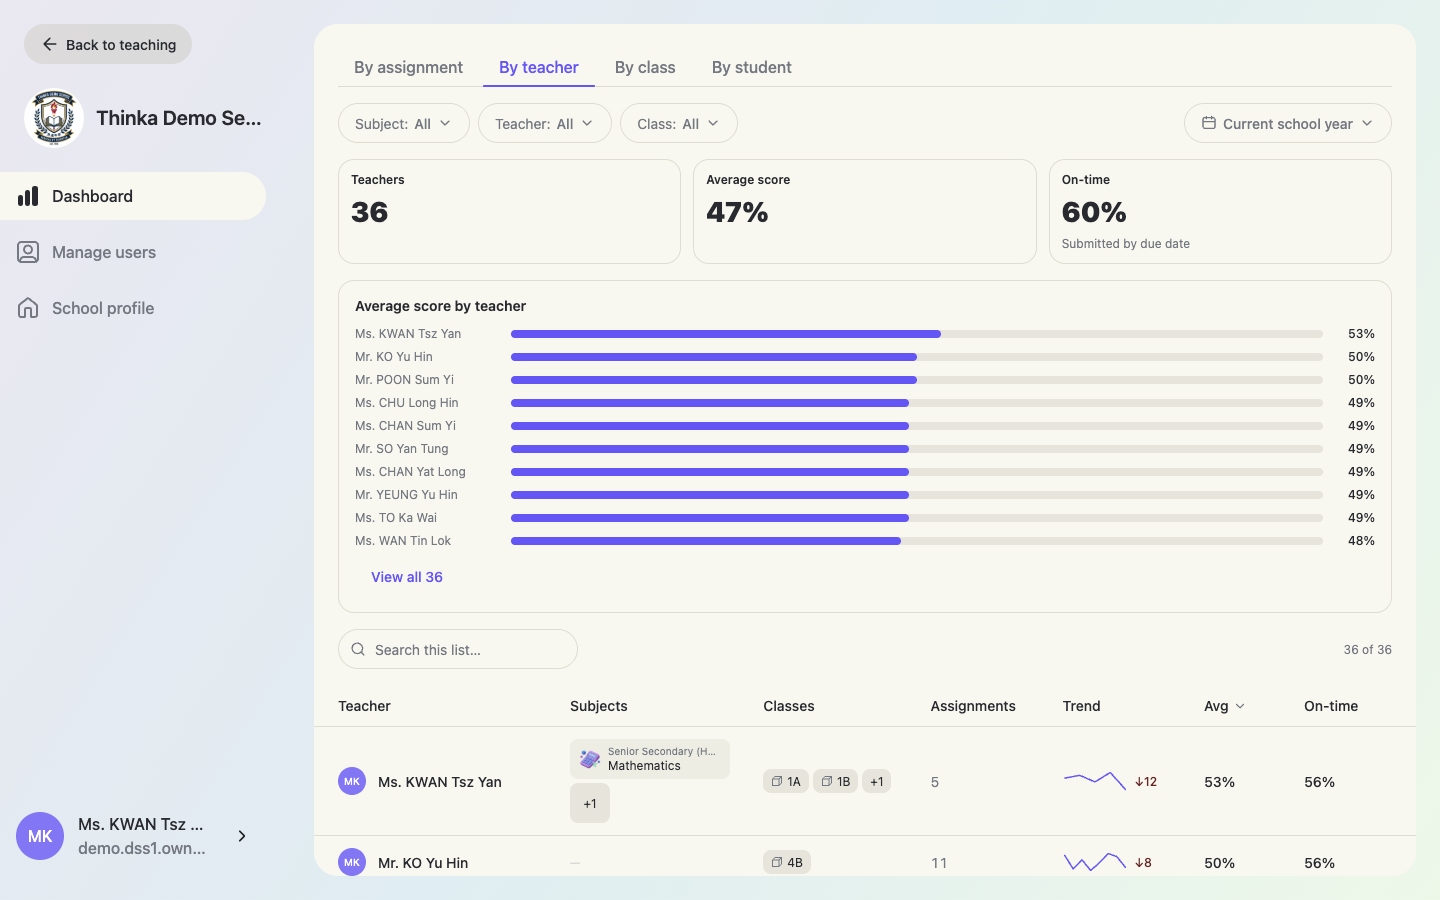
The console has three areas
Dashboard (school-wide performance), Manage users (teachers / students / classes) and School profile (name, logo, school year). Use Back to teaching in the top-left corner to return to the normal teaching workspace at any time.
Section 3
Create / import / manage teachers
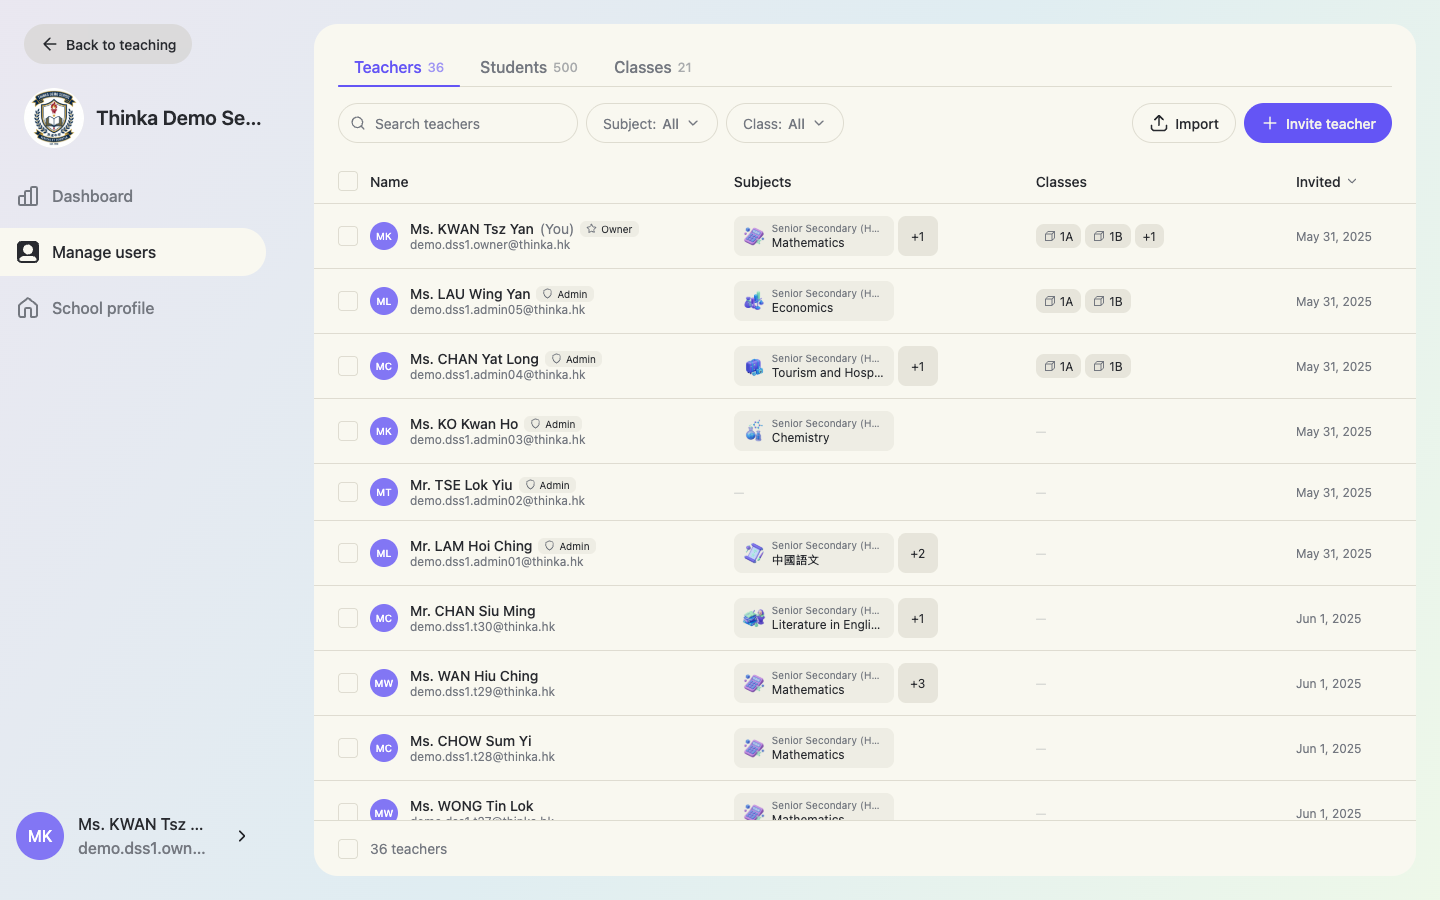
Open Manage users → Teachers. The table shows every teacher with their subjects, classes, join date, and badges for the Owner and Admins. Use the search box and the Subject / Class filters to narrow the list; click any column header to sort.
The Teachers tab
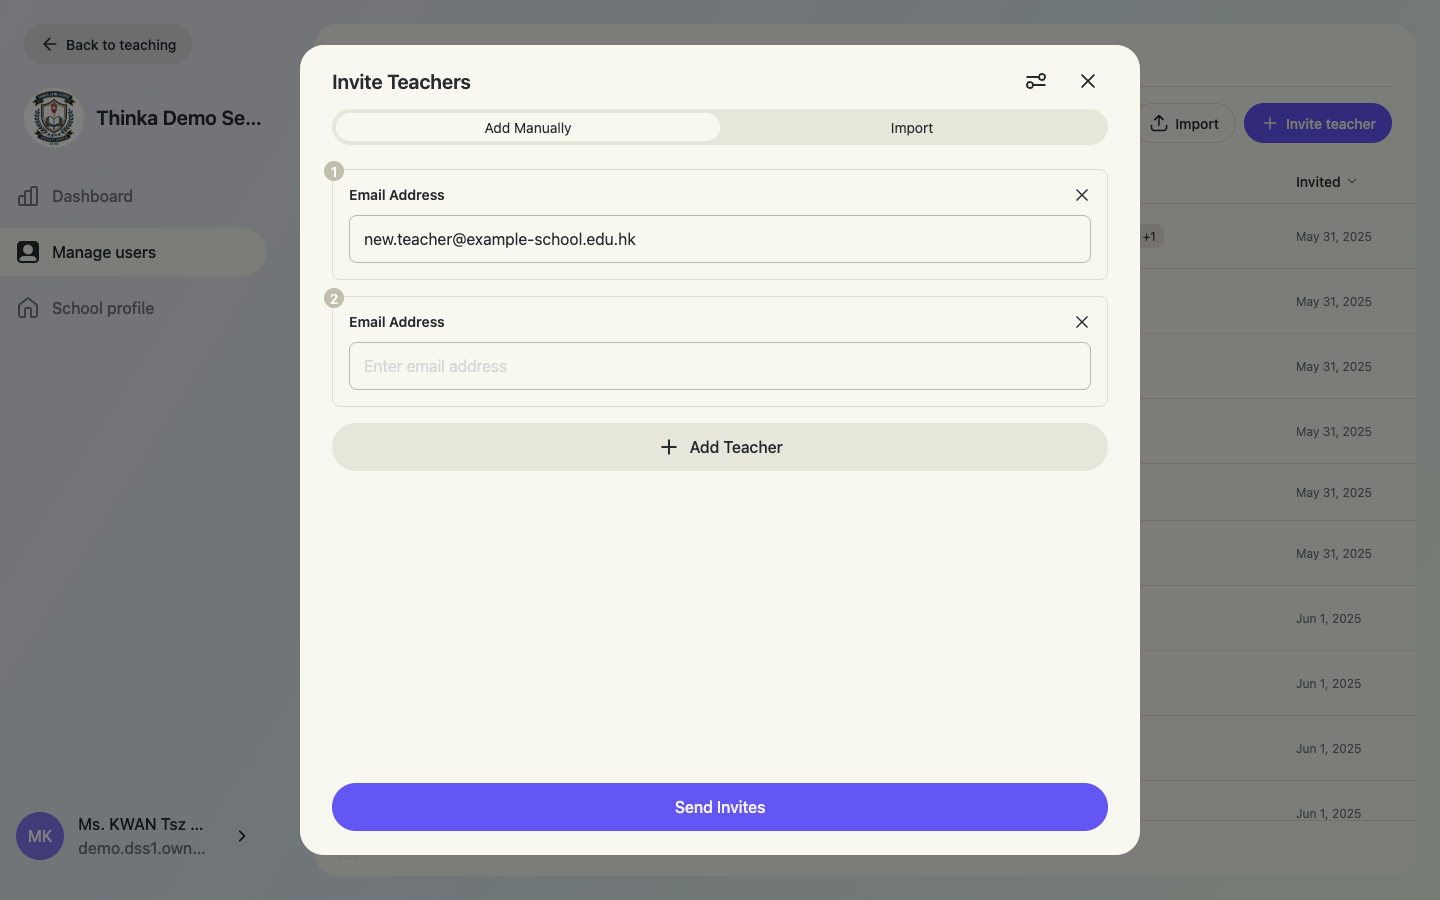
Invite teachers one by one
Click + Invite teacher. In the Add Manually tab, enter one email per row and click + Add Teacher for more rows. Finally click Send Invites.
If the email already has a thinka teacher account, that account joins your school and keeps its personal workspace. The teacher can switch between the two (see “Others → Switching workspace”).
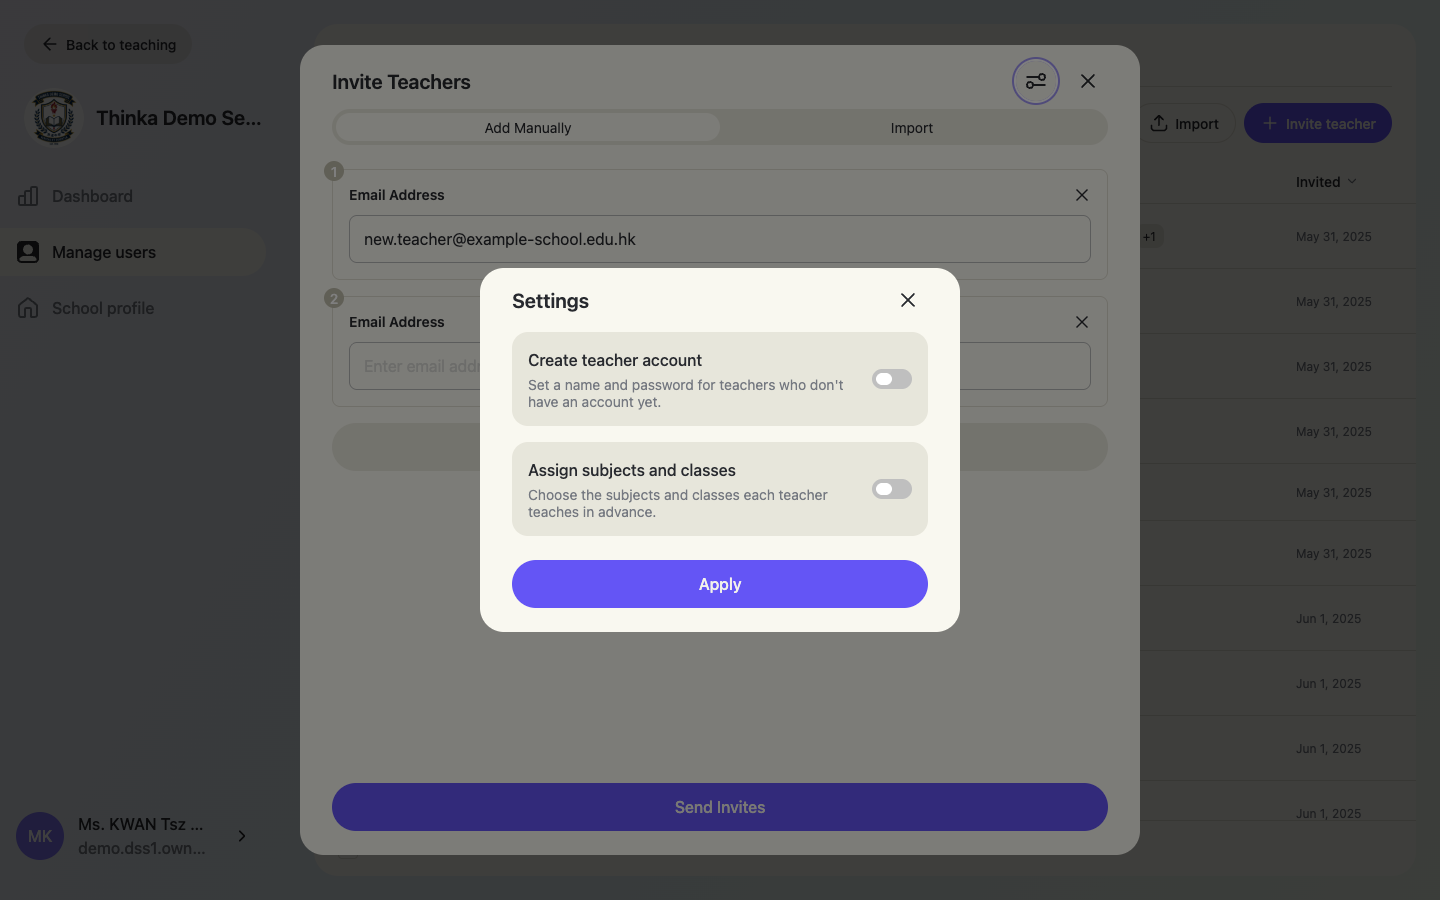
Invite settings: create accounts & pre-assign
Click the settings icon (top-right of the invite sheet). Create teacher account lets you set a name and password for teachers who don't have an account yet — they can log in immediately, no email confirmation needed. Assign subjects and classes adds subject / class pickers to each row so teachers are fully set up on day one.
The full invite form
With both settings on, each row has Name / Email / Password plus Add subject and Add class buttons.
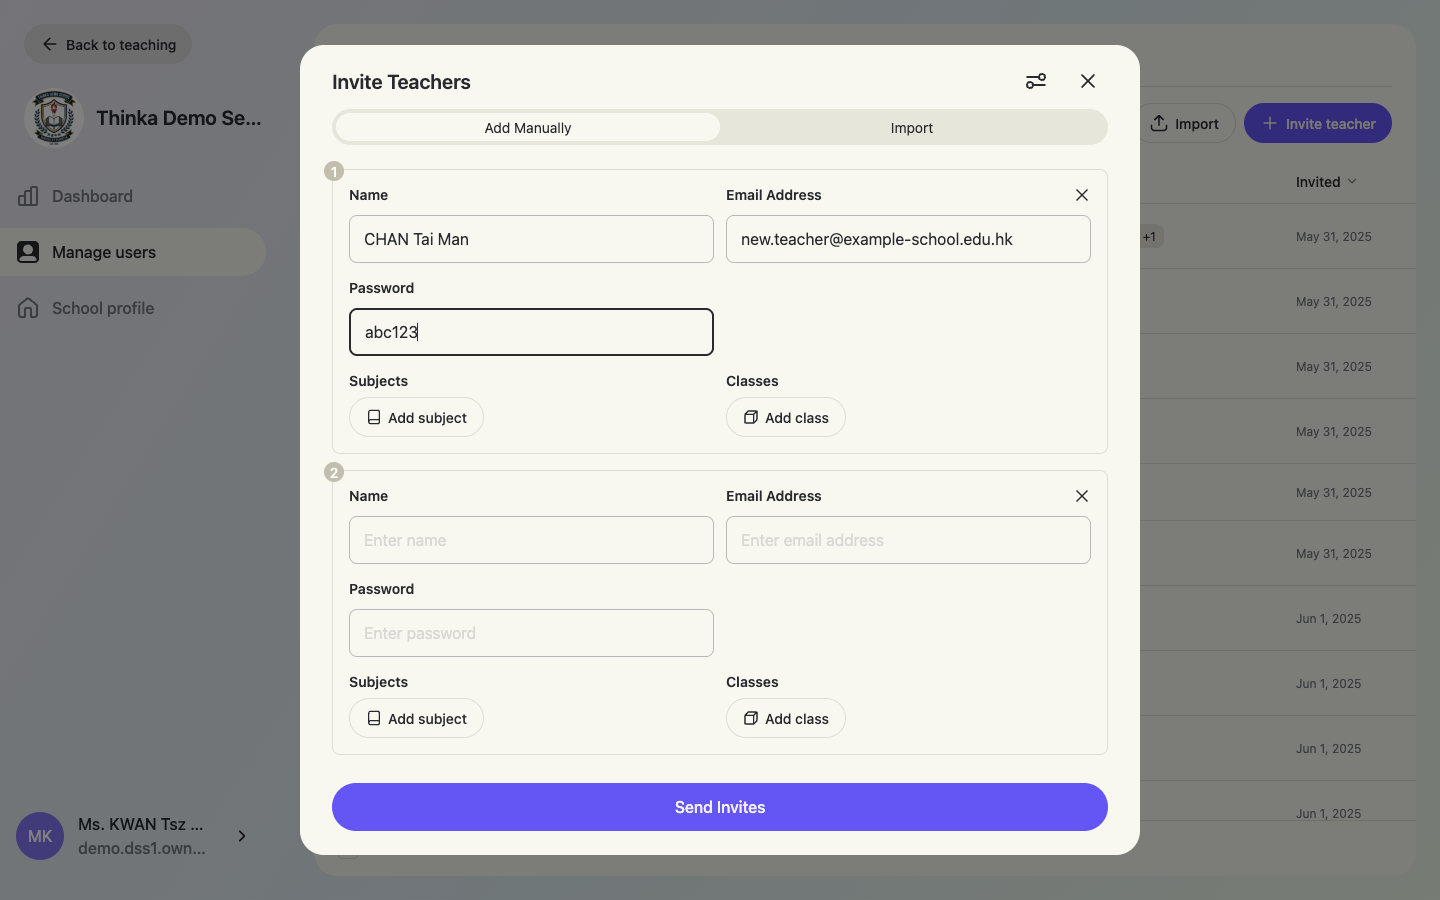
Classes that don't exist yet are created automatically when the invite is sent, with the invited teacher assigned to them.
Import teachers from any file (AI)
Click Import (or the Import tab inside the invite sheet). AI identifies the fields in your file and builds the teacher list for you — no template to follow. CSV, Excel, PDF and even photos of a printed list all work. Choose a file, then click Read file.
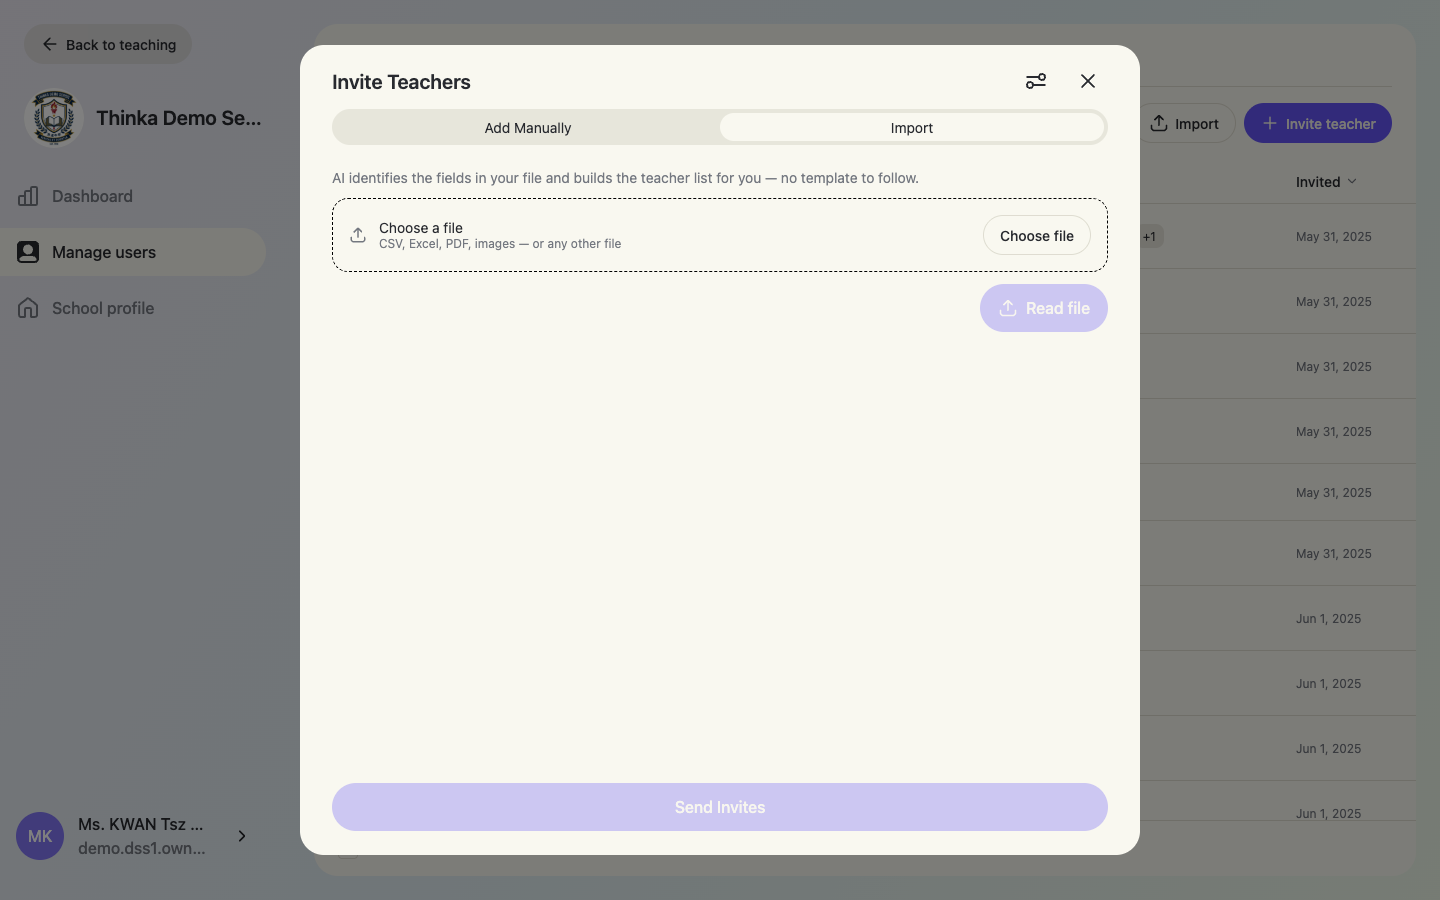
Review the parsed list before sending
After a few seconds the parsed teachers appear as editable rows. Subjects mentioned in your file are automatically matched to your school's curriculum. Review, adjust anything, then click Send Invites. Nothing is saved until you send.
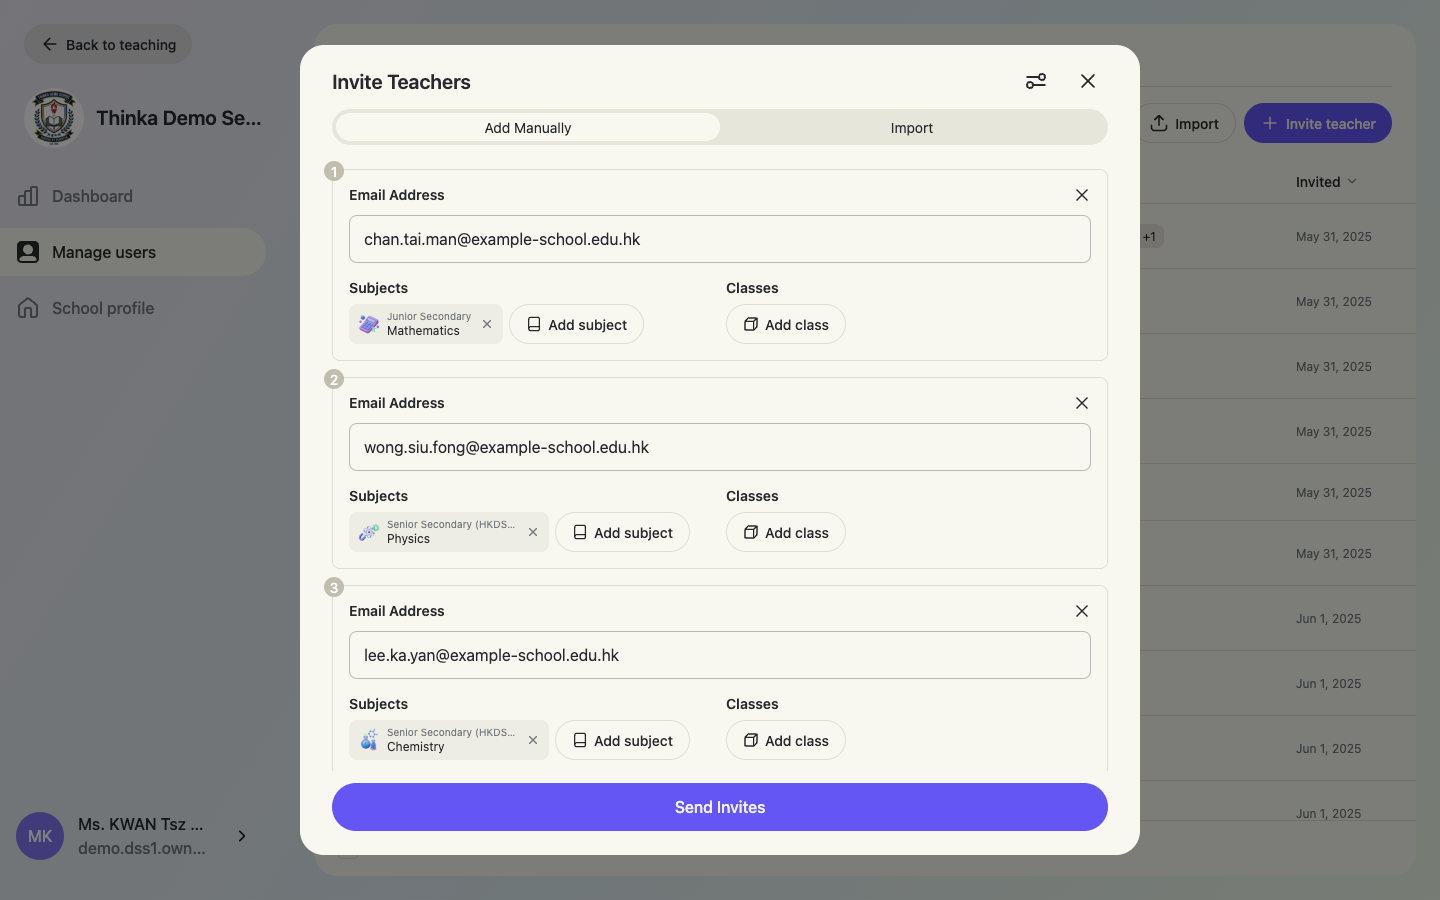
Edit a teacher
Click any teacher row to open their card: rename (pencil icon), edit Teaching (subjects & classes), toggle Admin access, or Remove from school at the bottom.
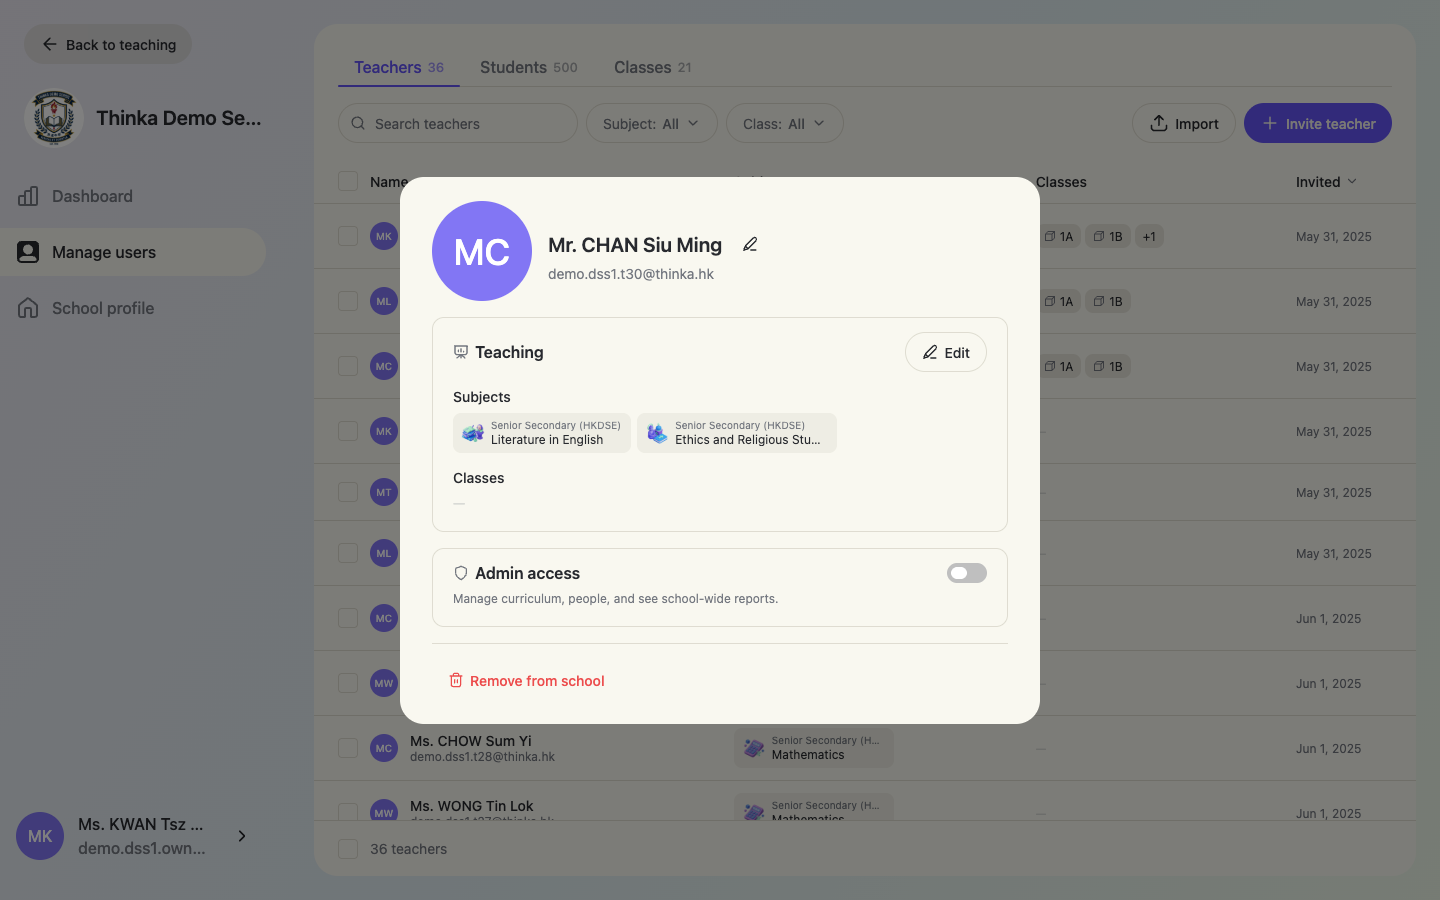
Bulk actions
Tick the checkboxes on the left of the table to select several teachers. A footer bar appears with Add subject / Add class / Grant admin / Remove. Each pick in the subject / class sheet applies to every selected teacher, and the sheet stays open so you can assign several in a row.
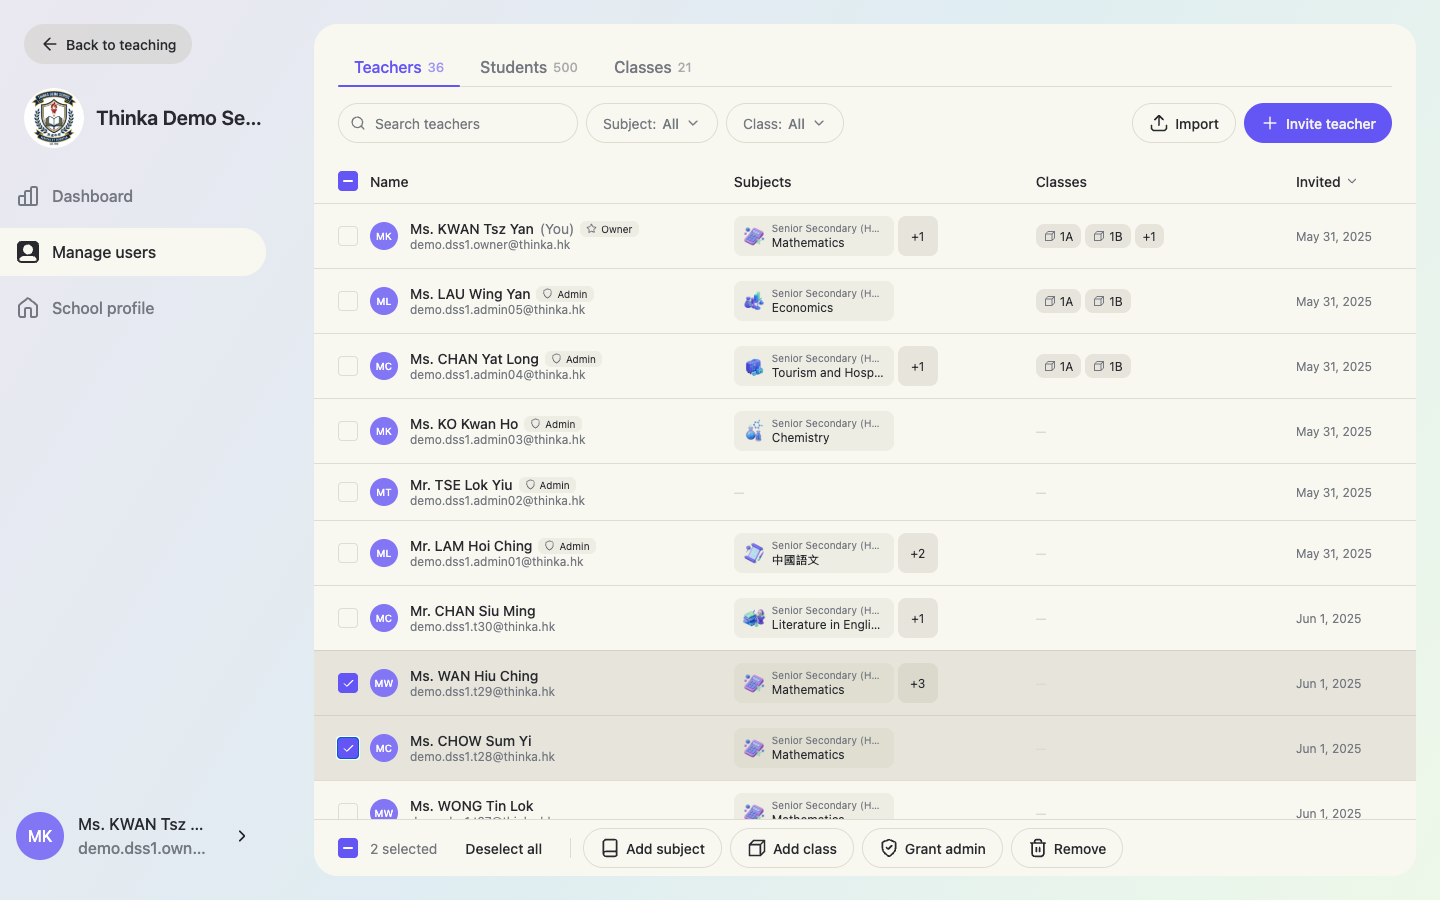
Section 4
Create / import / manage students
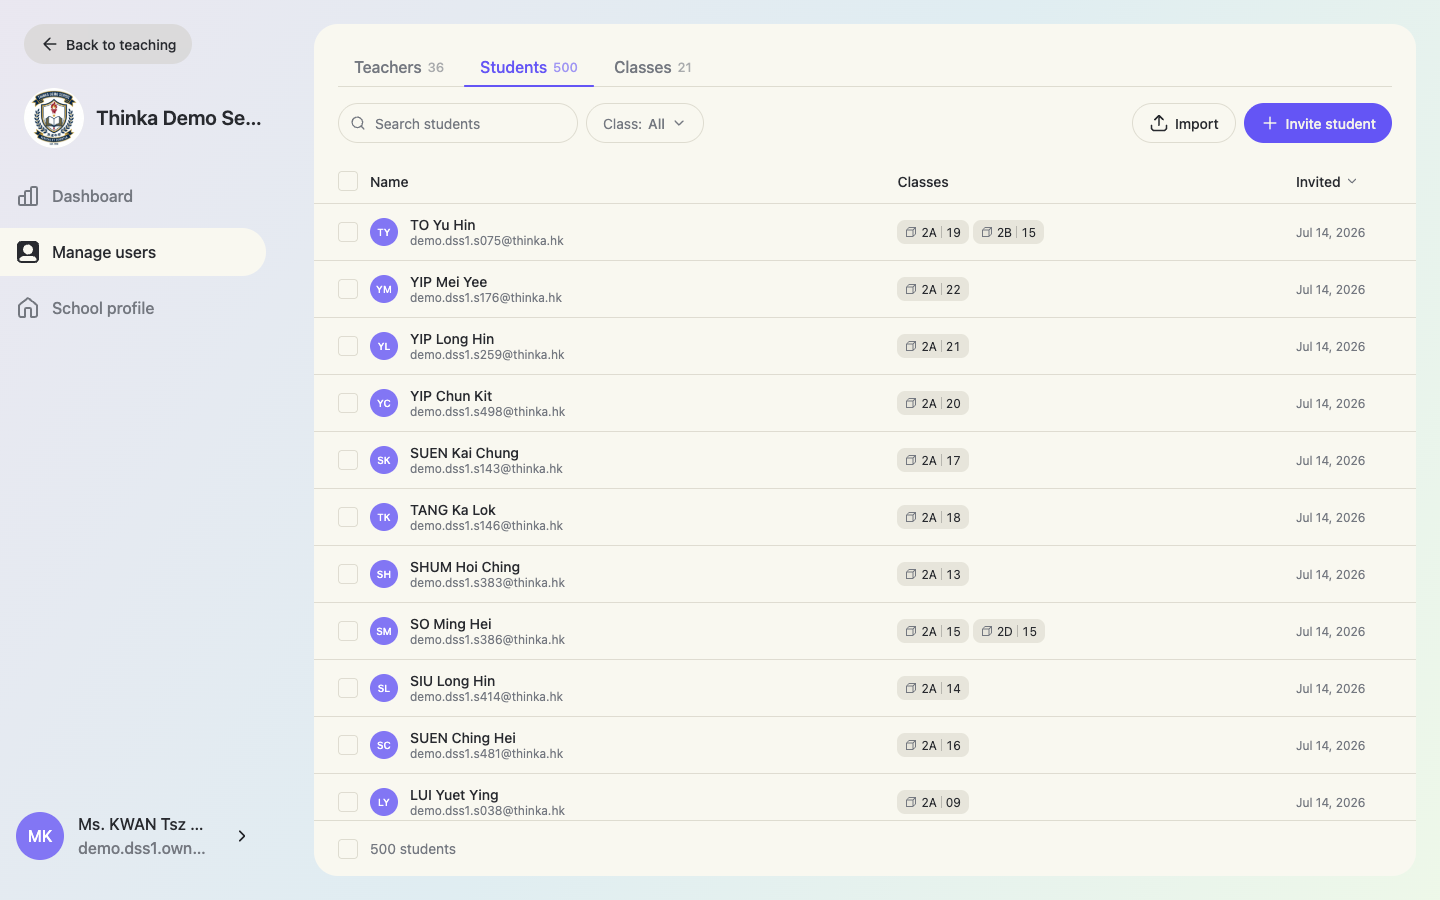
Open Manage users → Students. Each row shows the student's classes as chips with their student number after a divider, e.g. 2A│19.
The Students tab
Invite students
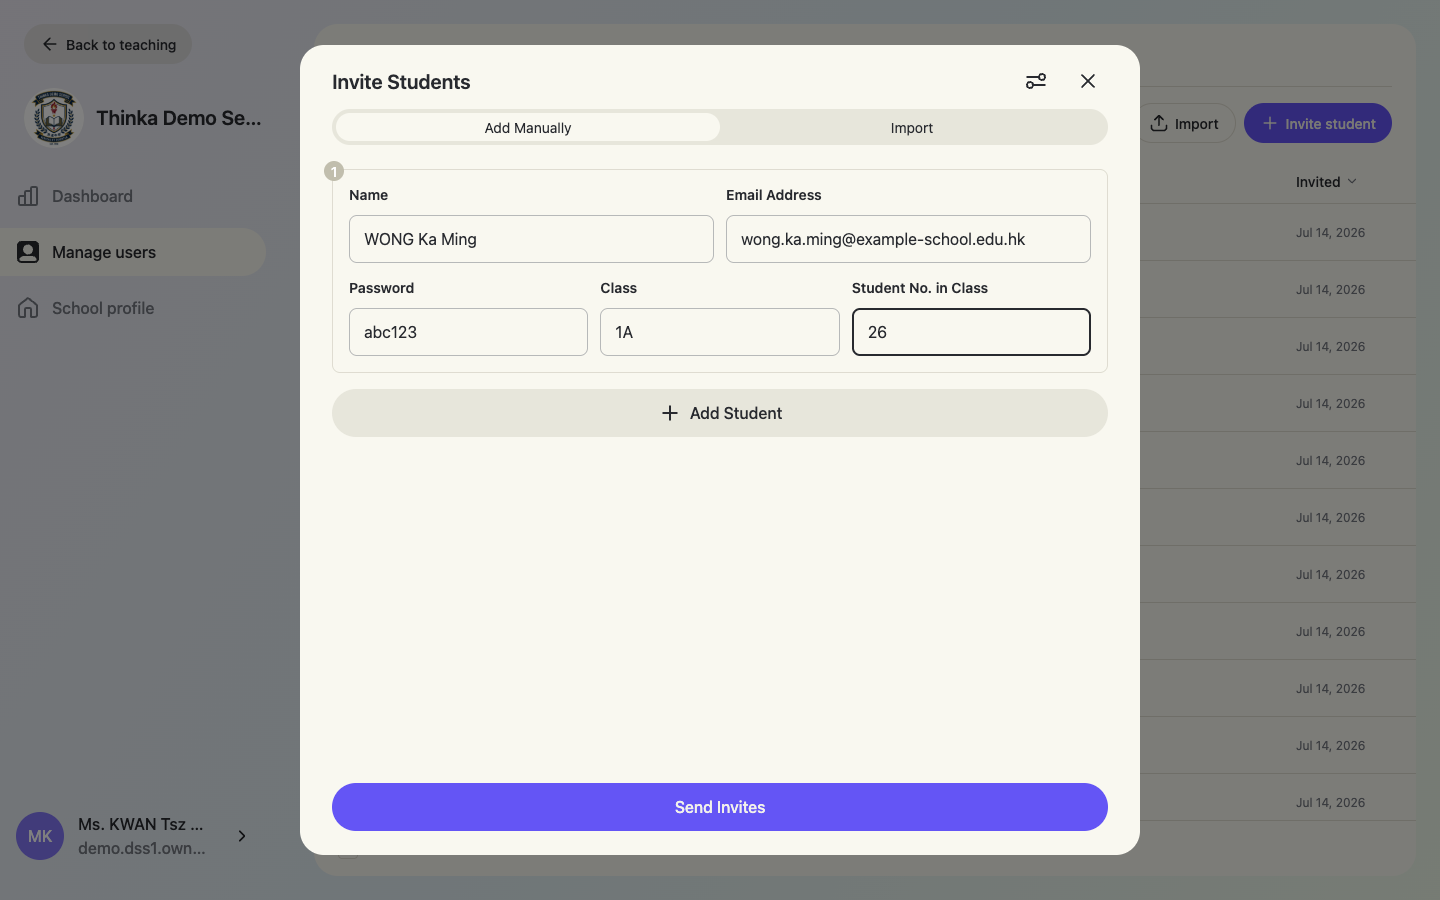
Click + Invite student. Like teachers, the settings icon enables Create student account (name + password) and Assign to class — adding Class and Student No. in Class fields to every row.
Import students from a roster file
The Import tab works exactly like teacher import: upload your class roster in any format (CSV / Excel / PDF / photo), AI extracts names, emails, classes and student numbers, you review, then Send Invites. Accounts created by import can log in immediately with the password in your file — include a password column so students get their own passwords.
Edit a student
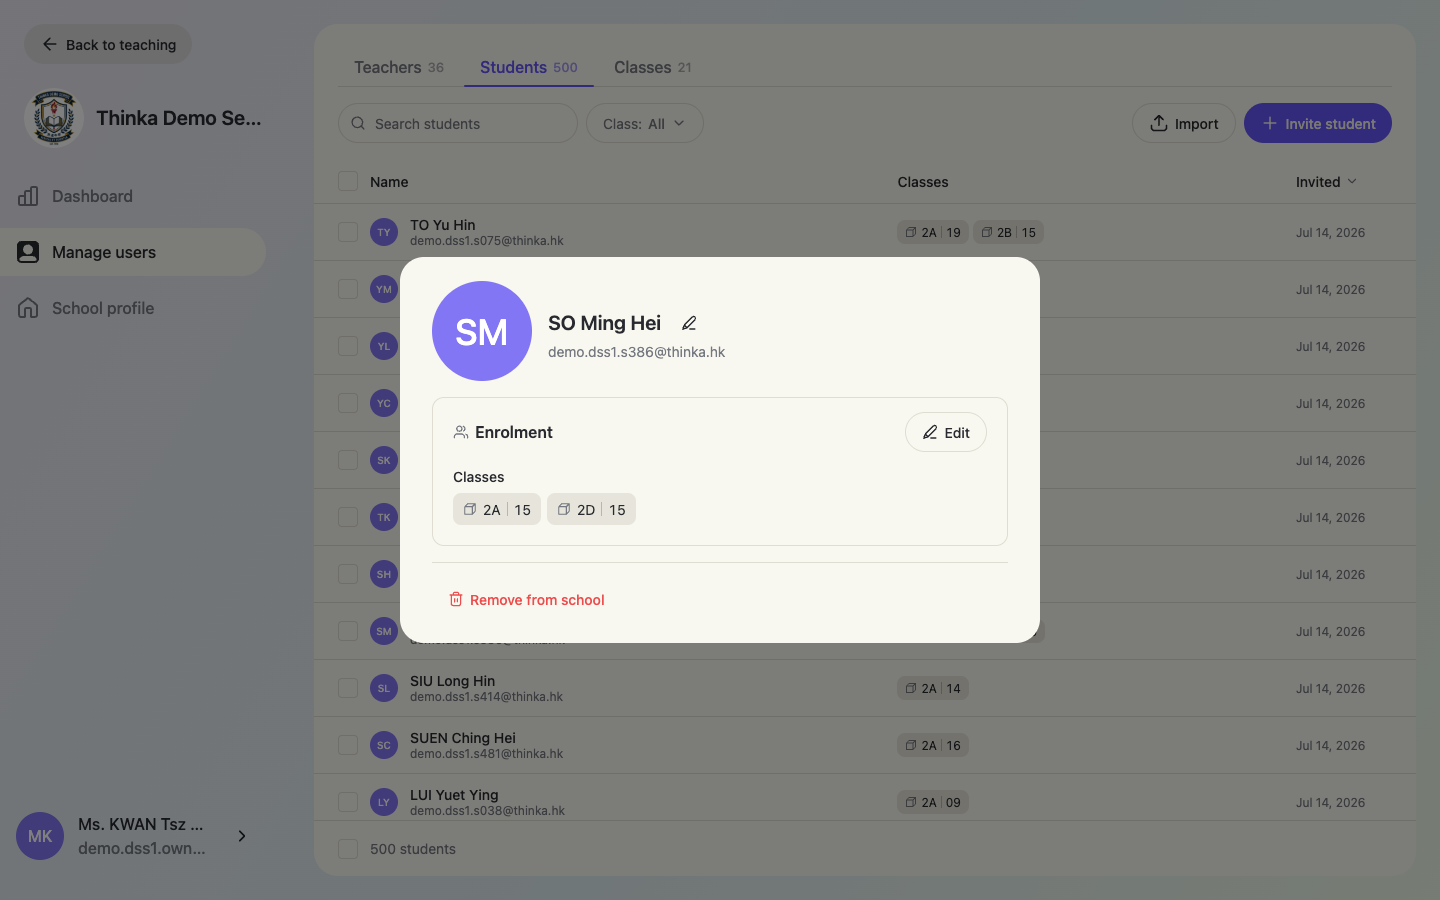
Click a student row to rename them, edit their Enrolment (classes and student numbers) or Remove from school.
Search by class + number
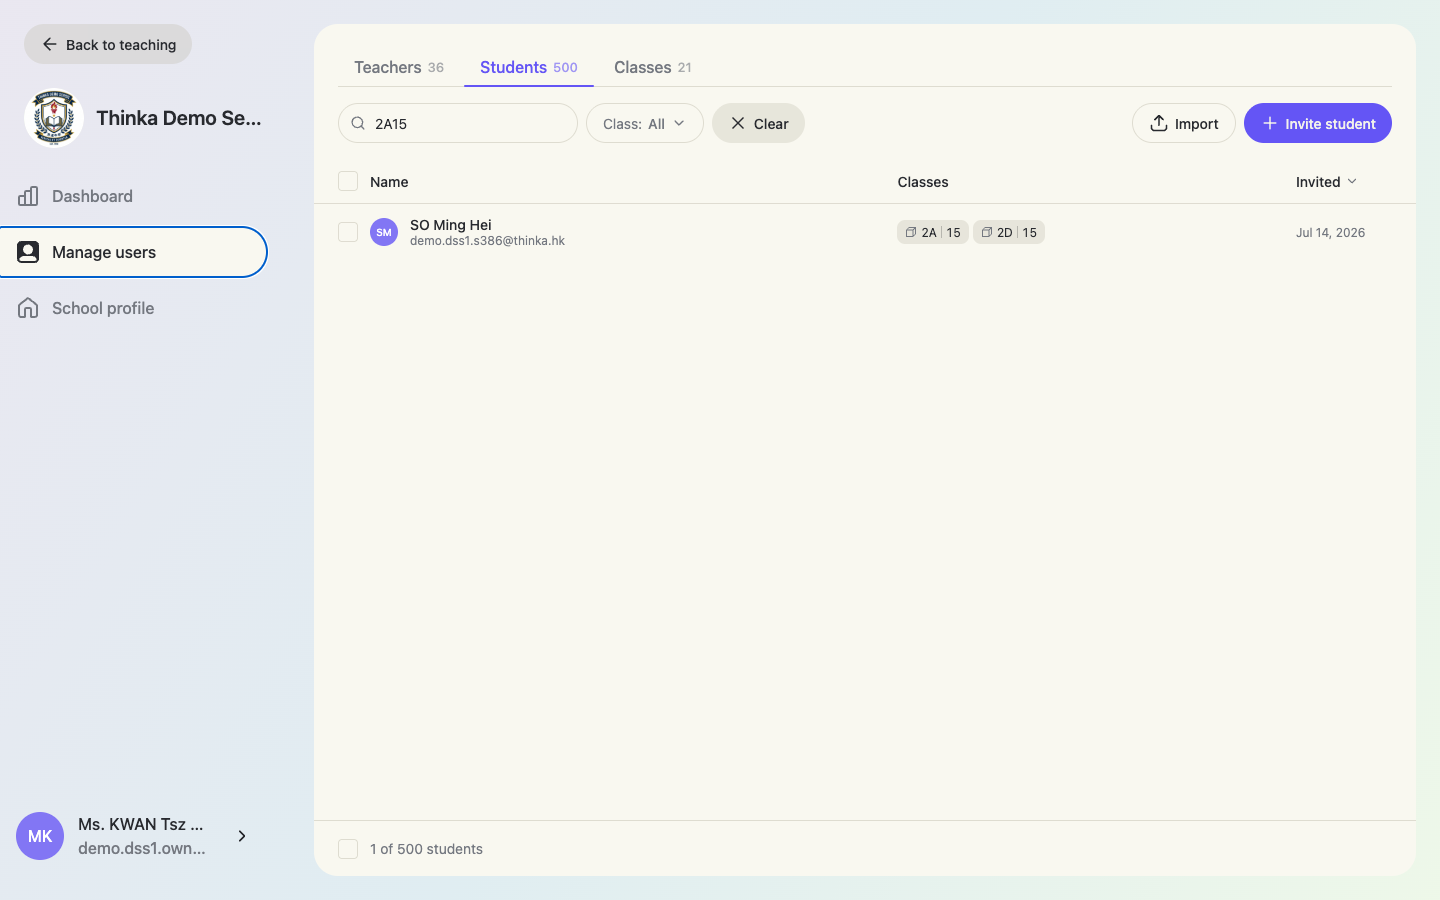
Every student search understands class-and-number shorthand: typing 2A15 (or 2A15 without the leading zero, e.g. 2A1 for 01) finds the student who is number 15 in class 2A. Name and email search work as usual.
Section 5
Create / import / manage classes
Open Manage users → Classes. The left pane lists every class (plus a No class bucket for unassigned students); the right pane shows the selected class with Enrolled (students) and Teaching (teachers) tabs.
The Classes tab
The roster is sorted by student number; click a number cell to edit it in place. Students also appear here with all their class chips.
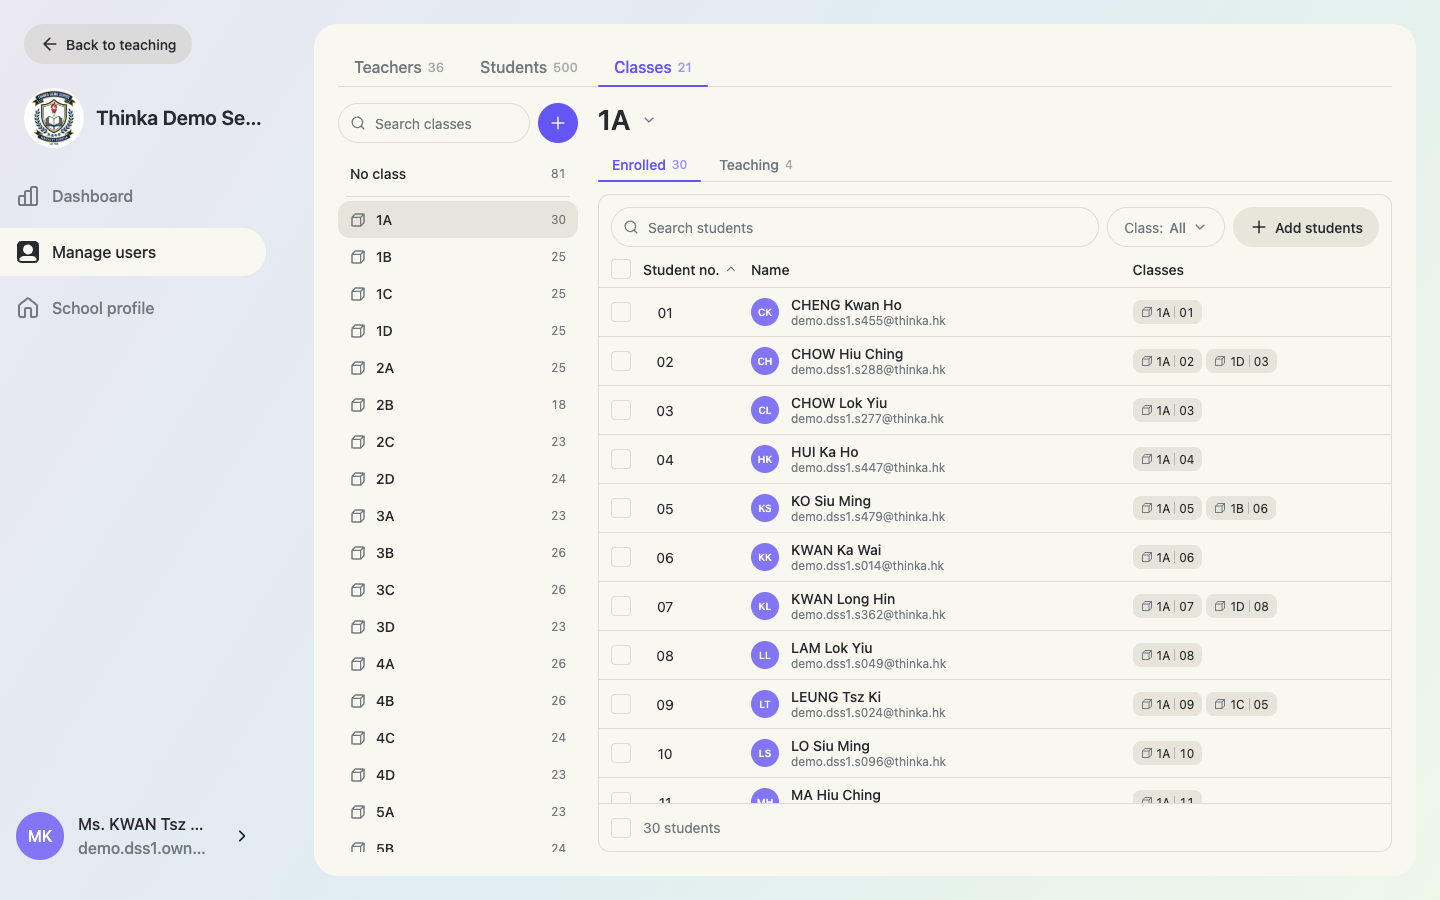
If you type a number that already belongs to another student, thinka asks whether to reassign it — numbers stay unique within a class.
Create a class
Click the round + button next to the class search box, name the class (e.g. 6A) and click Create.
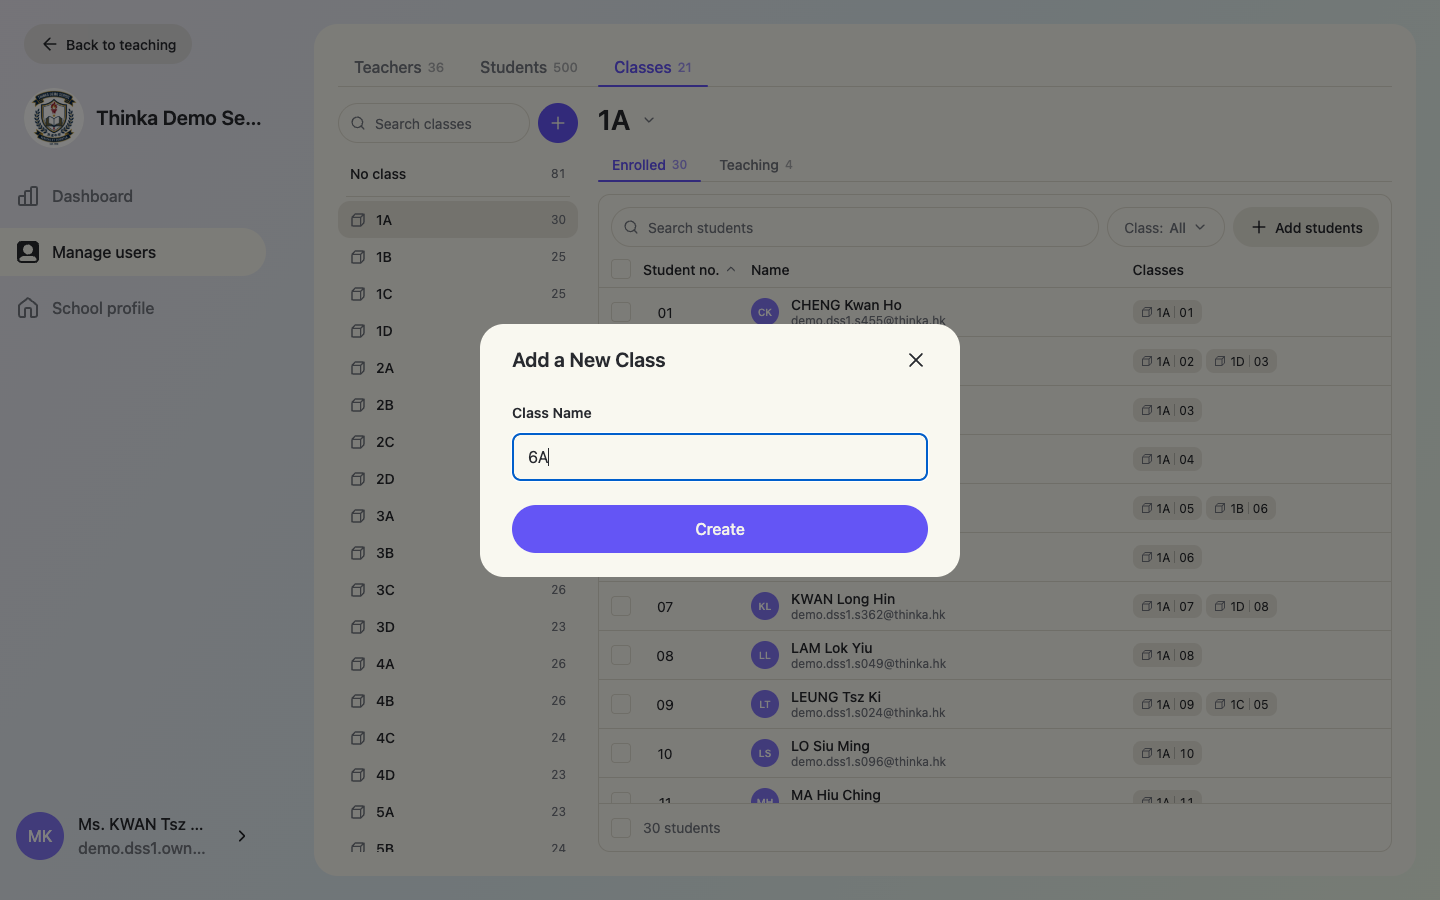
Classes are also created automatically when a teacher / student import mentions a class that doesn't exist yet.
Rename or delete a class
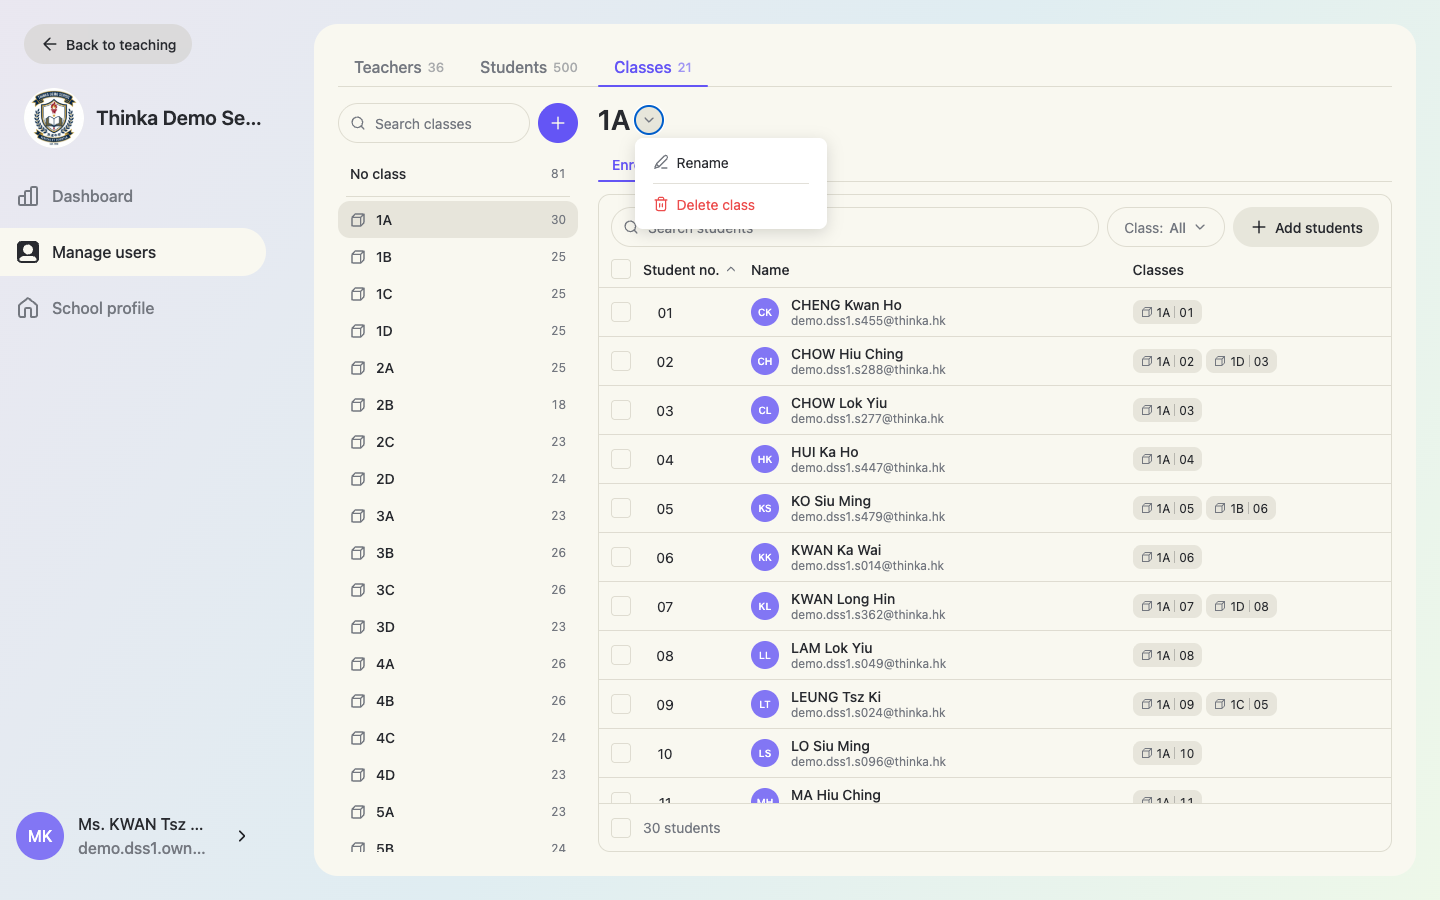
Click the ▾ next to the class name to open its menu with Rename and Delete class.
Add students to a class
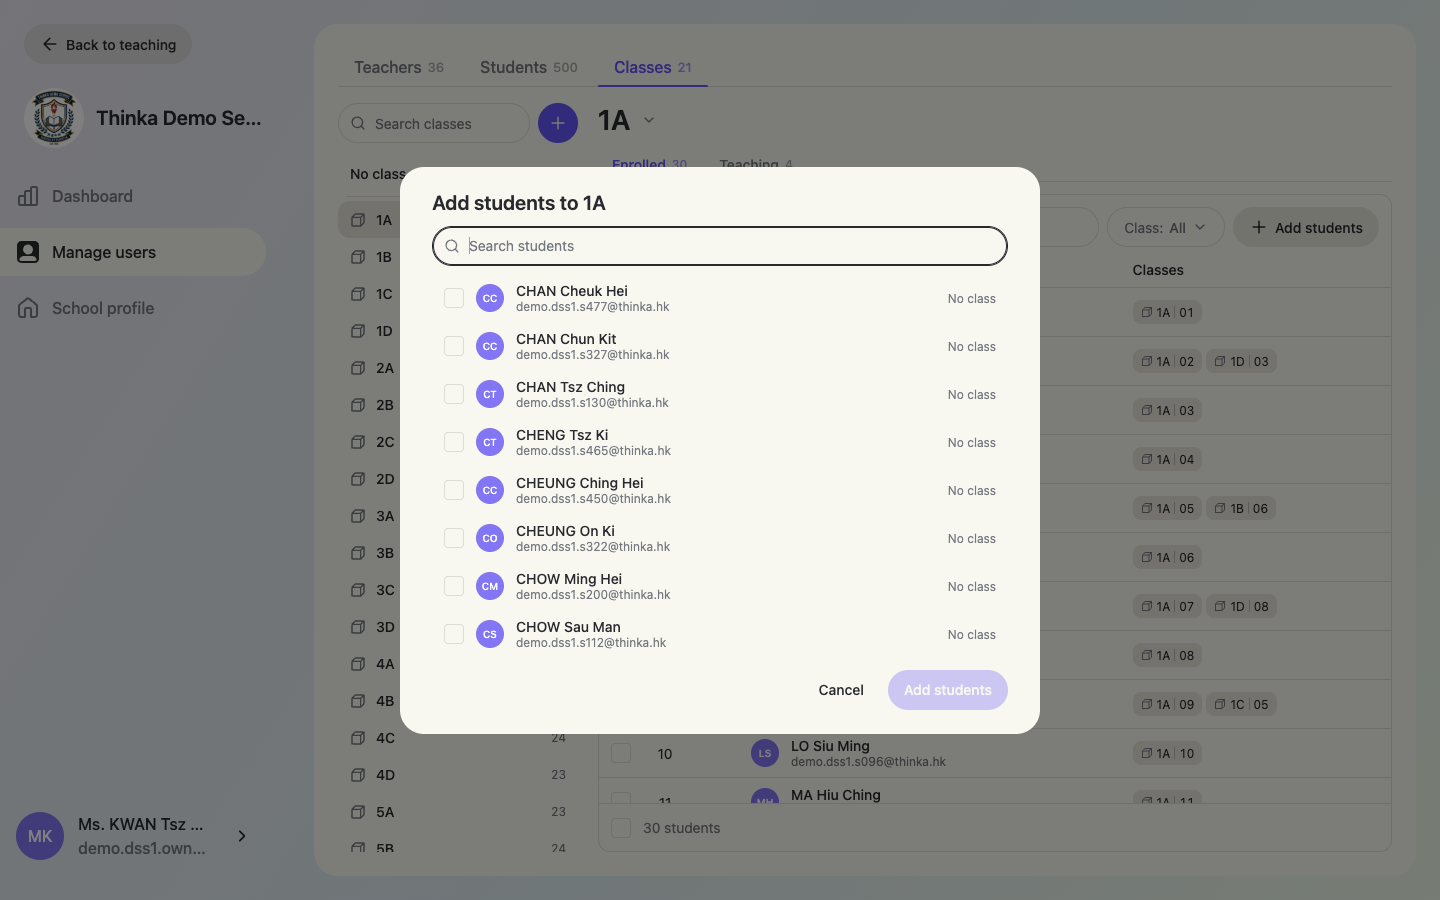
In the Enrolled tab click + Add students. The picker lists every student in the school — students without a class first. Newly added students automatically get the next free student number.
Manage the class's teachers
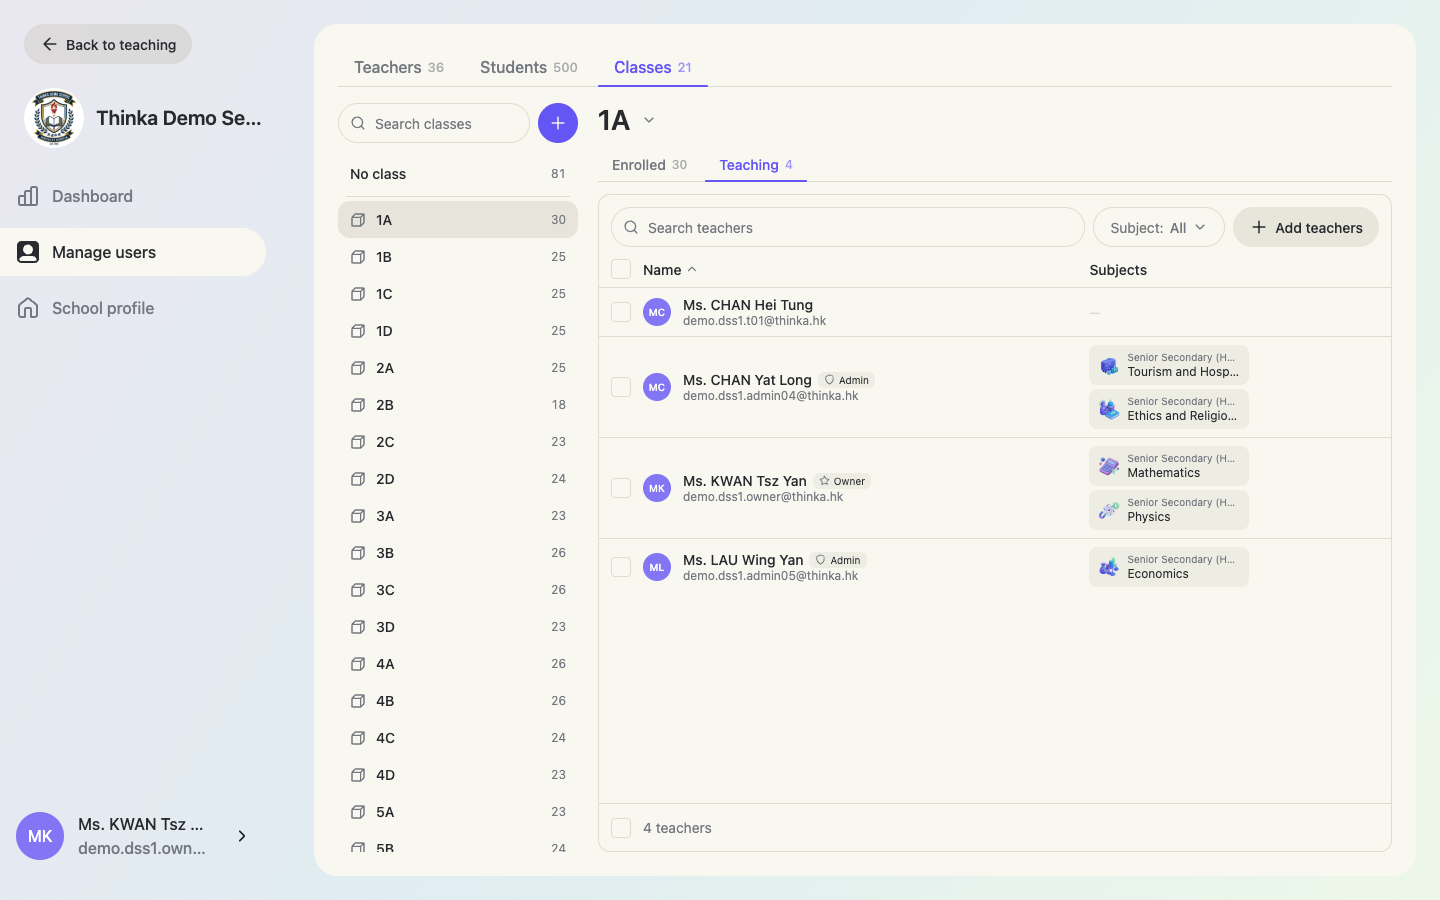
The Teaching tab lists the teachers of this class with their subjects. Use + Add teachers to assign more. Several teachers can co-teach one class.
Bulk move / remove
Select students with the checkboxes to reveal footer actions: Move to class (keeps them in the school, changes the class) and Remove from class. Moved students join the new class without a number — assign one in the roster.
Section 6
Assigning subjects and classes to teachers
Assignments (功課) in a school workspace are scoped by subject: a teacher sees their own assignments plus every assignment in their assigned subjects. Keeping subject assignments accurate keeps every teacher's view clean.
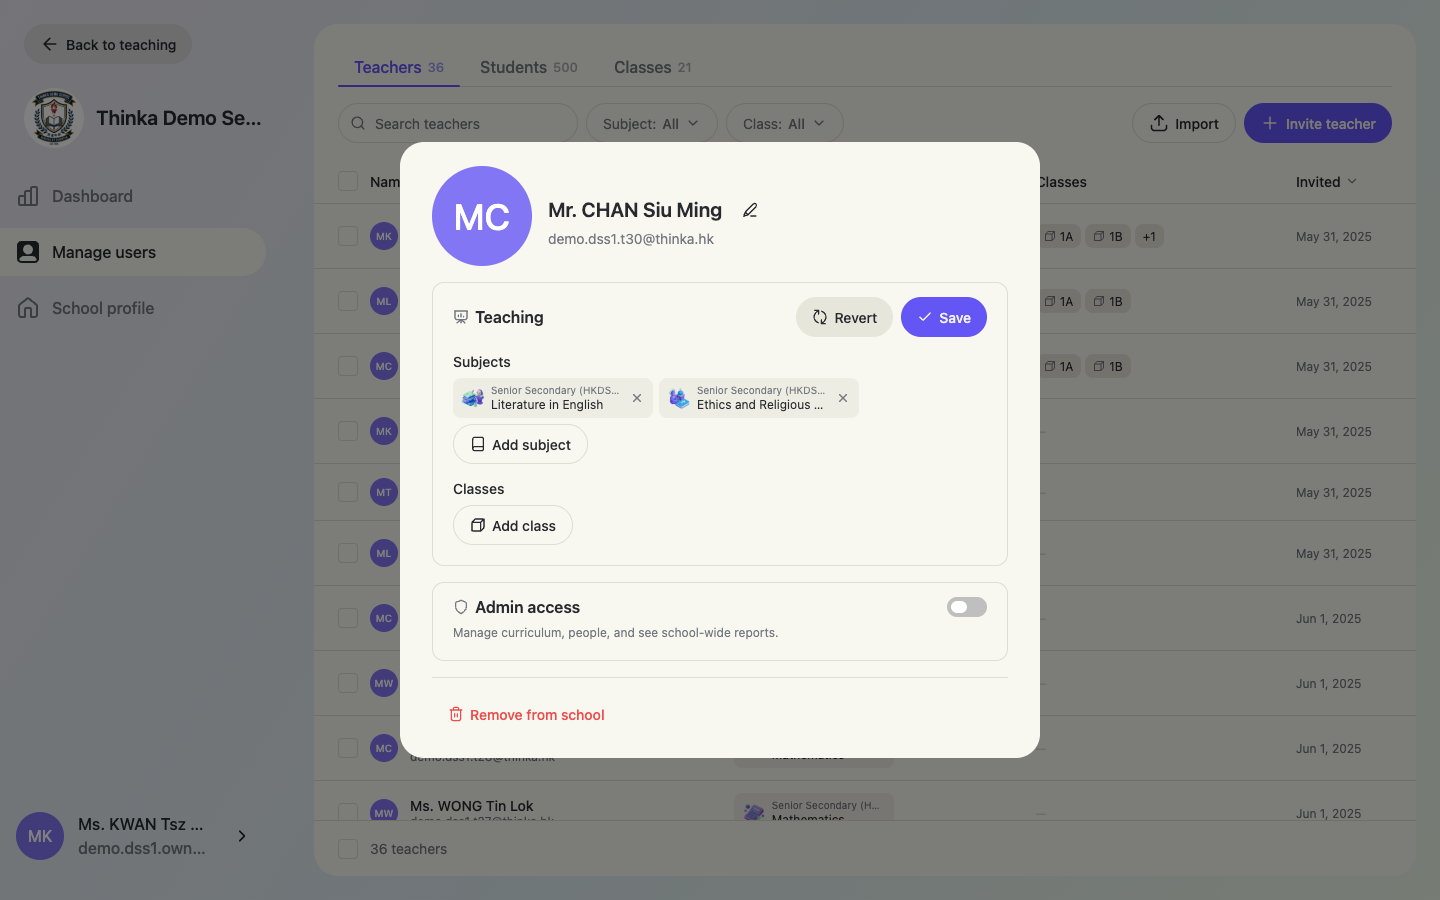
Open the teacher's card and click “Edit”
In Manage users → Teachers, click the teacher, then Edit in the Teaching section. Add subject opens the school's curriculum-scoped subject list; Add class opens the class picker.
Pick classes
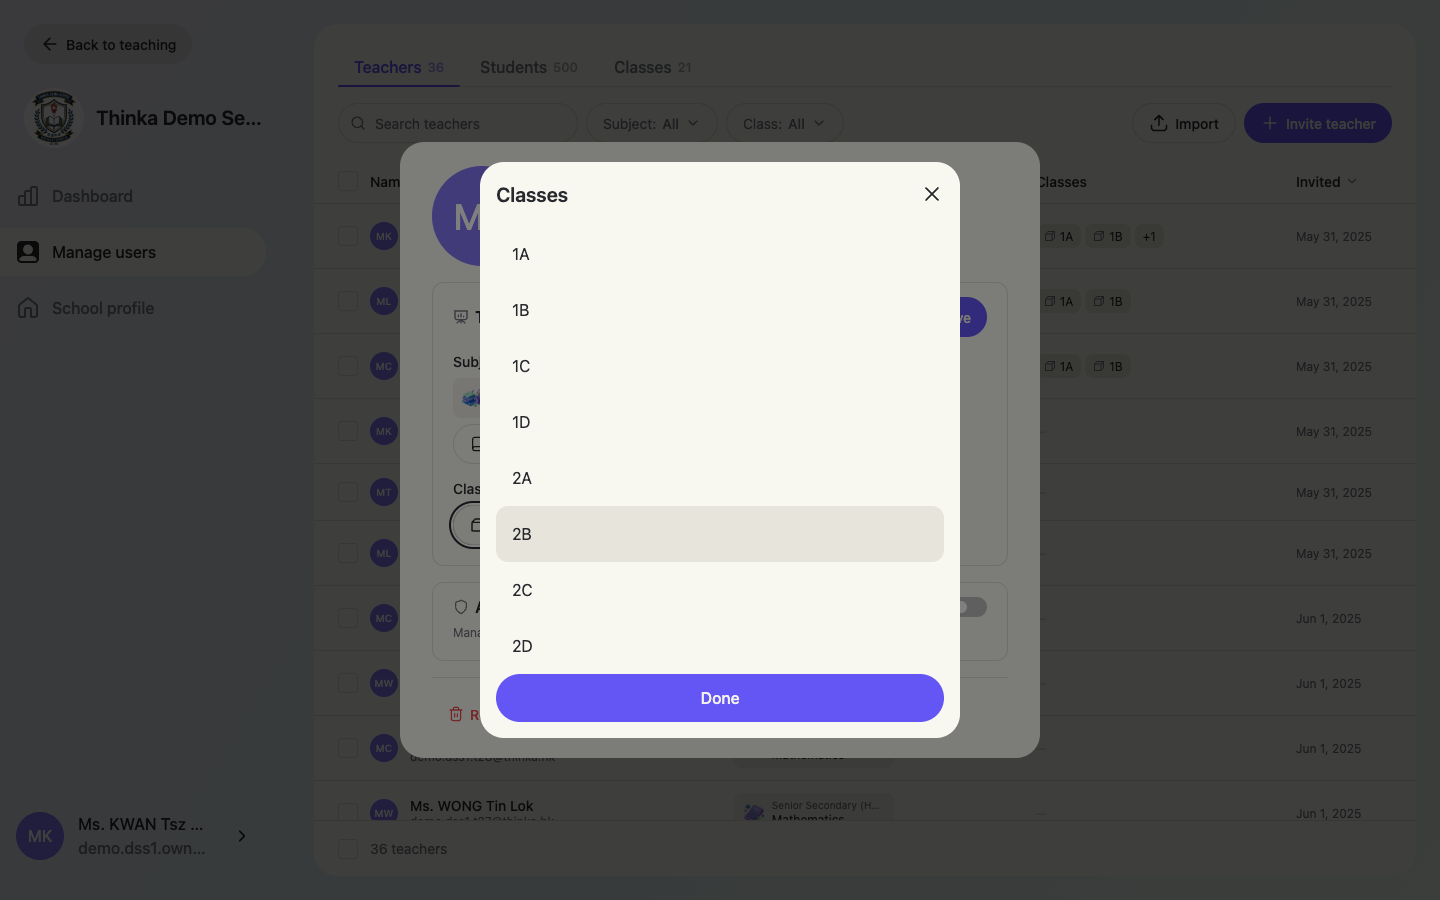
Tap classes to toggle them, then Done. Remember to click Save on the card — Revert discards your draft.
Or assign in bulk
Select several teachers in the table and use Add subject / Add class in the footer bar — ideal at the start of a school year. You can also pre-assign subjects and classes during invite / import (see “Manage teachers”).
Section 7
Assign teachers as school admins
Admins can manage curriculum, people, and see school-wide reports — everything in this guide except deleting the school itself. The Owner badge stays with the school's owner account.
Toggle “Admin access” on a teacher
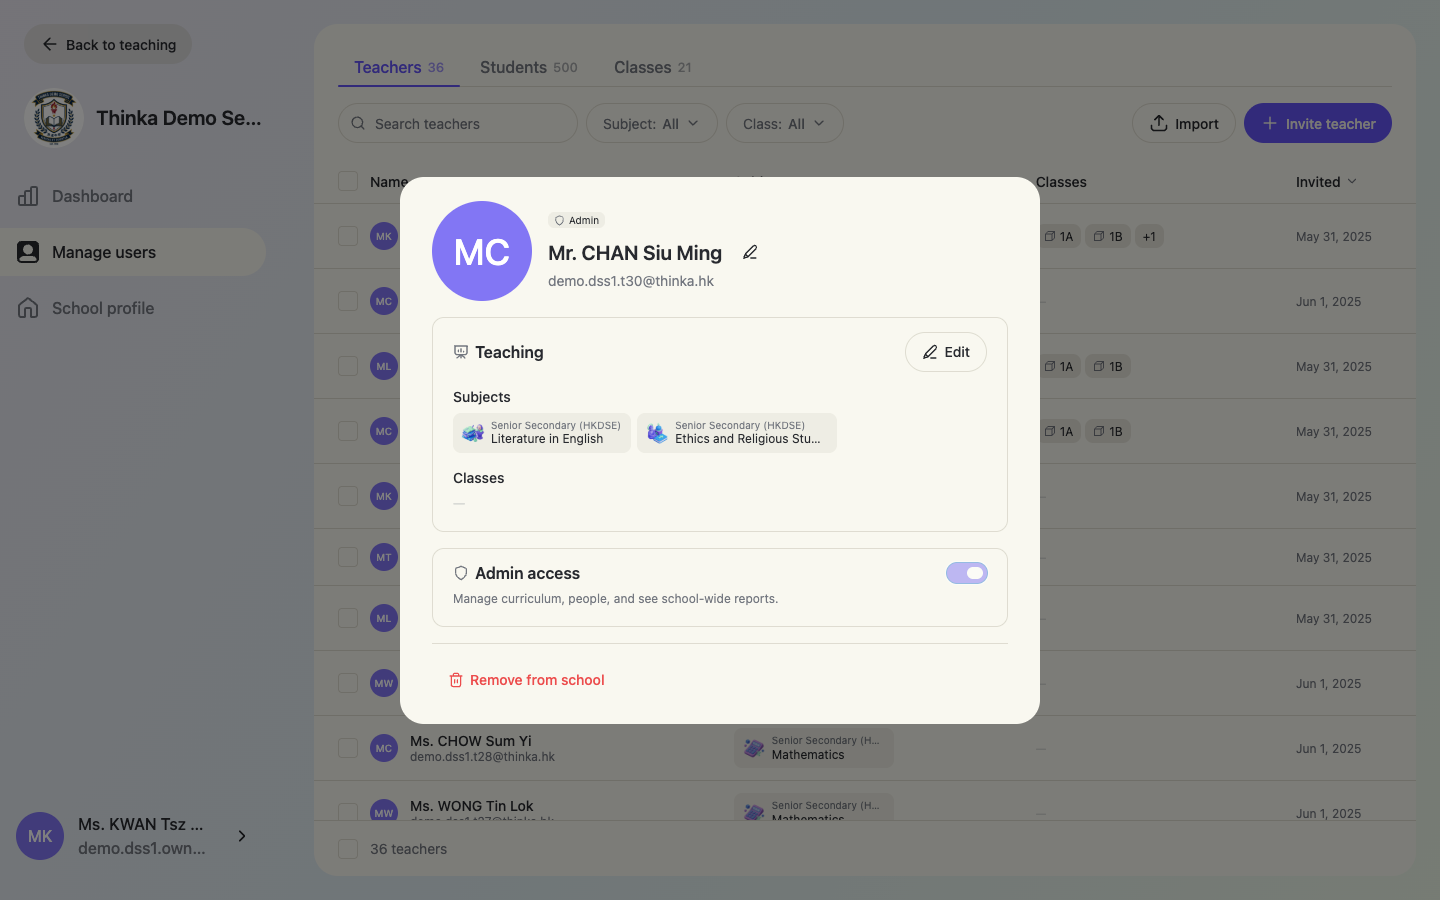
Open the teacher's card and switch on Admin access. The change applies immediately — the teacher gets an Admin badge and sees Manage school the next time they open their profile.
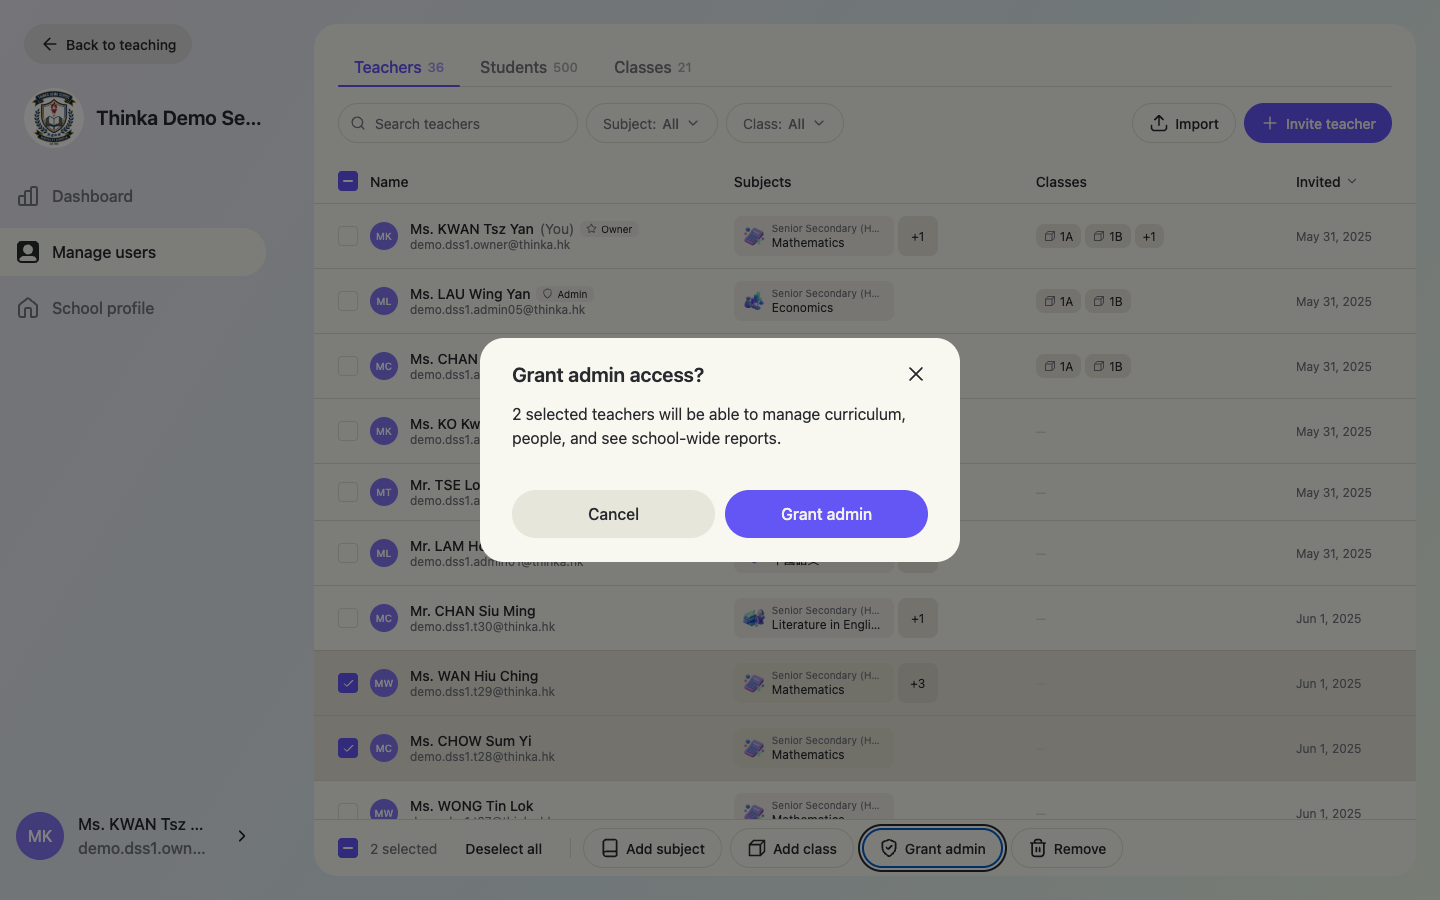
Grant admin in bulk (with confirmation)
Select teachers and click Grant admin in the footer. Because admin access is powerful, thinka asks you to confirm first.
Section 8
Manage the school profile
School profile page
Open School profile in the console sidebar. Here you set the logo (shown in the sidebar, on the branded sign-in page and as the app icon when installed on a phone), the school name, and the school year.
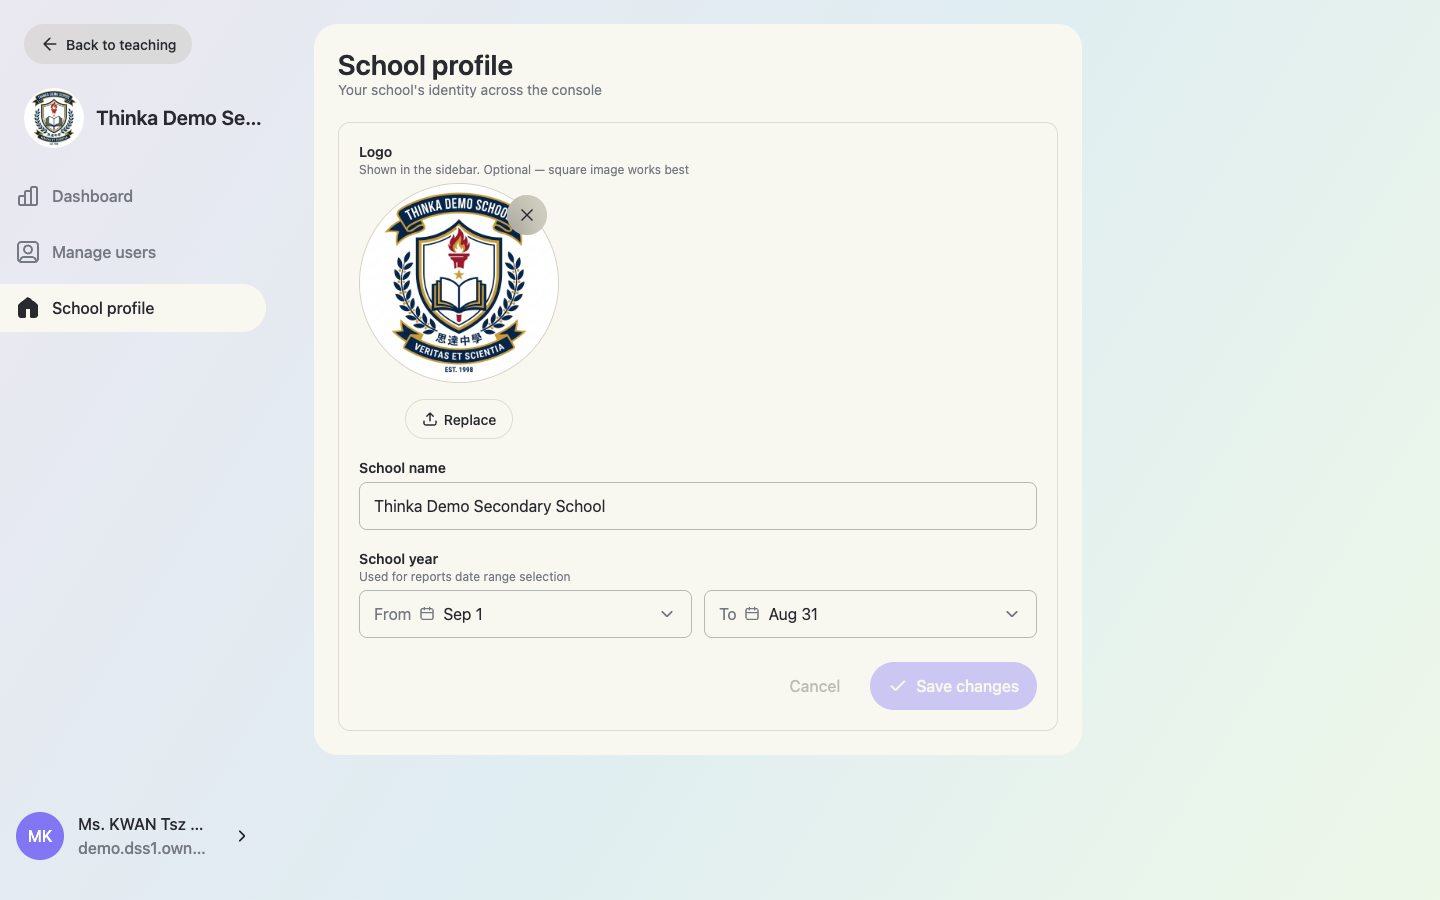
When you upload a logo, thinka opens a cropper so you can pan / zoom to a clean square. A square image works best.
School year drives report ranges
The School year (From / To, e.g. Sep 1 – Aug 31) defines the Current school year date preset used across the Dashboard and all reports. Set it once and every report defaults to the right window.
Work created after the school-year end date is outside the “Current school year” window — switch the report range to “Last 7 days” / “Last 30 days” to see it.
Section 9
School-wide dashboard
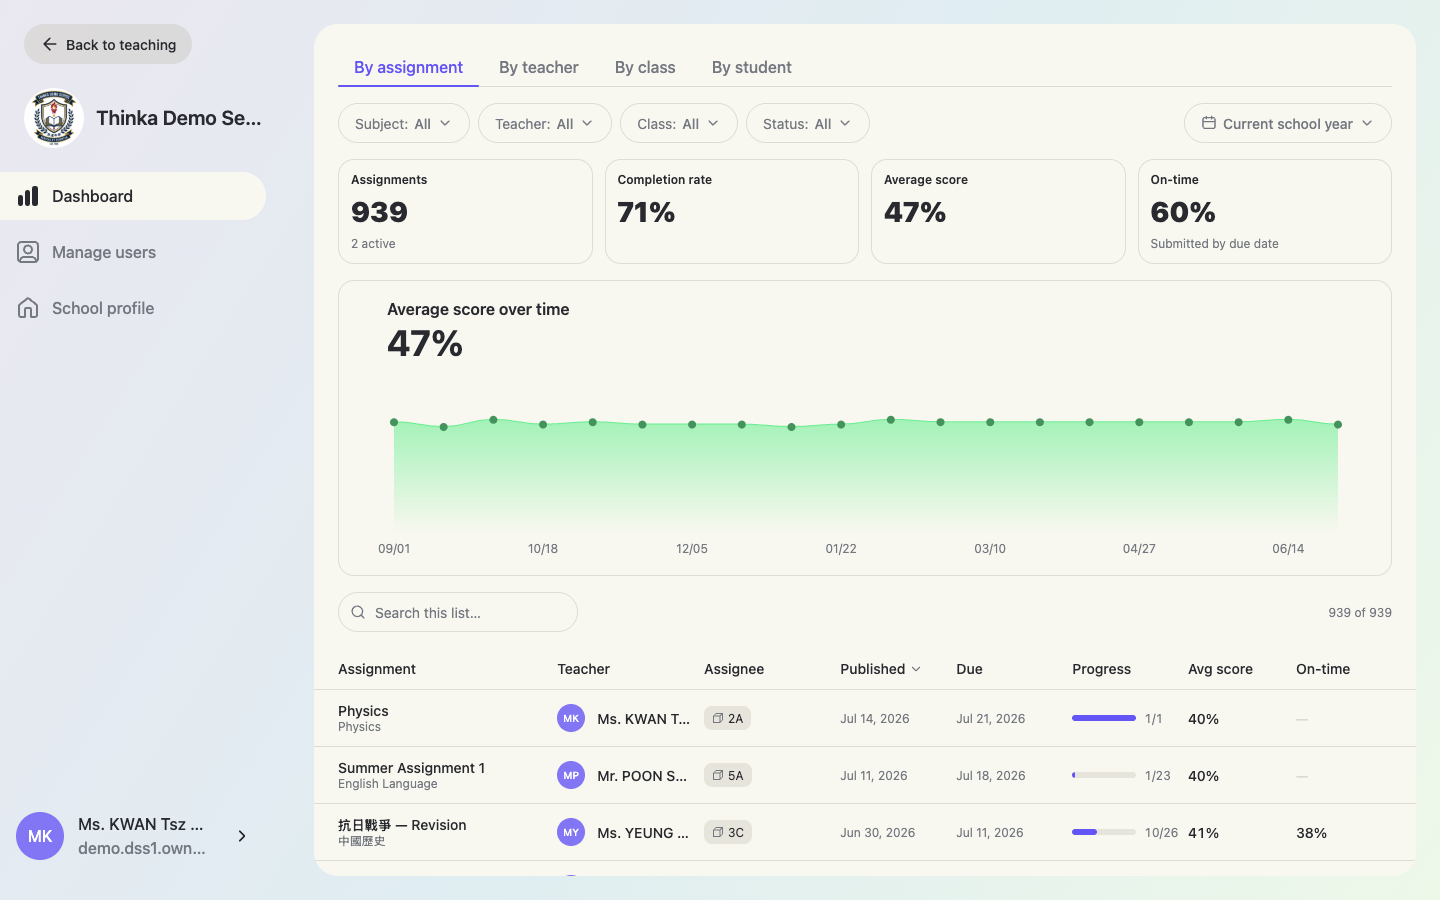
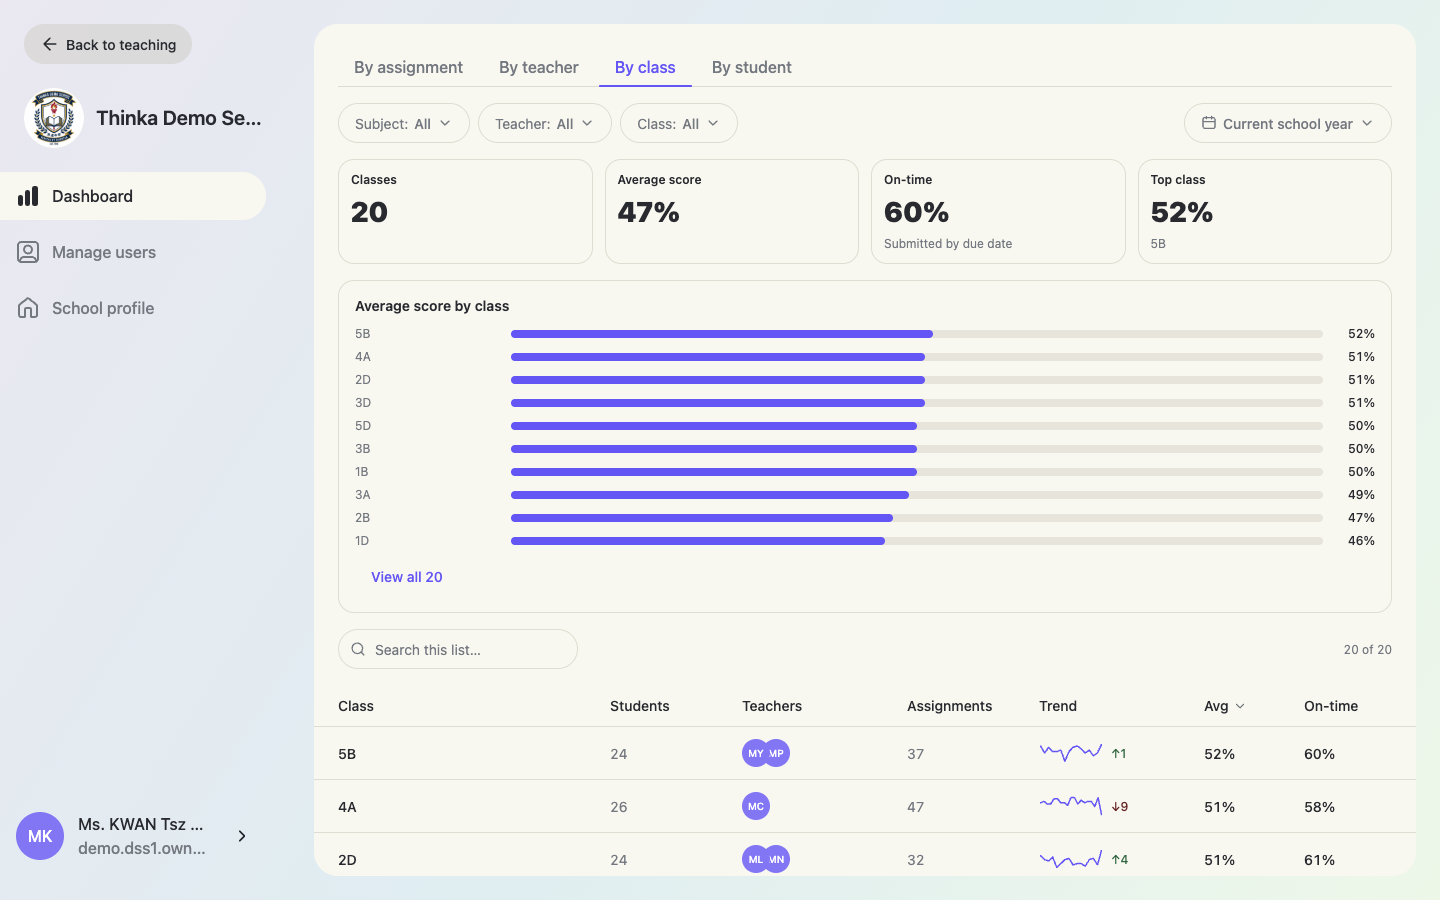
The Dashboard aggregates every published assignment in the school and lets you view the same data through four lenses: By assignment, By teacher, By class, By student. Filters, the time range and the search box apply to whichever lens you're on.
By assignment
Stat cards show Assignments (with active count), Completion rate, Average score and On-time rate, followed by a trend chart and a sortable table (teacher, assignee, published / due dates, progress, average score, on-time).
By teacher / class / student
Each lens has its own stat cards, a top-10 bar chart (View all expands it) and a table with per-row trend sparklines, average score and on-time rate. The student lens also supports the 1A01 class+number search.
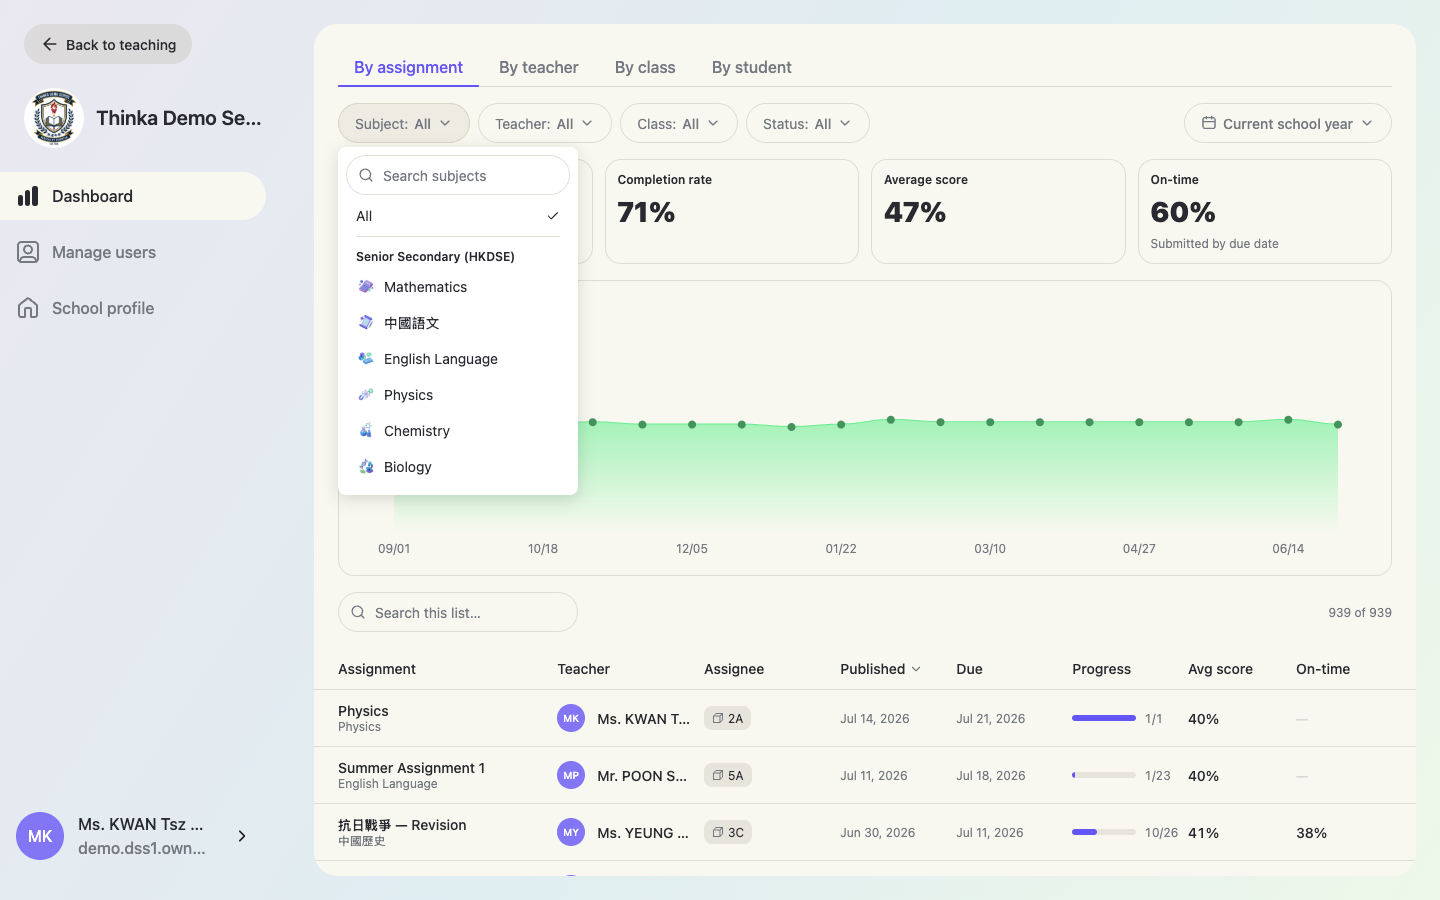
Filter by subject, teacher, class or status
The filter pills are multi-select: tap several subjects to combine them (OR within a filter, AND across filters). “All” clears the filter. The Status filter (Active / Ended) is available on the assignment lens.
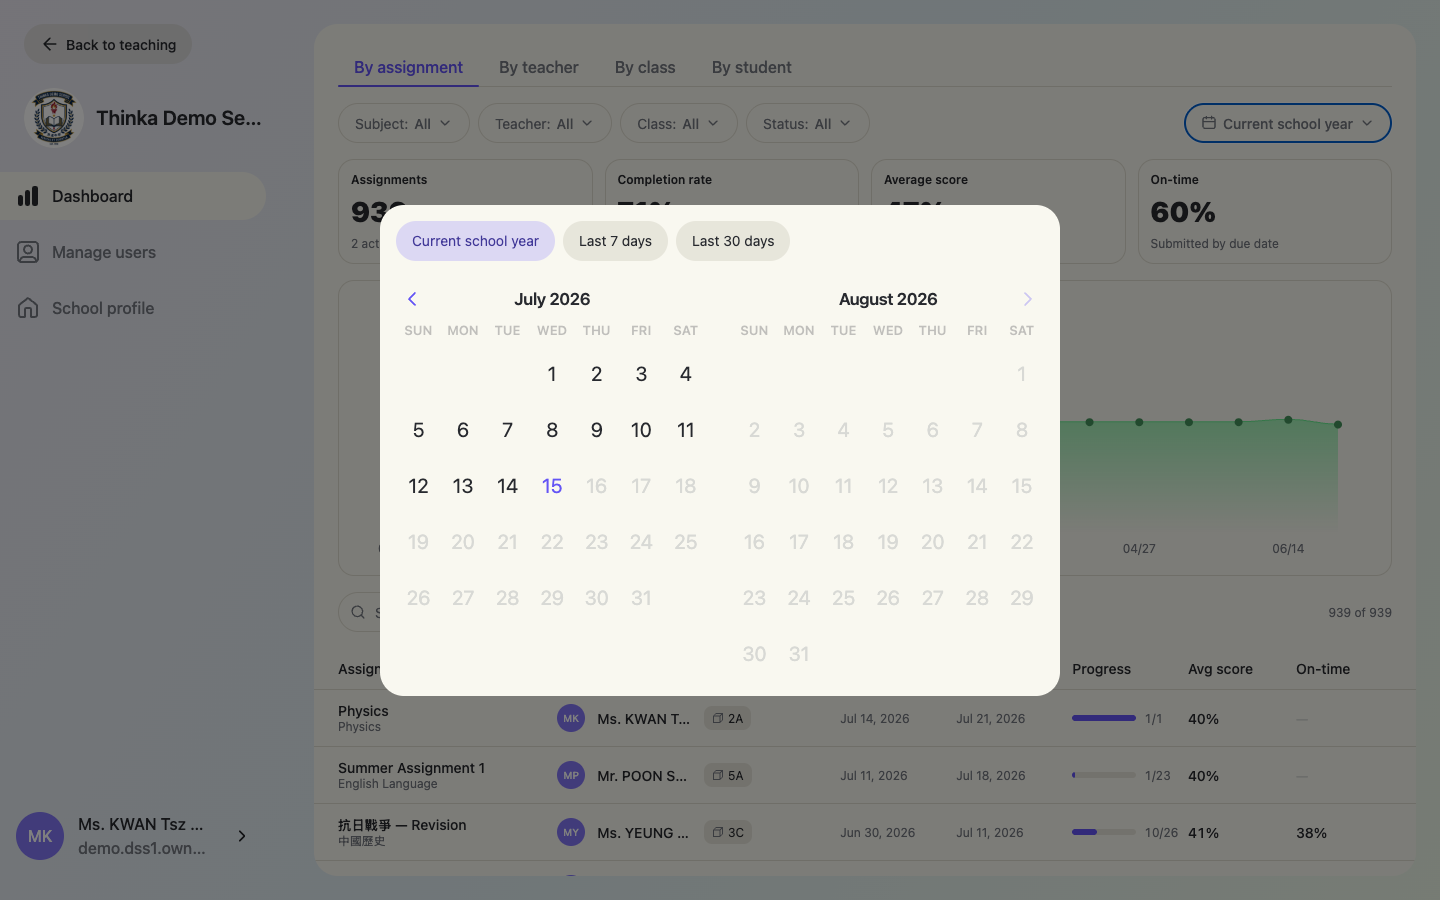
Time range
Defaults to Current school year (from your School profile). Presets for Last 7 / 30 days, or pick any custom range on the calendar.
Drill into any row
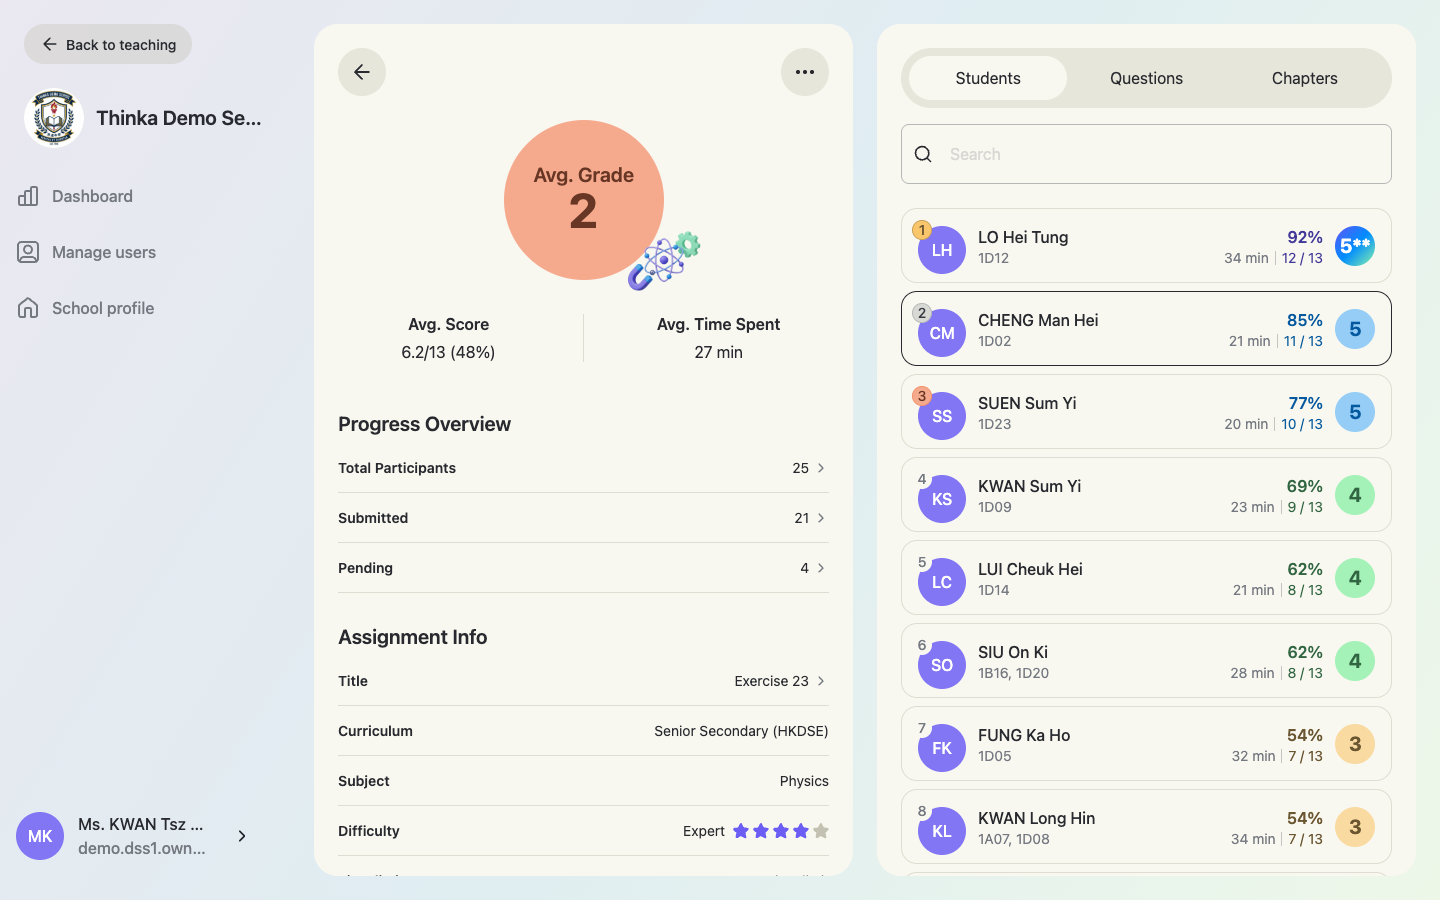
Click an assignment row to open its full result view — student ranking with grades, per-question analysis and chapter breakdown (the same view teachers see).