
Teacher Guide
Create assignments with AI, print or assign them, collect submissions (including handwritten ones via OCR) and read class / student reports.
Section 1
Signing in as a school teacher
Sign in on the school domain
Go to your school's domain (https://<school>.app.thinka.ai) and sign in with your school email — Continue with email → email → password → Log in. The steps are shown in detail in the Admin / Owner guide; they are the same for every role.
The teaching home
The sidebar has Home, Assignments, Bookmarks, Students, Classes. Home shows your recent assignments with submission counts, plus two live counters: Pending submission and Unchecked assignments.
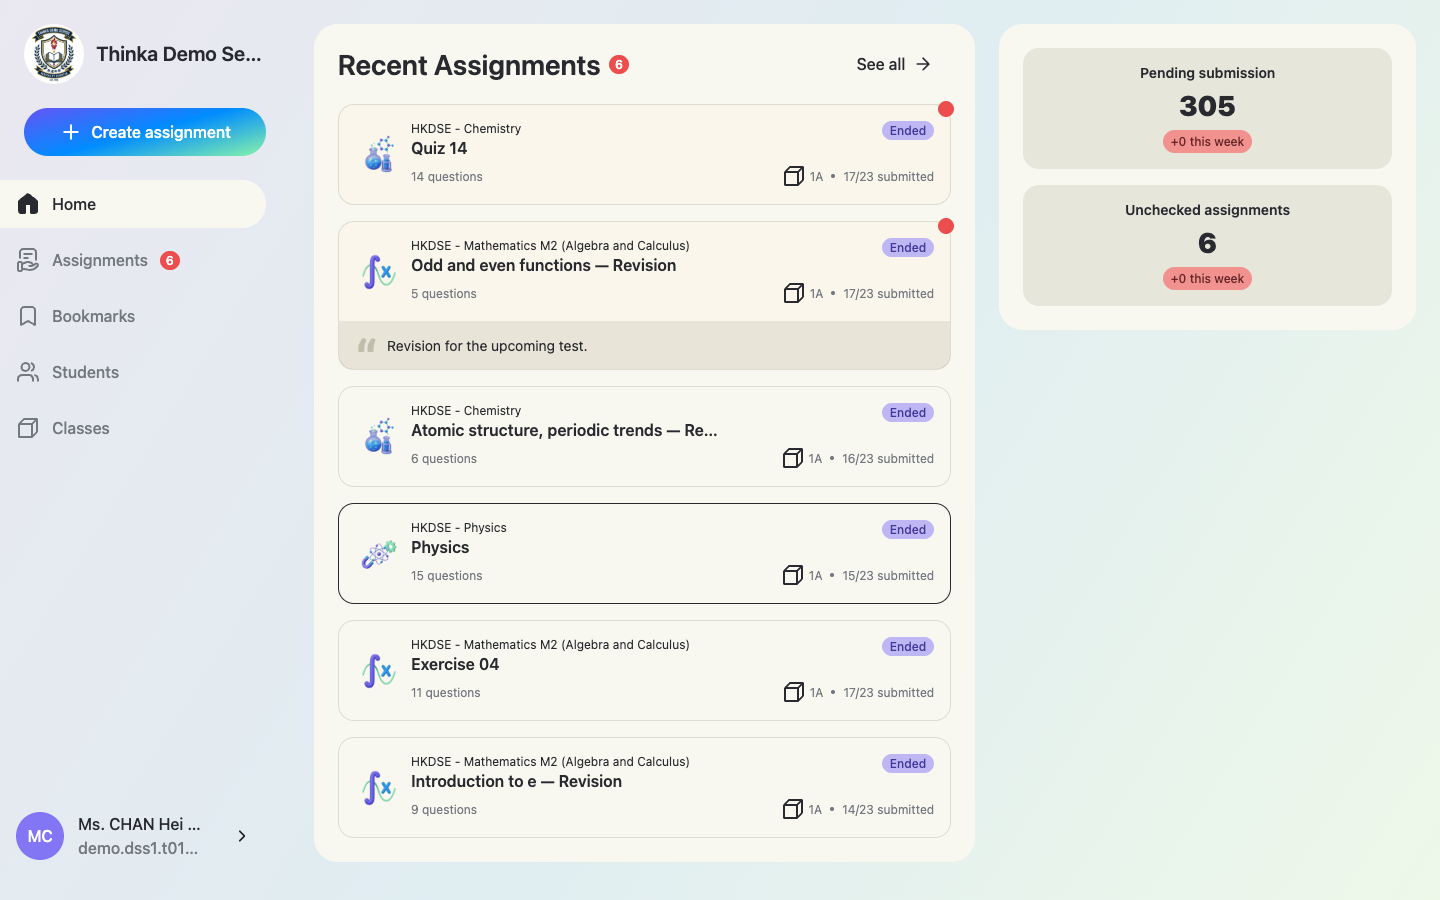
In a school workspace you see your own assignments plus assignments in your assigned subjects. If a colleague's assignment seems missing, check your subject assignment with your school admin.
Section 2
Create an assignment
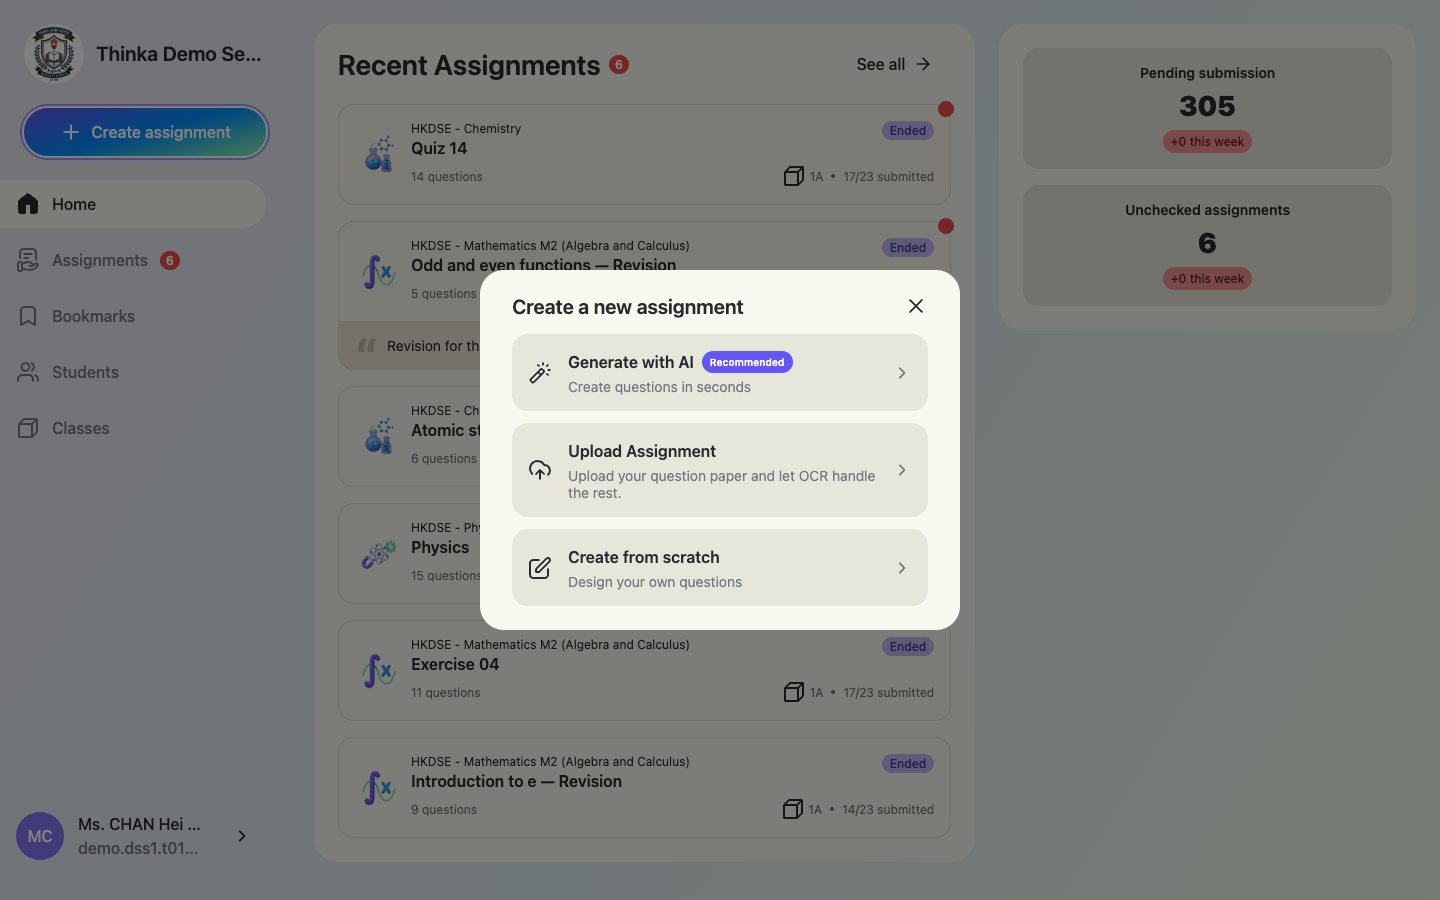
Click + Create assignment in the sidebar. There are three ways to create one.
Choose how to create
Generate with AI (recommended) creates questions in seconds. Upload Assignment turns your own question paper into an interactive assignment with OCR. Create from scratch lets you design every question yourself.
Option A — Upload your own question paper (OCR)
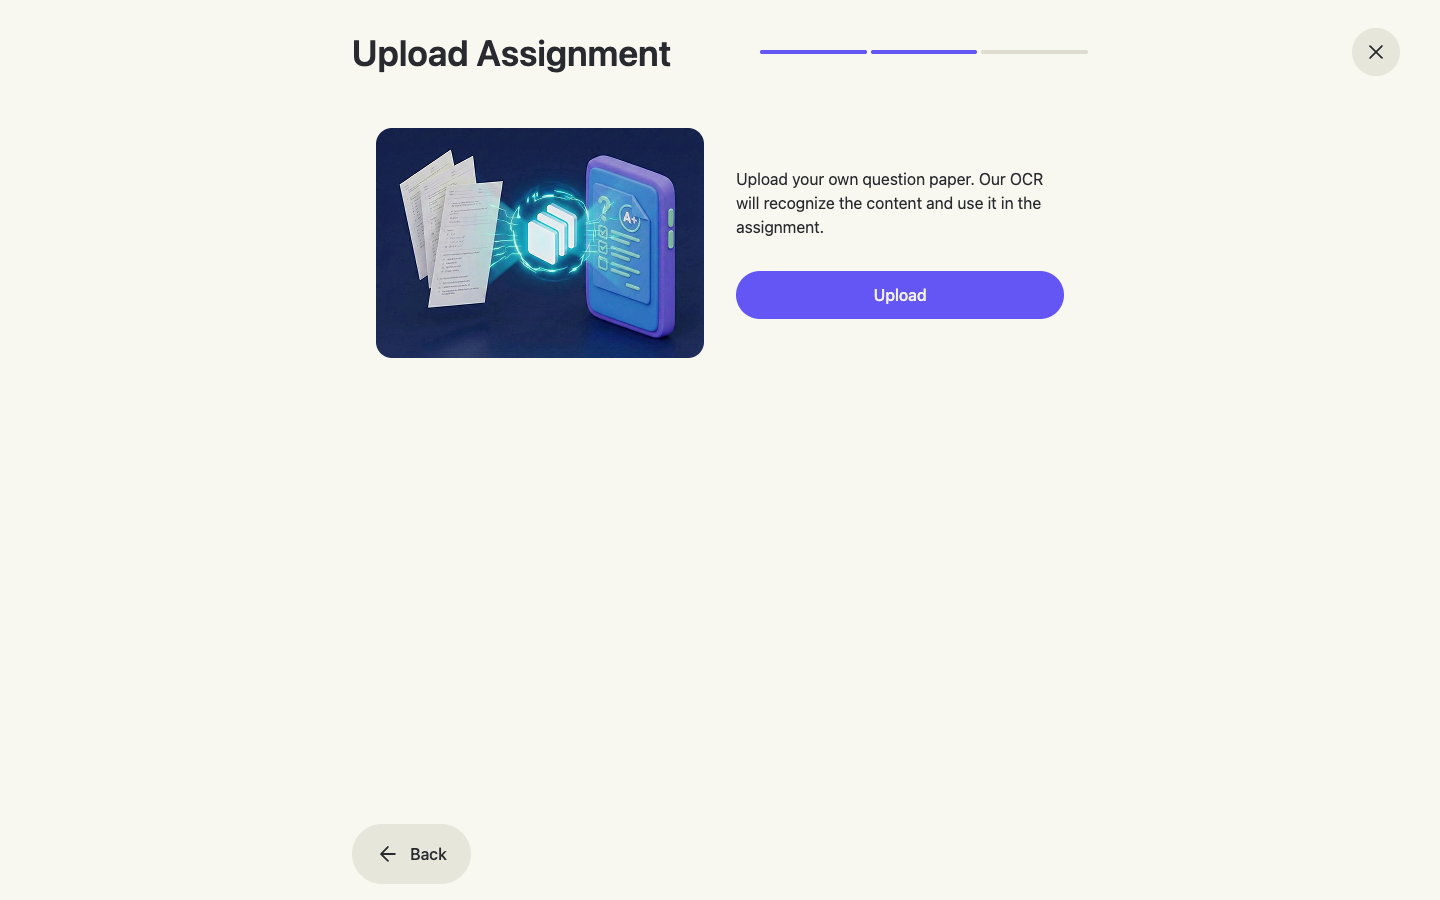
Choose Upload Assignment, pick the subject, then upload your existing paper (PDF, Word or photos). The system's OCR recognizes the content — questions, choices and formulas — and creates the questions for you, so worksheets you already use become interactive, auto-graded assignments.
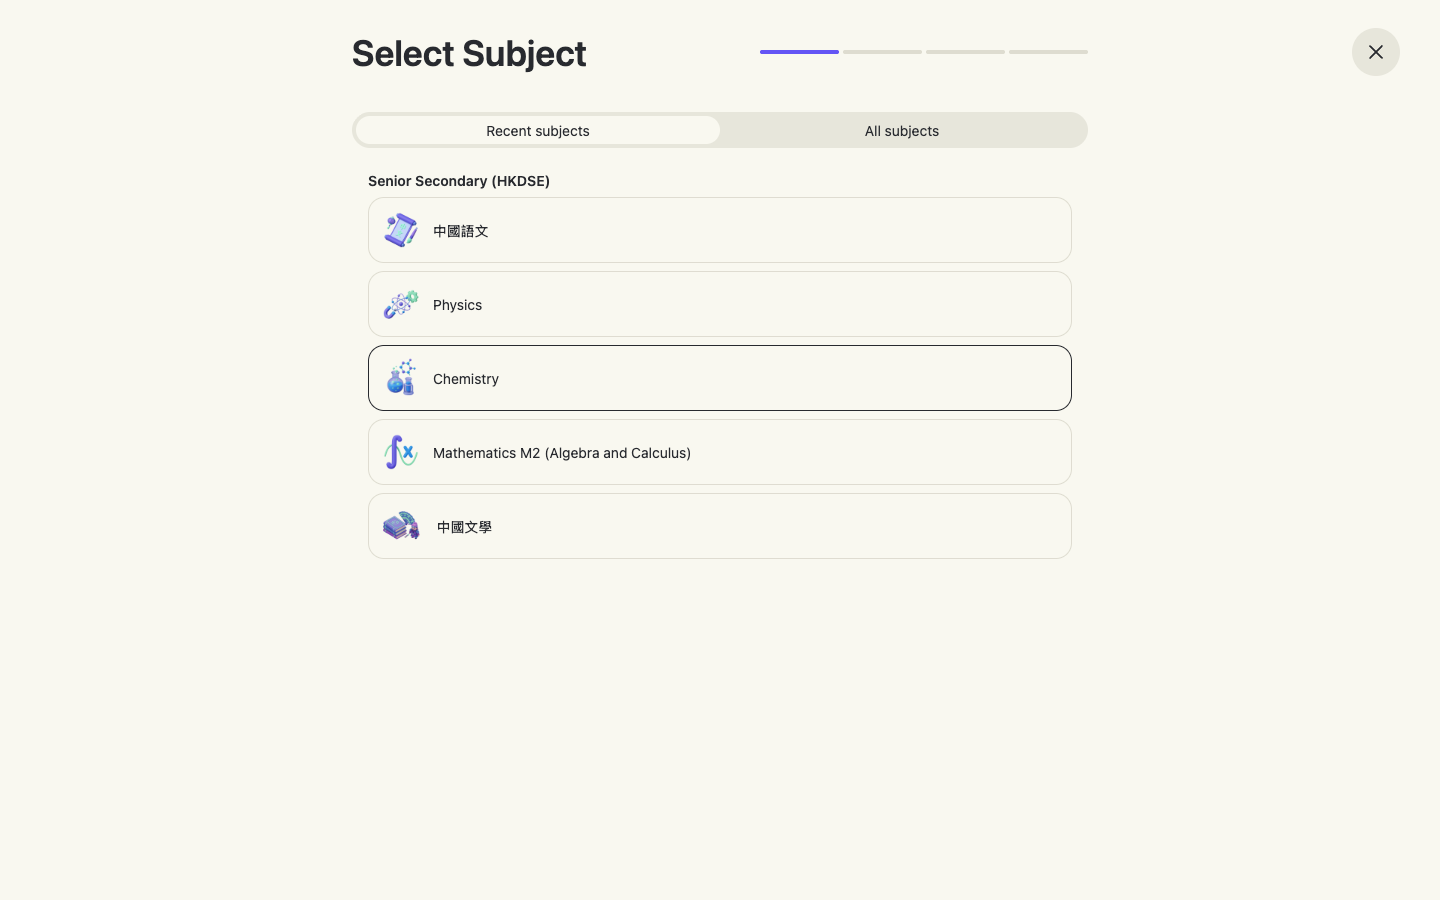
Option B — Generate with AI: pick the subject
The rest of this section follows the Generate with AI path. Recent subjects appear first; All subjects lists your school's full curriculum.
Pick chapters — or upload your own materials
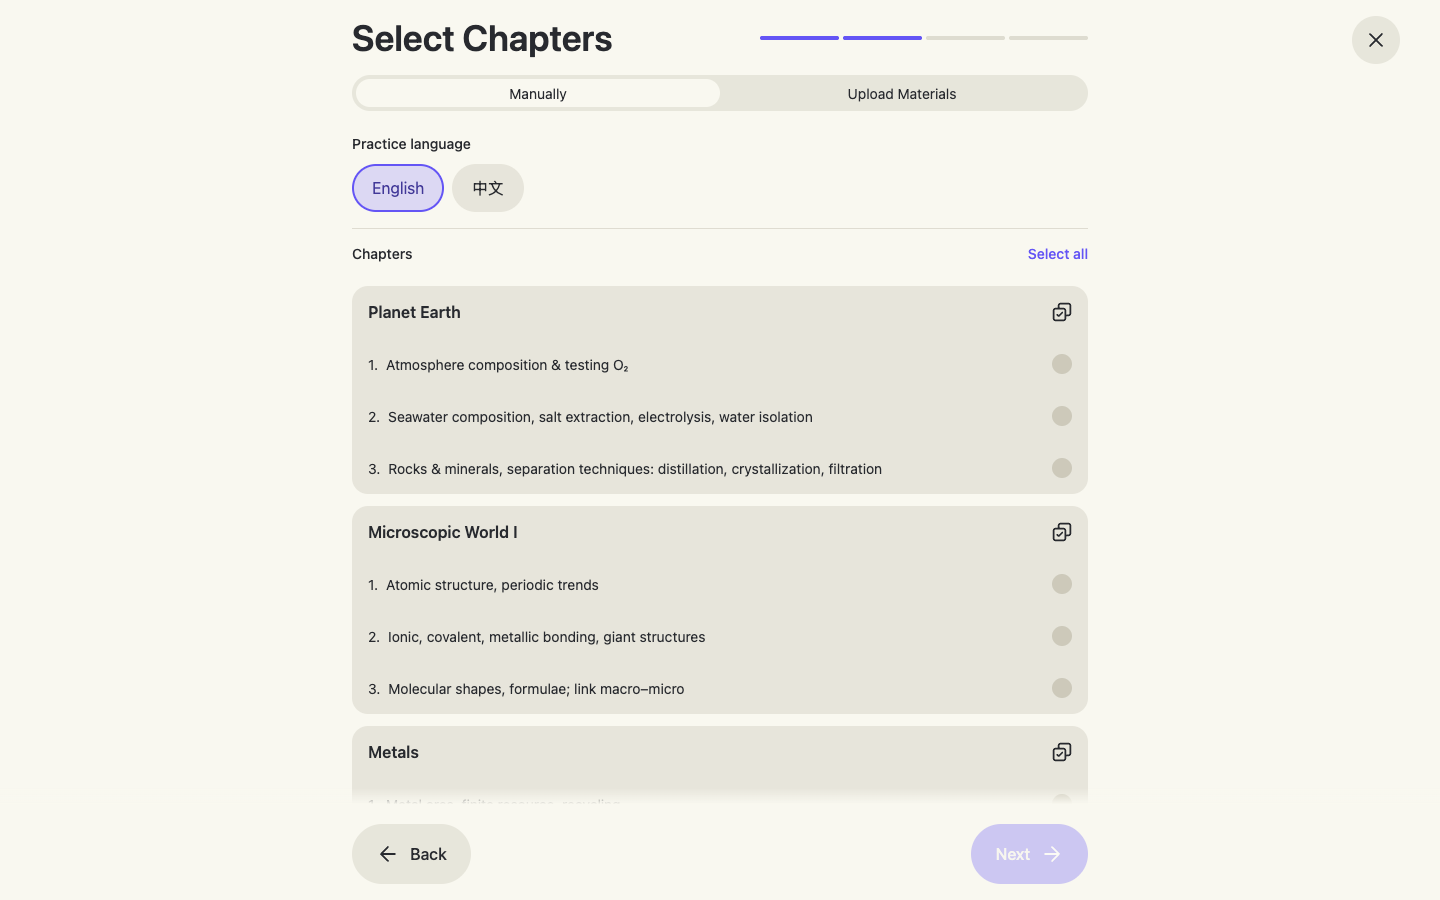
In the Manually tab, tick one or more chapters (grouped by topic; each group has a Select all) and choose the question language (English / 中文). The AI generates questions within your selection.
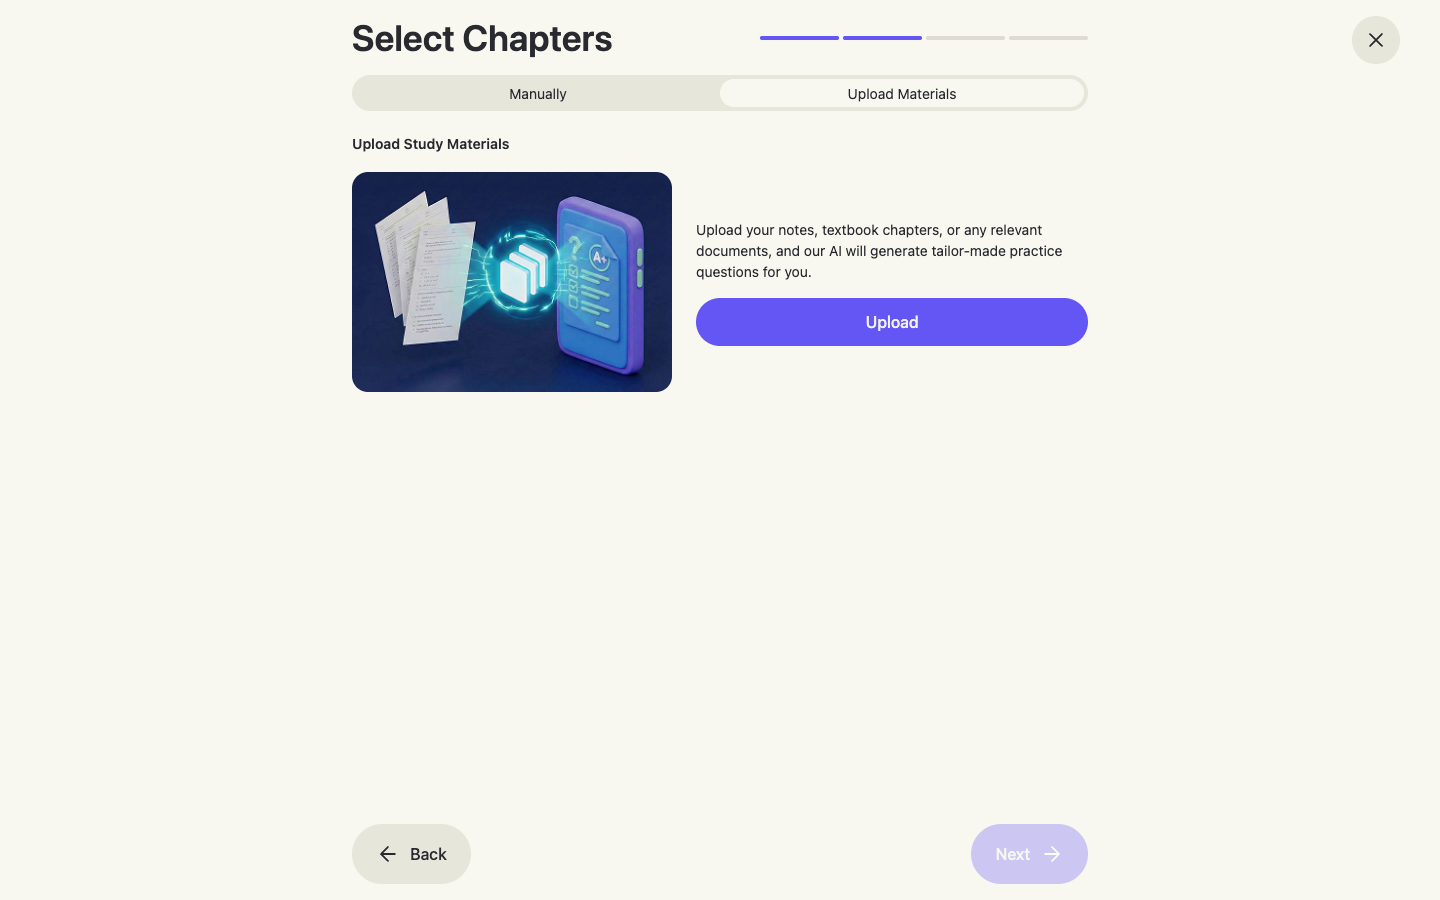
Upload Materials: AI questions from your own notes
Switch to the Upload Materials tab to upload your own teaching materials instead — notes, textbook chapters or any relevant documents. The AI generates tailor-made questions based on the scope, style and difficulty level of the uploaded materials, so the assignment matches exactly what you taught.
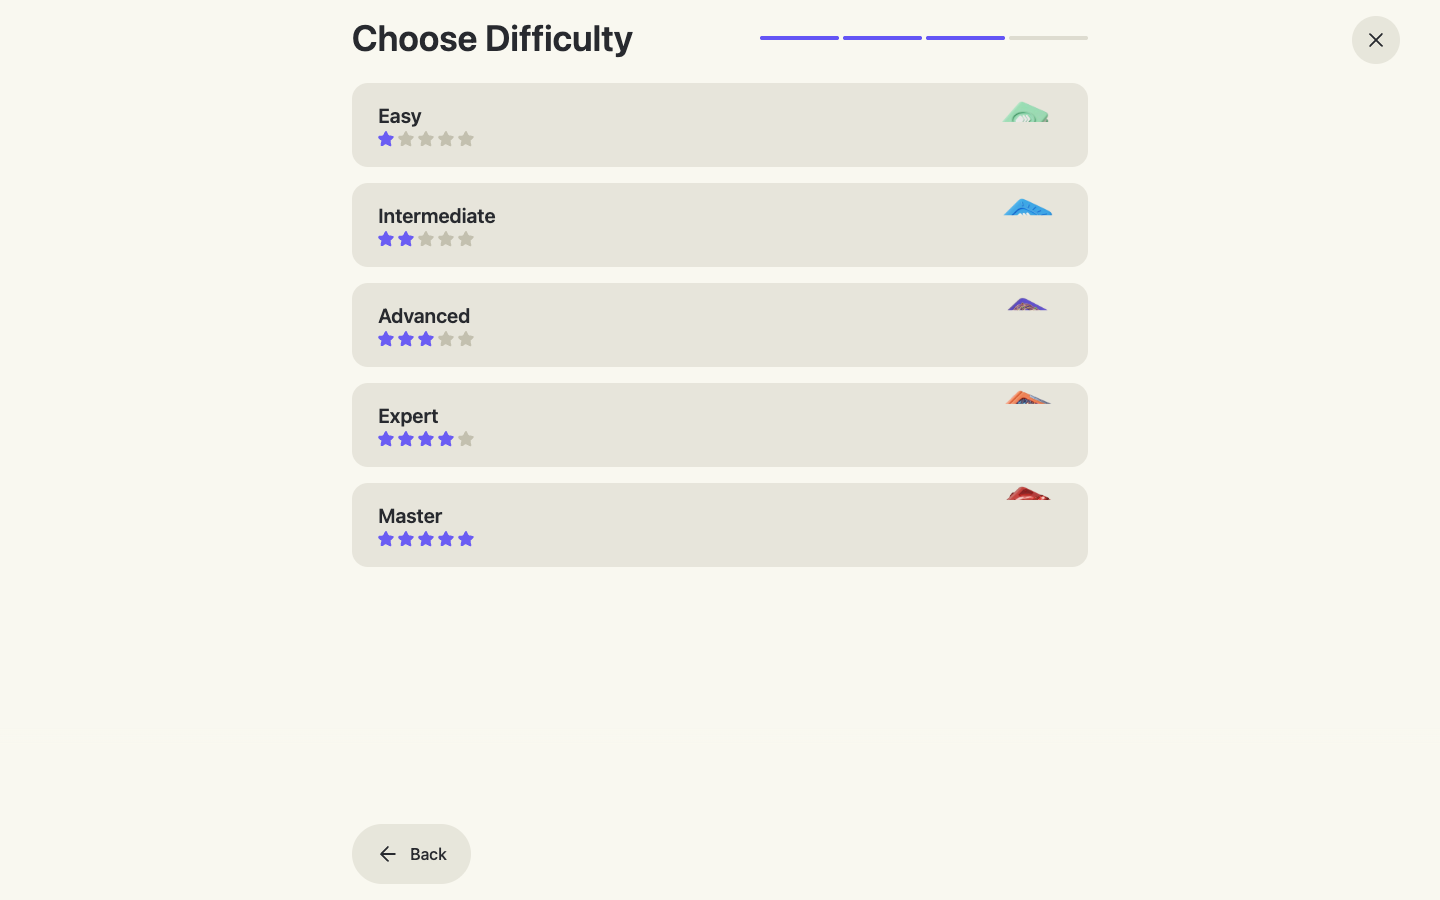
Choose difficulty
Five levels from Easy to Master.
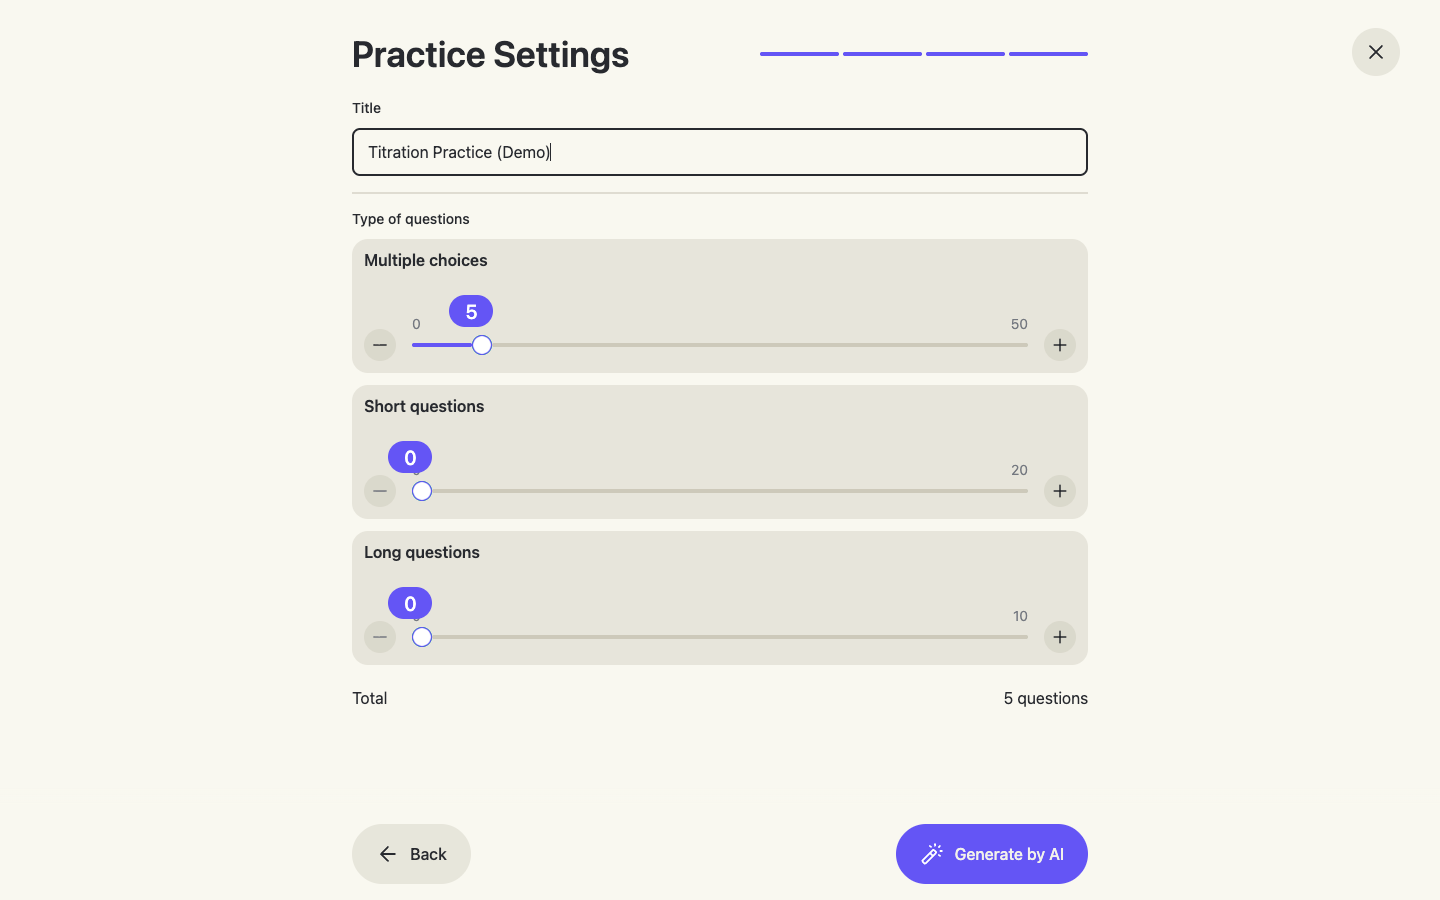
Name it and set question counts
Give the assignment a clear title and use the sliders to set how many questions of each type to generate, then click Generate by AI.
Preview and edit the questions
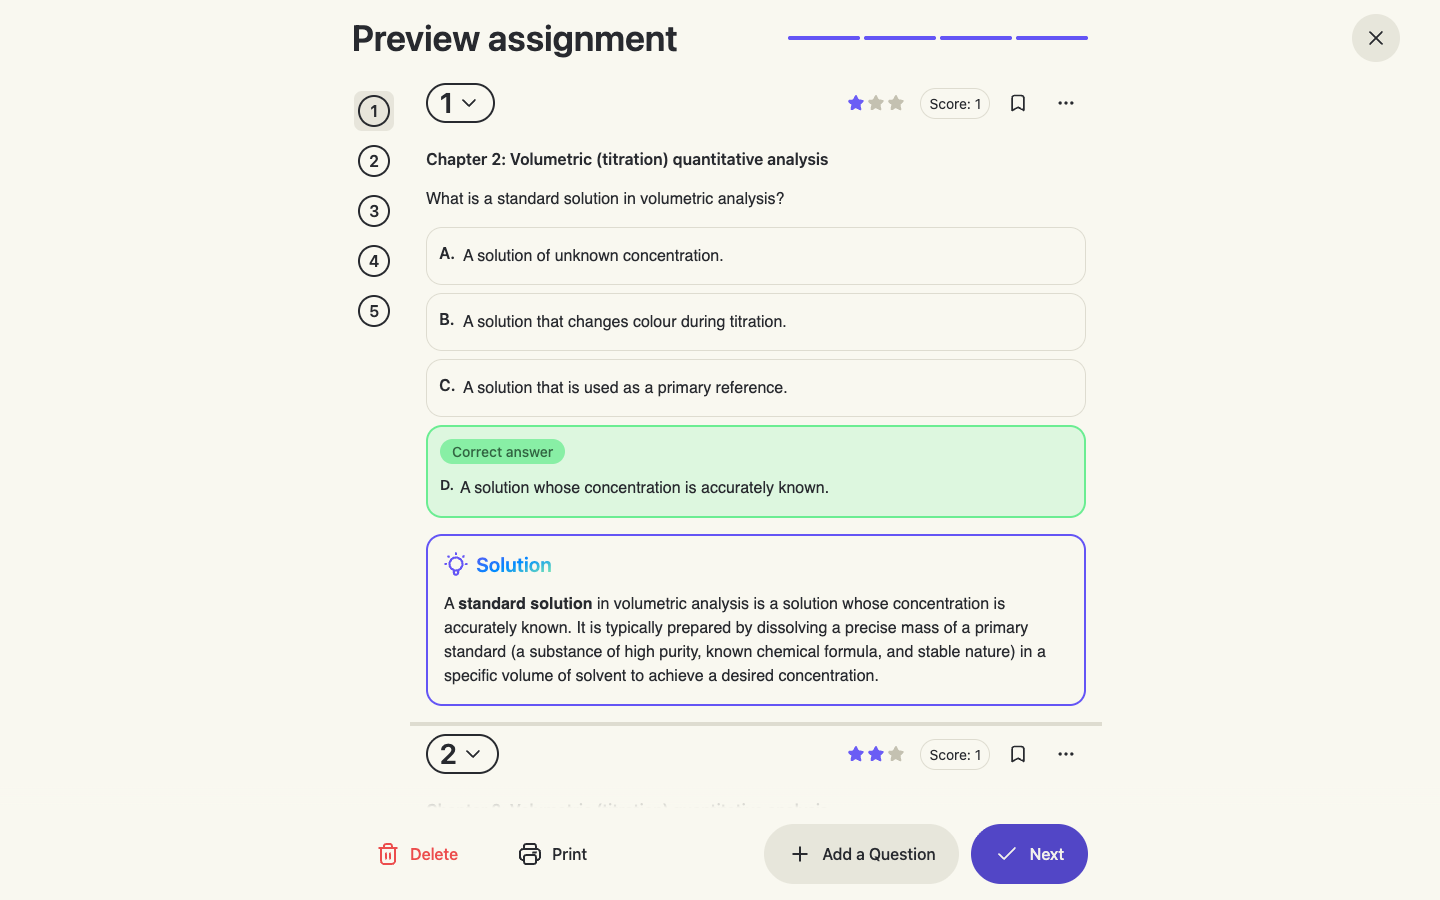
Each generated question shows its chapter, choices, the correct answer highlighted and a full Solution. You can adjust the per-question score, change difficulty stars, bookmark a question, delete or Add a Question. Happy? Click Next.
Section 3
Print it or assign it to students
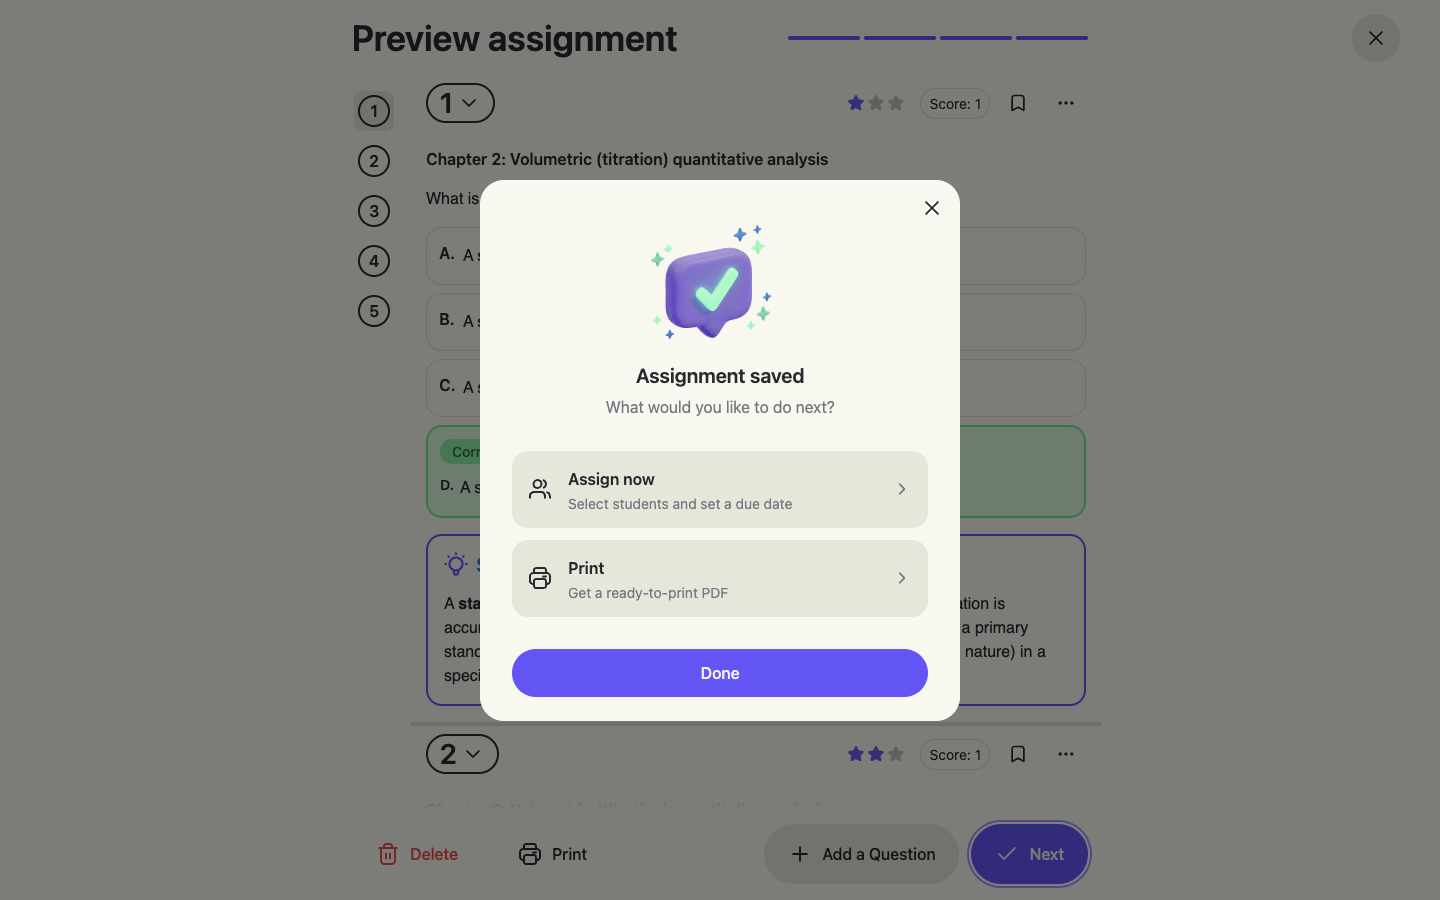
After the preview, choose Assign now (select students and set a due date) or Print (get a ready-to-print PDF). You can do both — assign digitally and print for students who work on paper.
Assign now or print
Print — with or without solutions
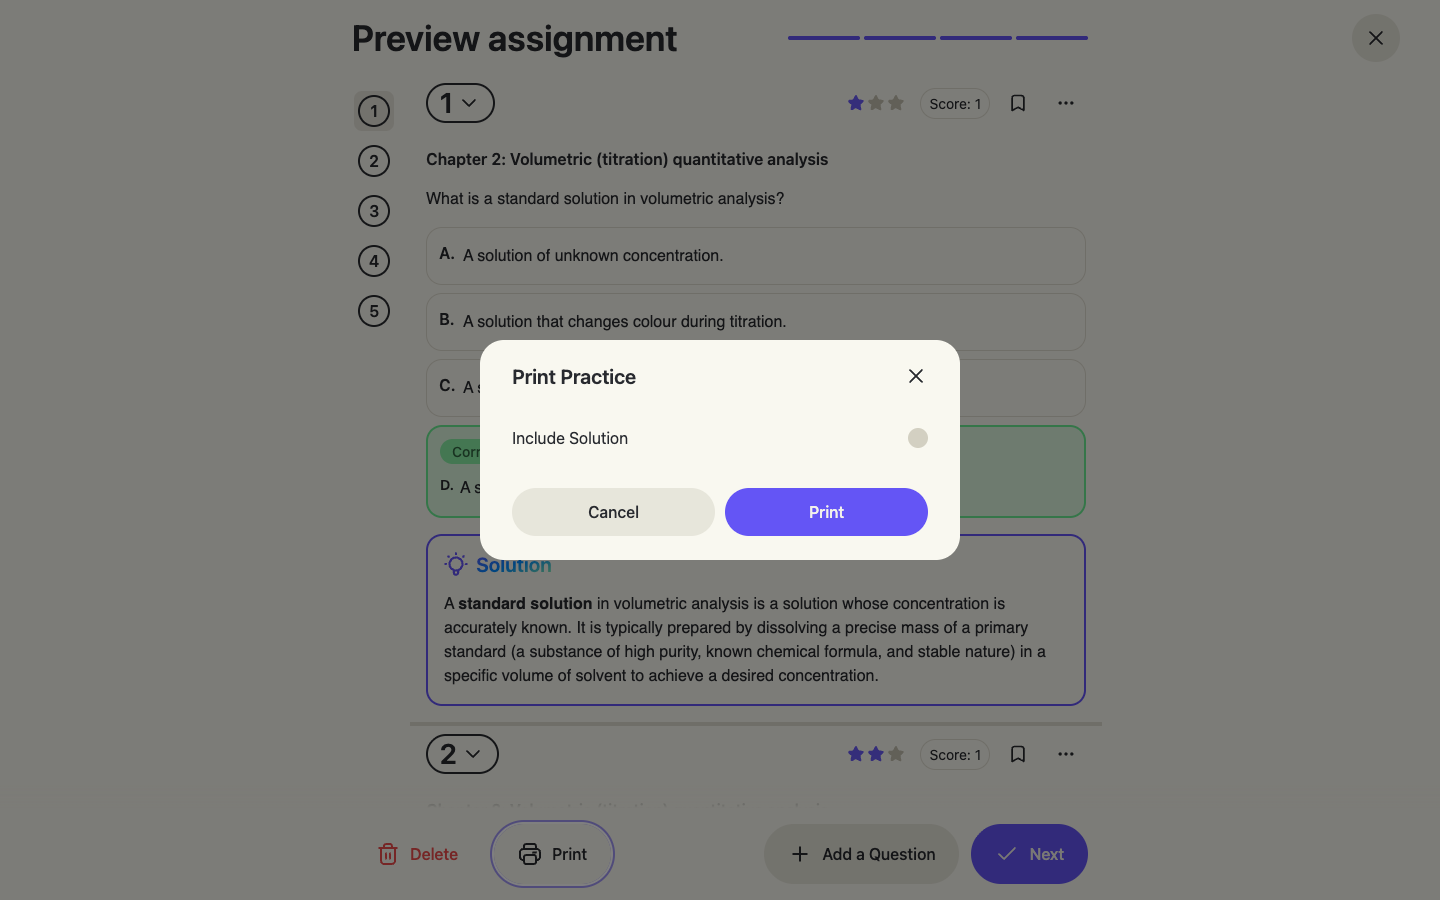
The print dialog has an Include Solution toggle: off for the student paper, on for a marking copy. Paper workflow below walks through the full print-and-scan cycle.
Select students
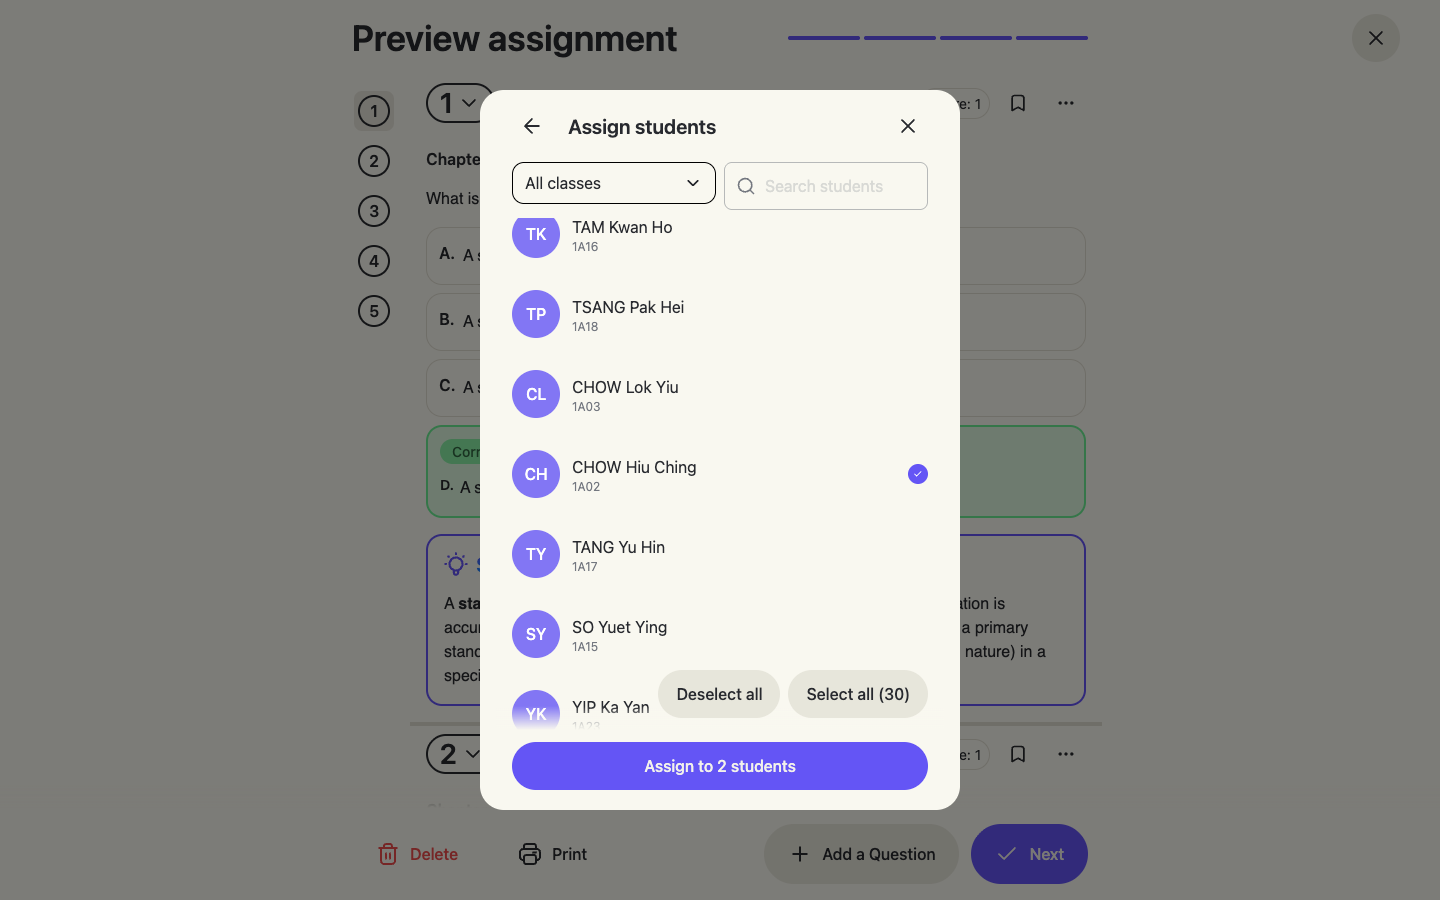
Pick individual students or use Select all for the whole class. Students are listed by class with their student numbers.
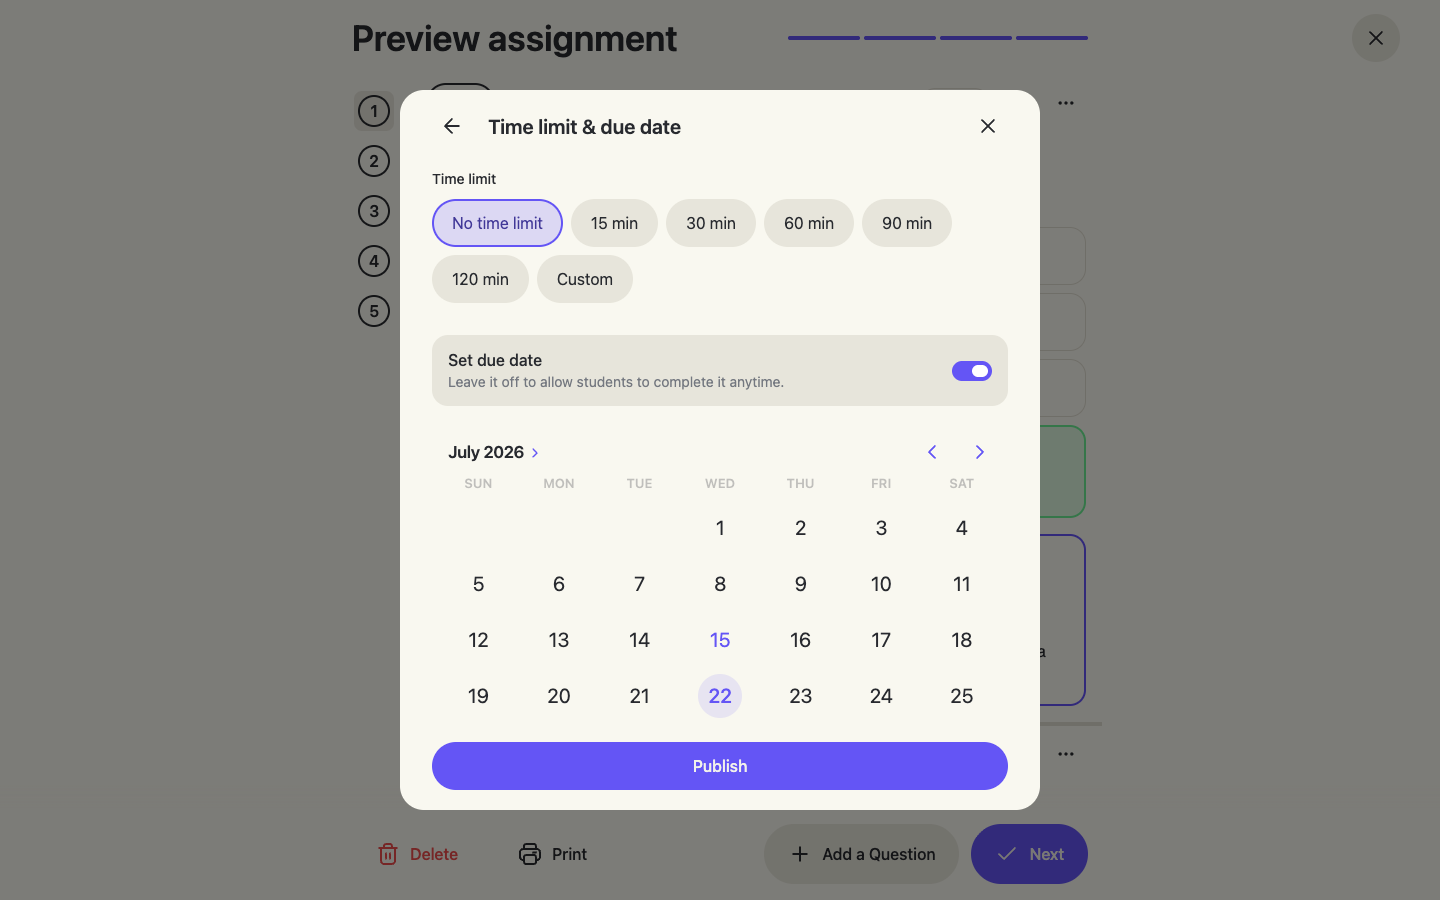
Time limit & due date, then publish
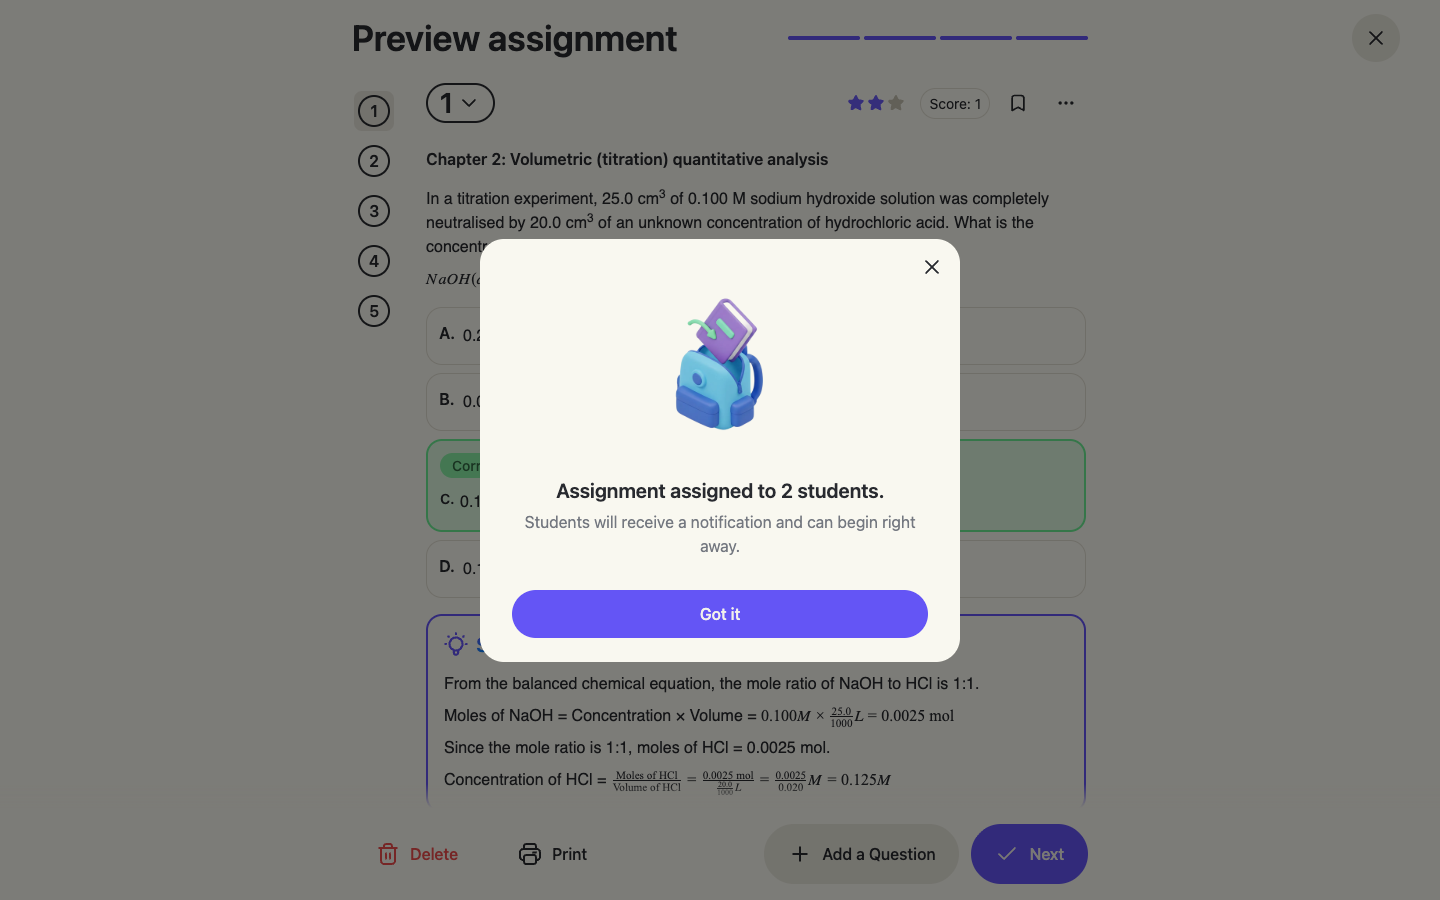
Optionally set a time limit (15–120 min or custom) and a due date (submissions after it are marked Late). Click Publish — students receive a notification and can begin right away.
Confirmation
Section 4
Track submissions
Open any assignment from Home or the Assignments list to see its live status.
The assignment detail view
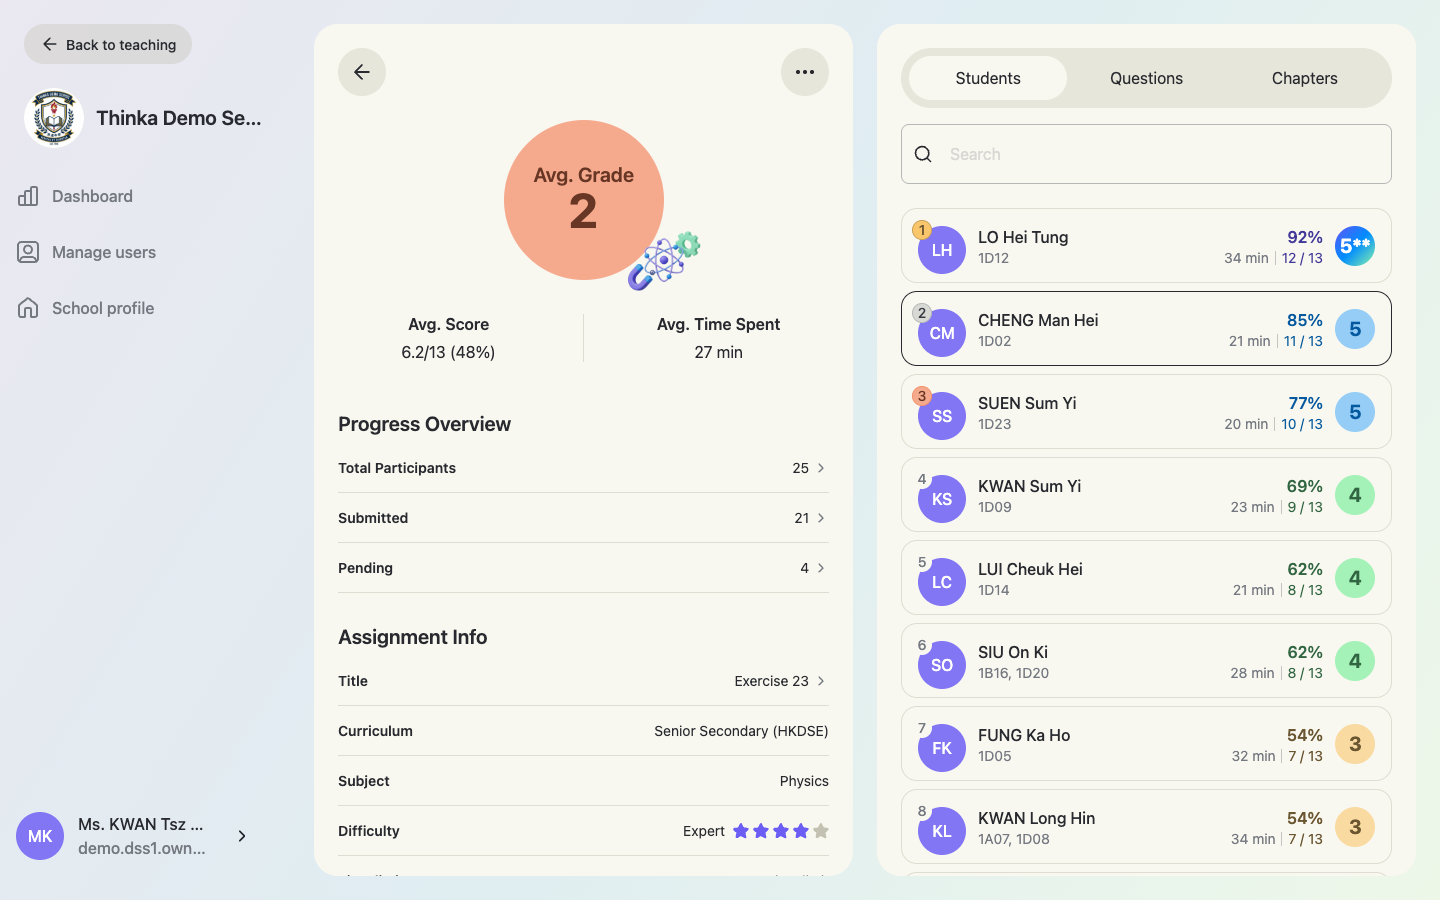
The left panel shows the average grade / score, Progress Overview (participants, submitted, pending) and assignment info — you can edit the title, due date and add remarks here. The right panel lists students: submitted ones with scores, and a Waiting for submission list. + Assign more adds students after publishing.
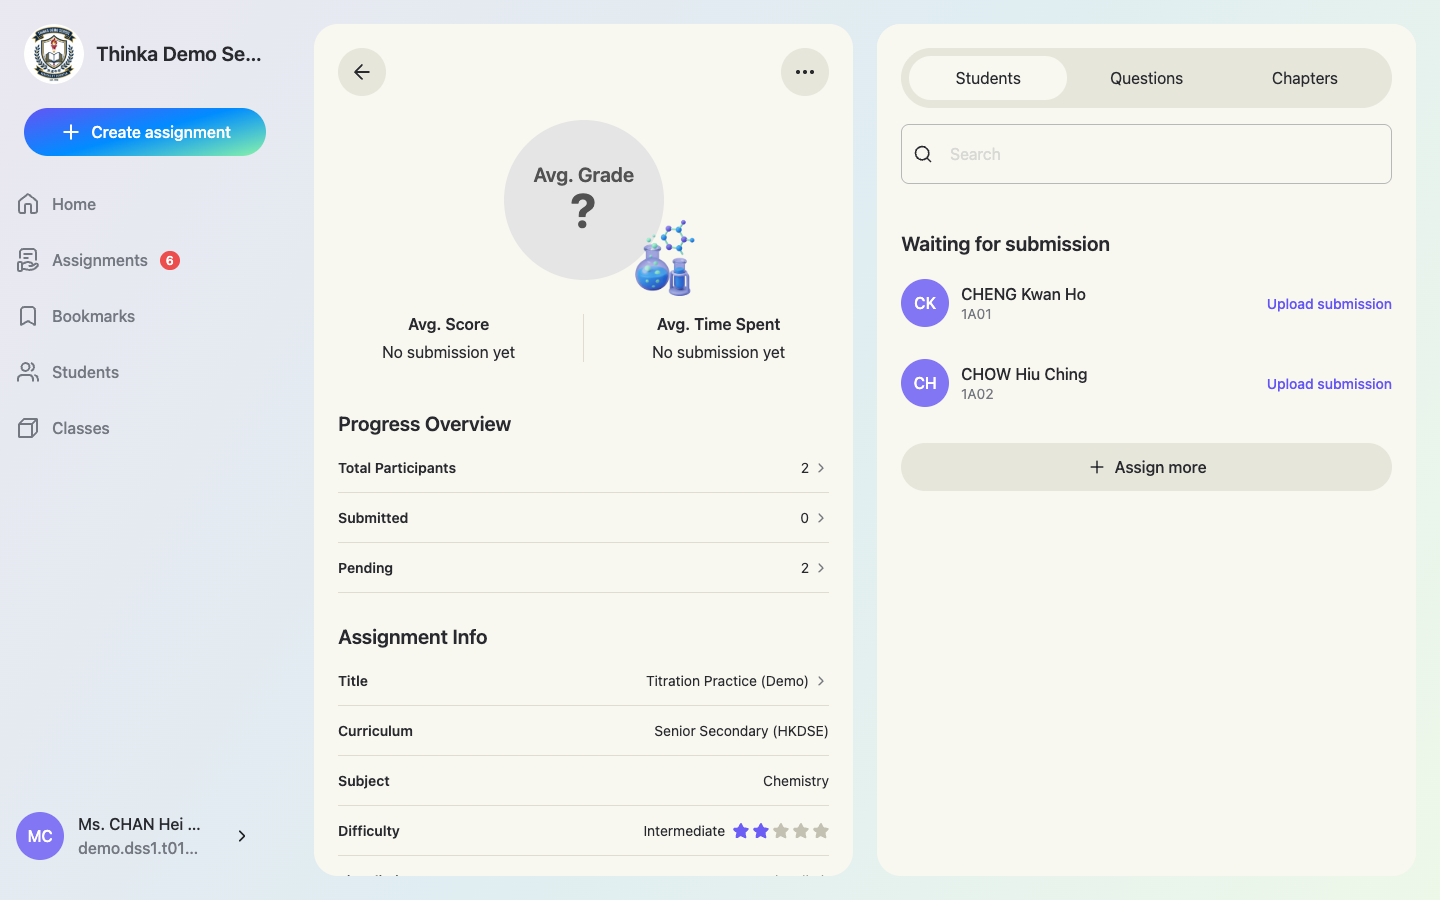
Digital submissions are auto-graded the moment students submit — “waiting for submission” is all you have to do for online classes. For students who answered on paper, see Paper workflow below.
Section 5
Paper workflow: print, then scan the answers back in
For lessons without devices, thinka prints any assignment as a clean exam paper. Students answer on paper as usual; you photograph or scan the papers, upload each one against the student's name, and thinka reads the answers and marks them exactly as if the student had answered on screen.
One assignment can hold both kinds of students, and they all appear in the same report.
1 · Print the assignment
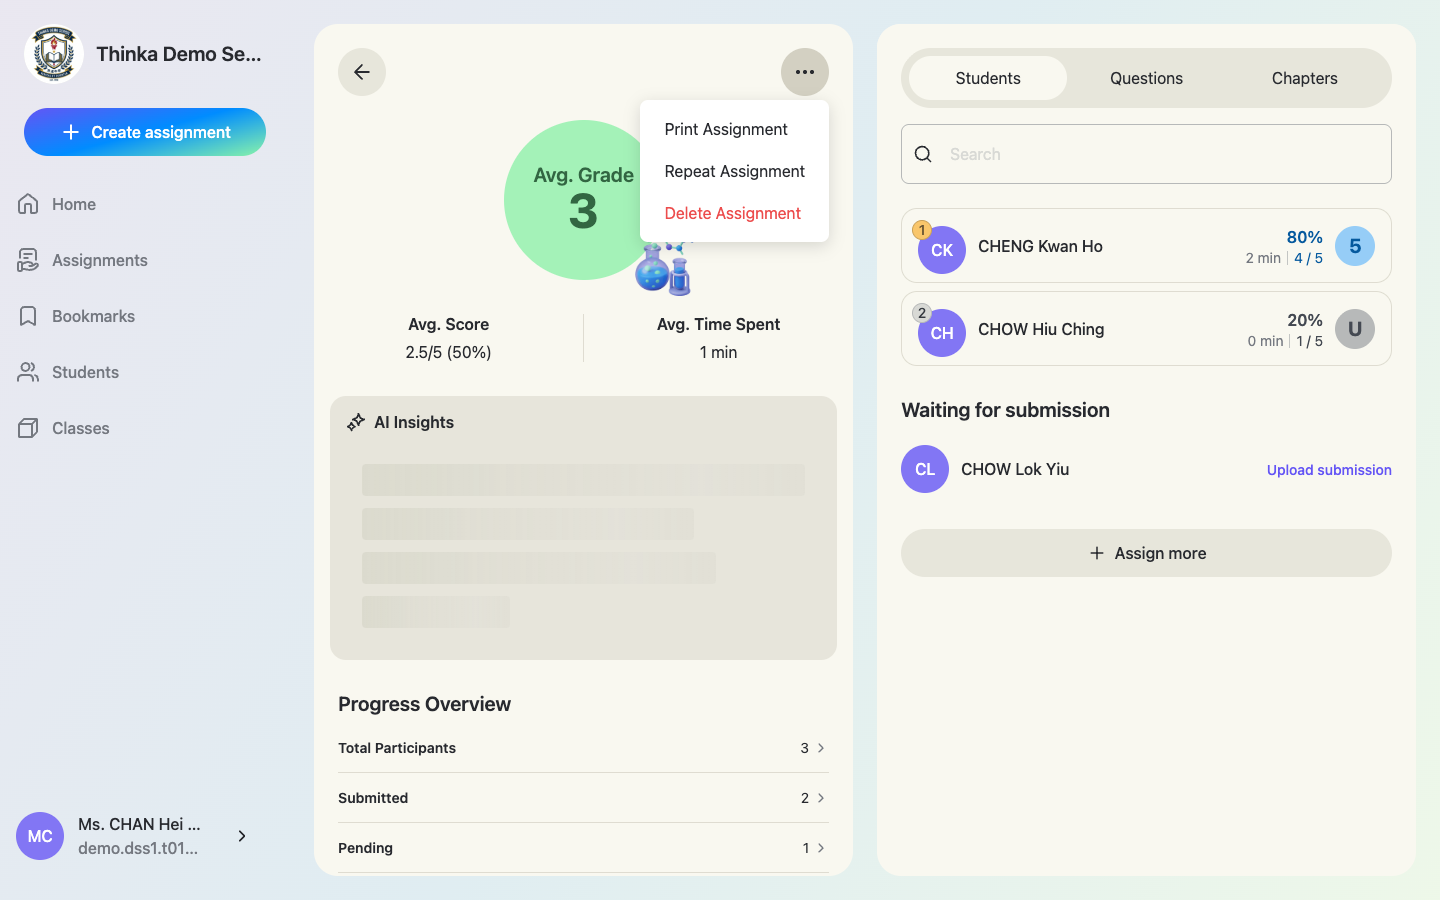
Open the assignment, then use the ⋯ menu at the top right of the left panel and choose Print Assignment. A published assignment can be printed at any time — you can also print straight from the preview while creating it.
2 · Student copy or marking copy
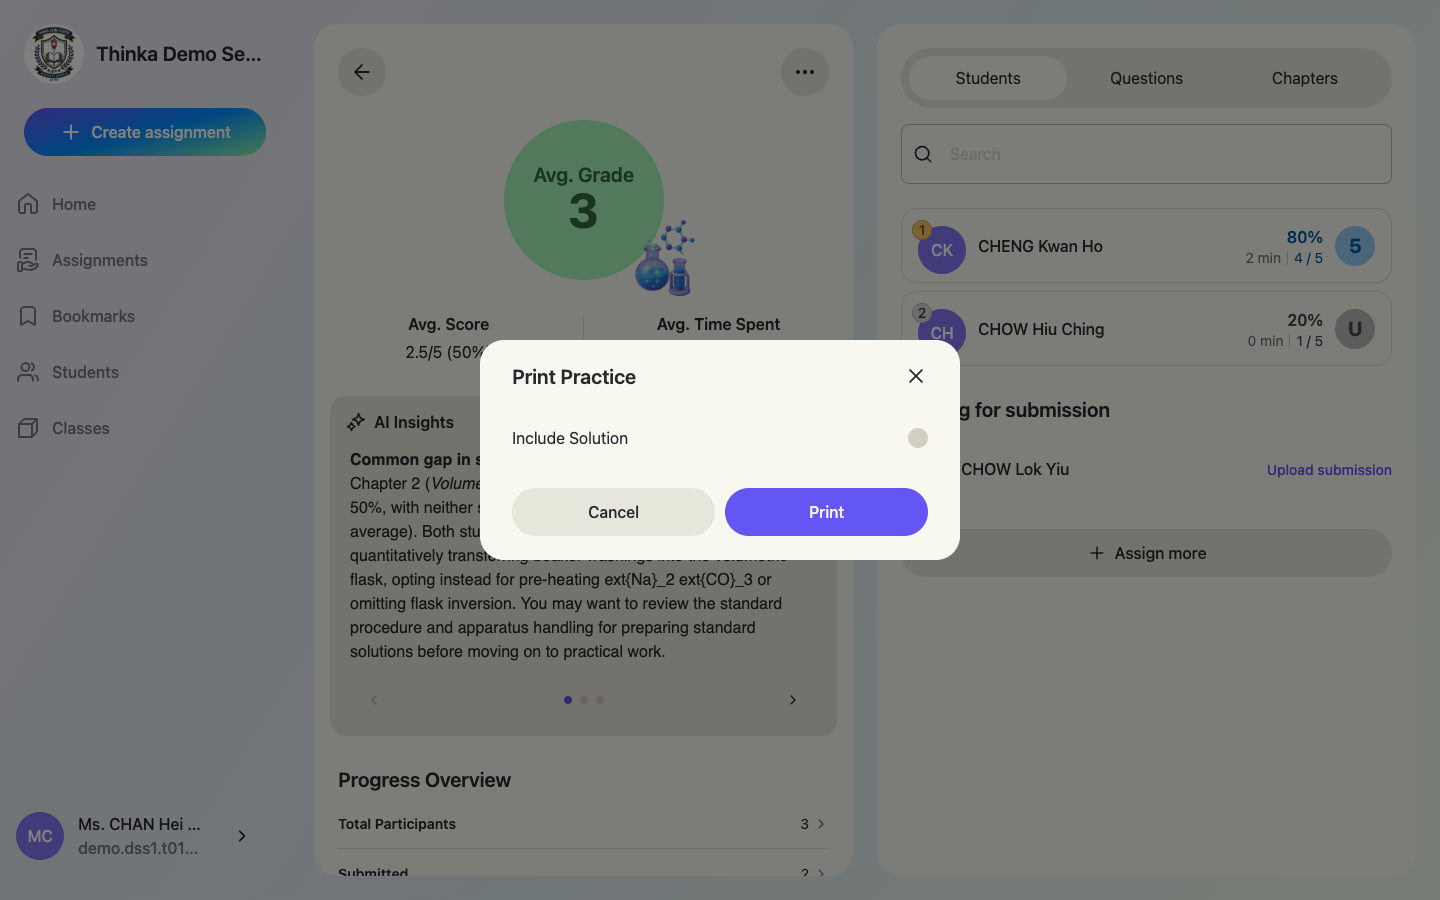
The Print Practice dialog has one switch, Include Solution. Leave it off for the paper students answer on; turn it on for your own copy with the model answers and full solutions. Press Print and your browser's print window opens — print it, or save it as a PDF from there.
3 · What comes out of the printer
A proper exam paper: the subject title, Total Questions, Total Marks and a Date line, the instructions, and Name and Class lines for the student to fill in. Every question keeps its number, its type and its marks in brackets, with room to write underneath.
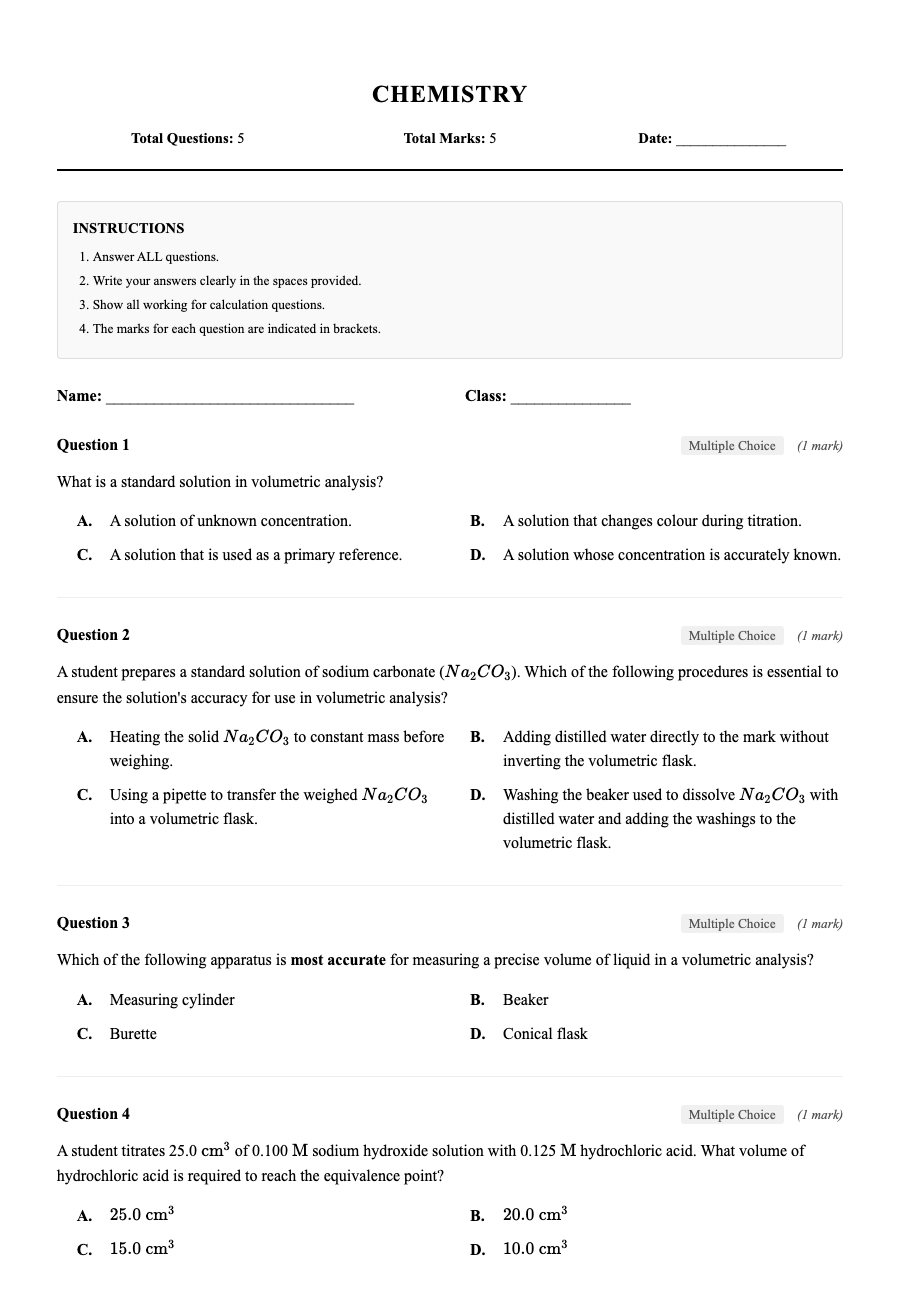
Tell students to answer in the spaces provided and to keep the question numbers visible — that is what lets thinka line each answer up with the right question when you scan the paper back in.
4 · Scan or photograph the finished papers
A phone camera is enough — no scanner needed. For the cleanest reading:
- One photo (or one PDF page) per page of the paper.
- Shoot straight down on a flat page, in even light, with all four corners in frame.
- Keep the pages in order — first page first.
- Photos (JPG, PNG, HEIC) and PDF files are both accepted, up to 10 MB per file.
5 · Upload each paper against the student's name
In the assignment's student list, find the student under Waiting for submission and press Upload submission next to their name, then select every page of that student's paper in one go. On a computer this opens your file picker; on a phone you can photograph the paper there and then.
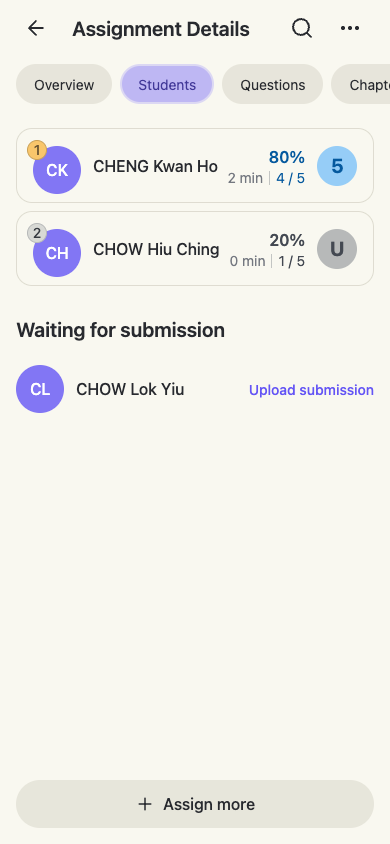
Upload one student at a time, and include all of that student's pages in the same upload — an upload becomes their complete submission. A student who has already submitted (on screen or by upload) cannot be uploaded again. If the student isn't on the list, add them first with + Assign more.
6 · thinka reads the paper and marks it
Give it a few moments. thinka recognises handwriting and printed text — multiple-choice letters, short and long answers, working with mathematical notation, true/false, matching, sentence reordering and fill-in-the-blanks — matches each answer to its question, then marks the paper with the same AI that marks on-screen submissions.
In this example CHOW Hiu Ching's paper answers were uploaded and graded 1 / 5 (20%) automatically — she moves from Waiting for submission into the ranked list, exactly like a digital submission, and counts towards the assignment averages, the Students, Questions and Chapters breakdowns and her student report. Time spent shows as 0 min, since the writing happened on paper.
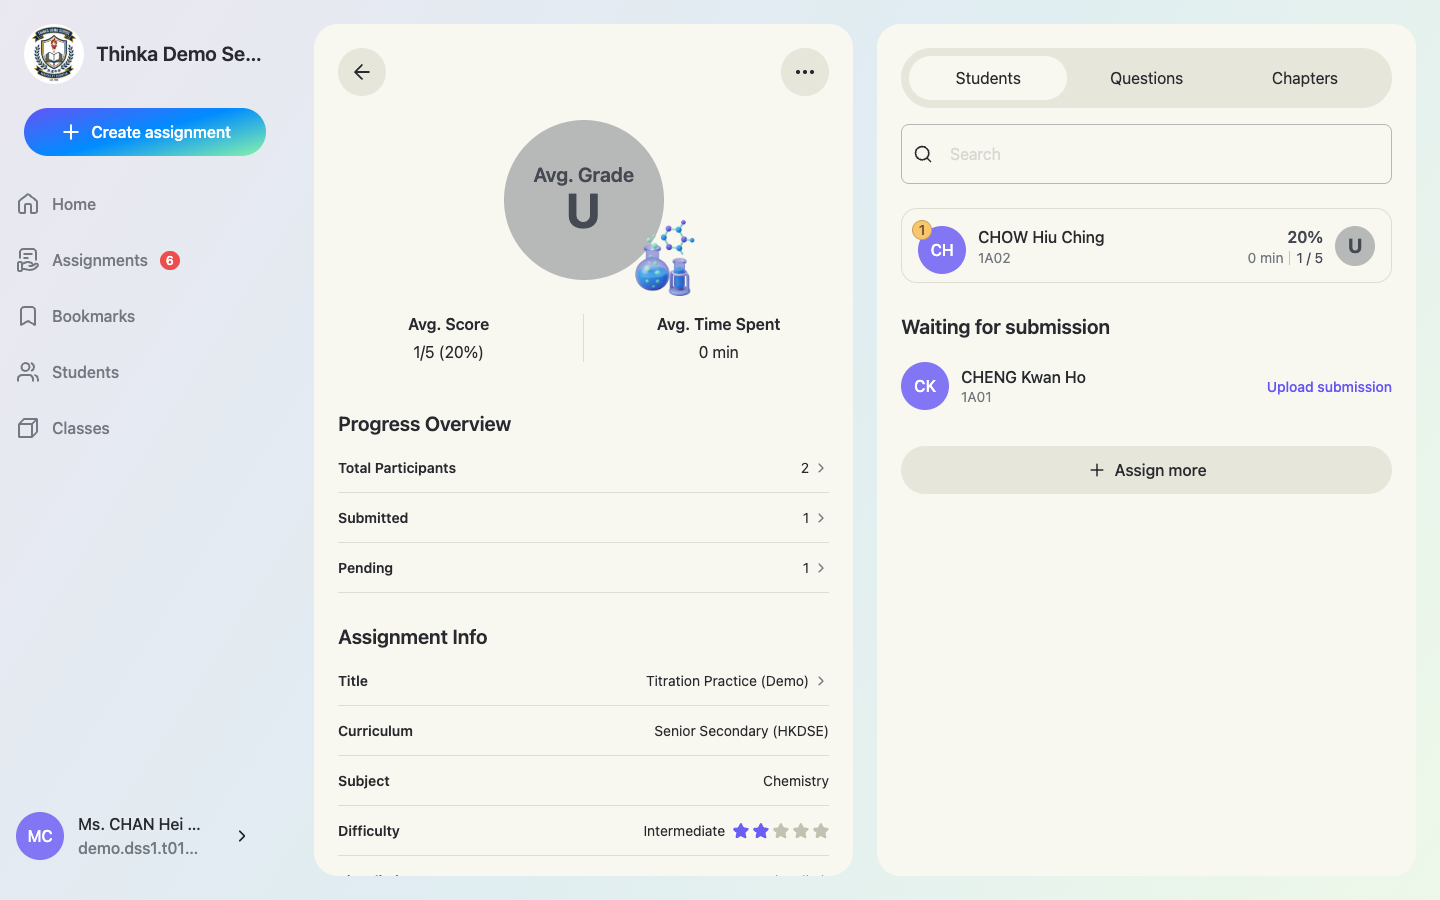
Where handwriting was messy, open that student's paper and check what was read back — the score and the comment on any question can be edited by hand.
Section 6
Class reports & student reports
Your classes
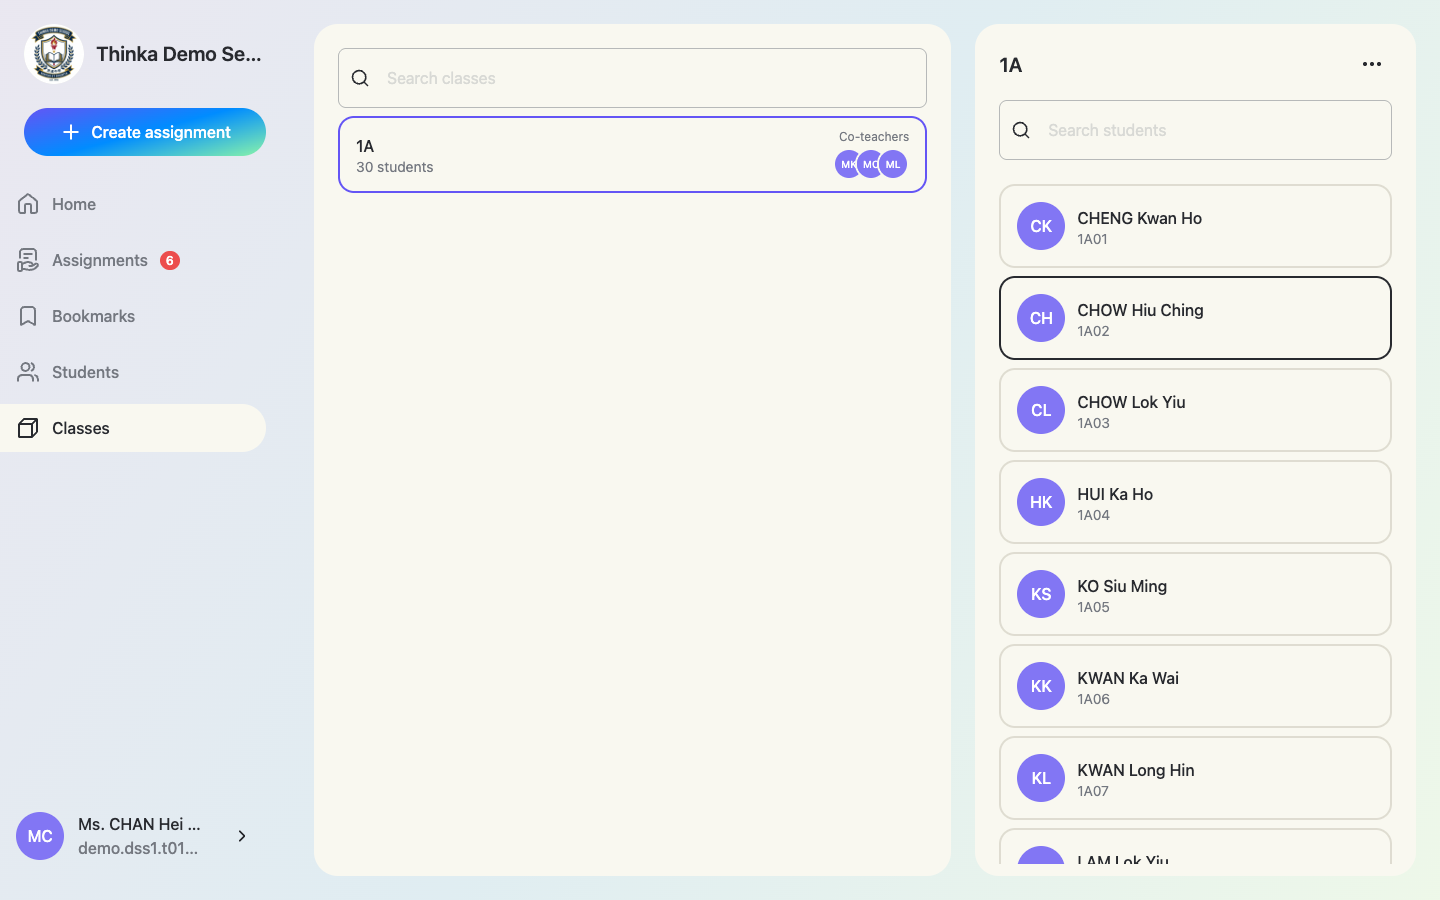
Classes in the sidebar lists your classes with co-teacher avatars and the roster. Open a class and use the ⋯ menu → Class Report.
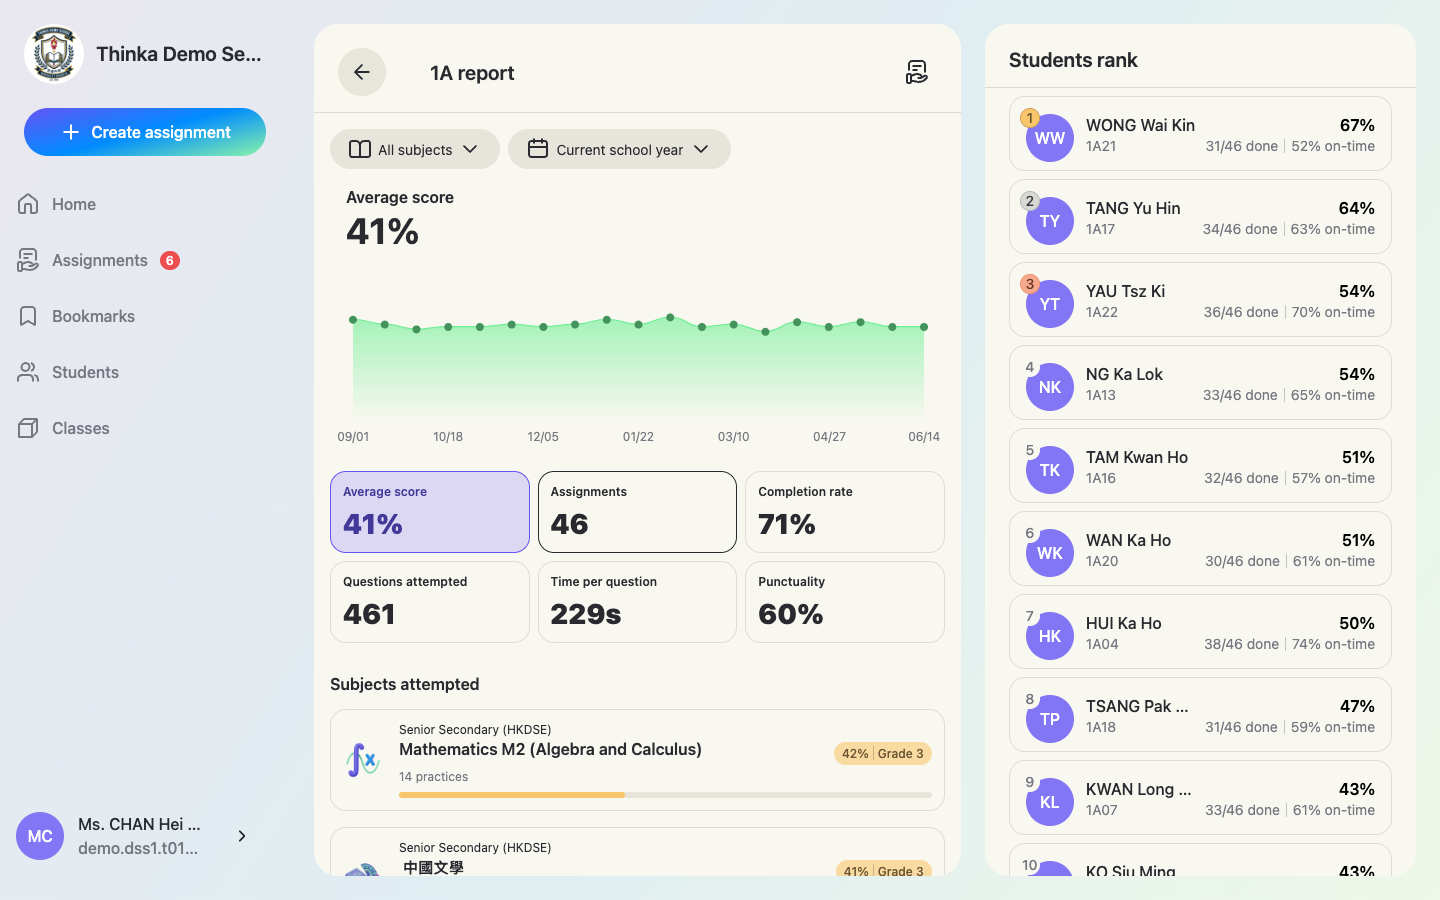
Class report
Average score with a trend chart, plus Assignments, Completion rate, Questions attempted, Time per question and Punctuality cards; Subjects attempted with per-subject grades; and a Students rank. Filter by subject and time range — the default is the current school year.
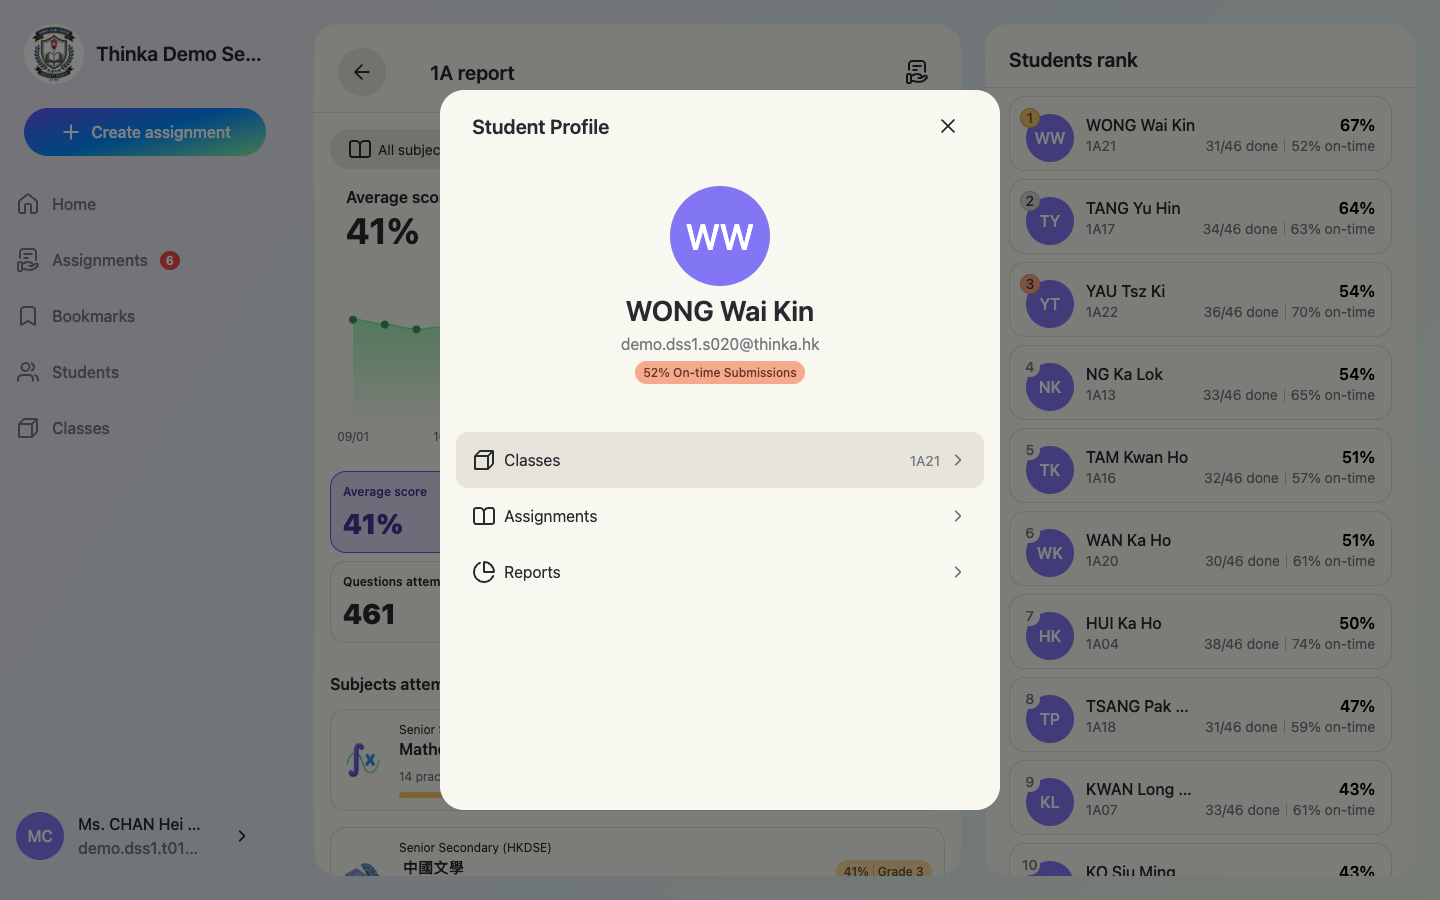
Open a student's profile from the rank
Tap any student in the rank to open their profile card (classes, assignments, reports).
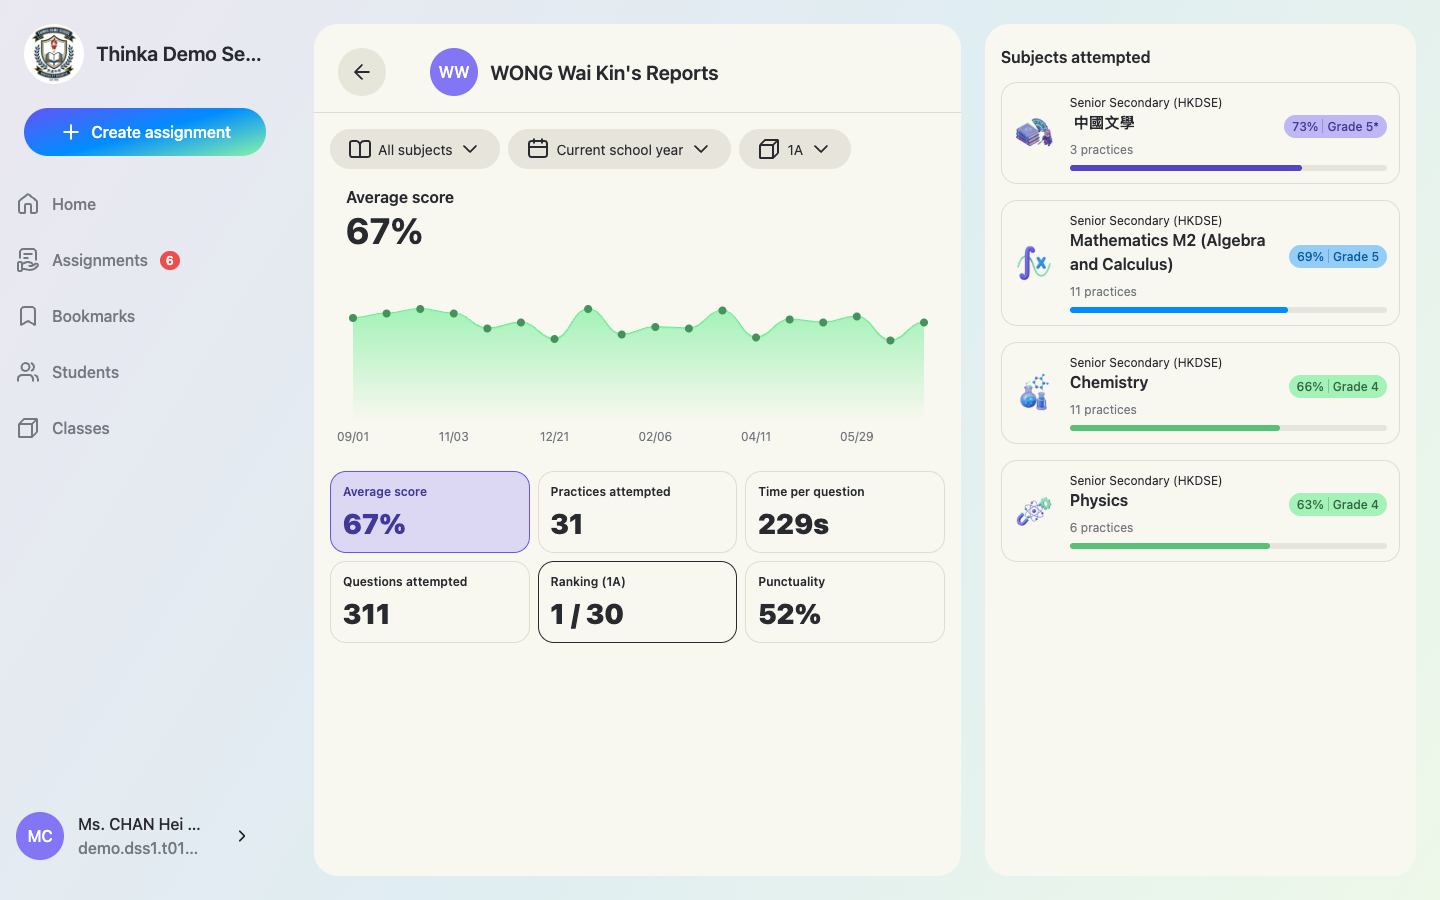
Student report
Click Reports on the profile to see the student's average score, trend, practices / questions attempted, time per question, class ranking, punctuality and per-subject grades. Your class-report filters (time, subject, class) carry over automatically.
Per-assignment analysis
Every assignment's result view has Students / Questions / Chapters tabs — see who struggled, which questions were missed most, and which chapters need revisiting.
AI insights for each assignment
When an assignment wraps up — every student has submitted, or the due date has passed — thinka automatically writes an Insights card on the assignment's detail view, right below the average grade: common weaknesses across the class, question patterns and suggested follow-ups. There is nothing to click — the insights appear on their own, and co-teachers see the same card.
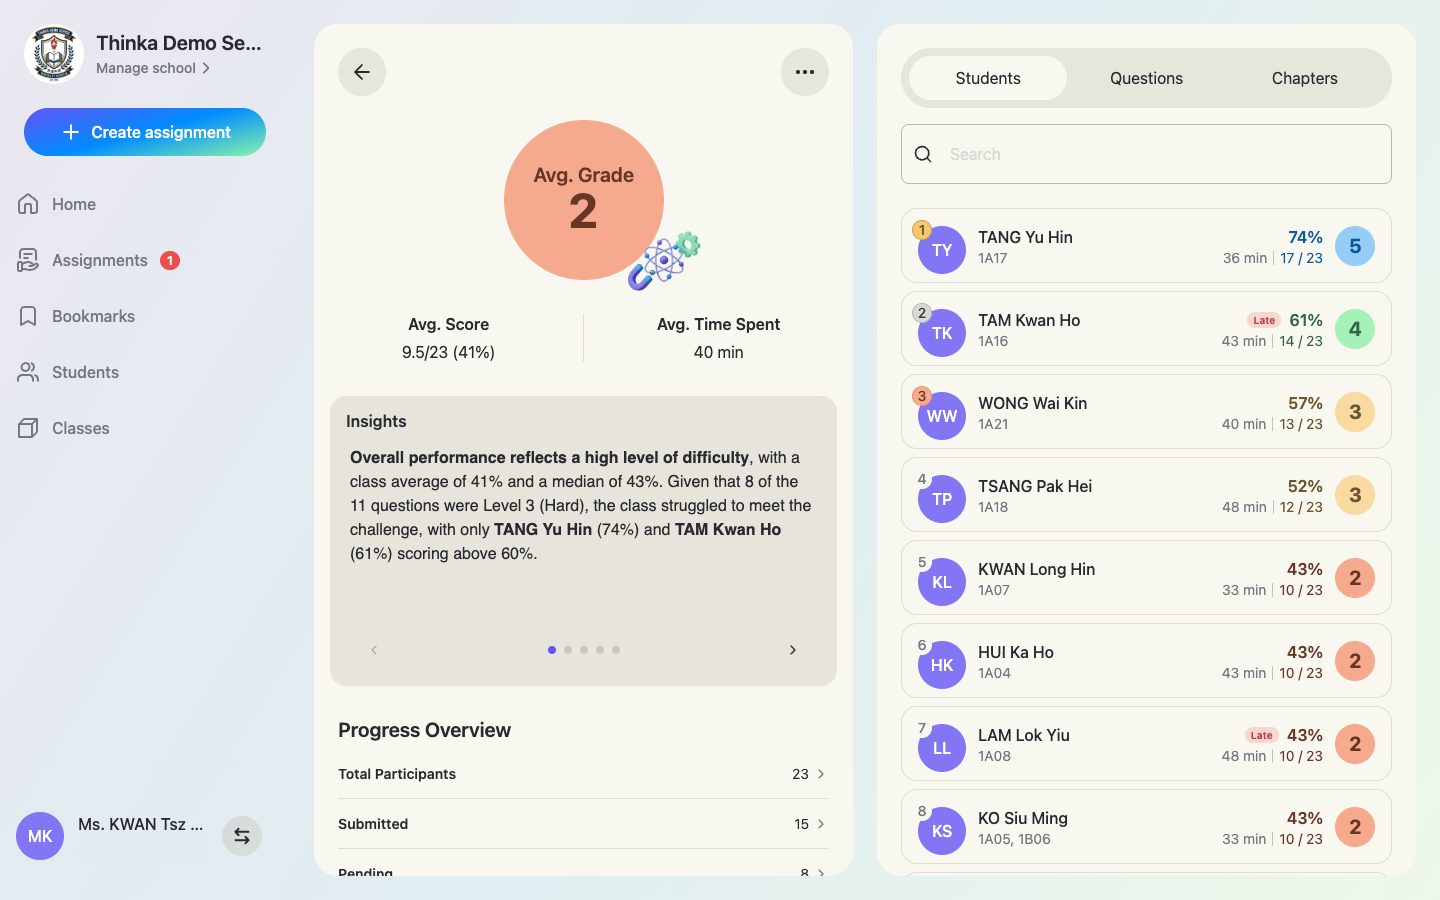
Insights are written in the language of the assignment's questions.